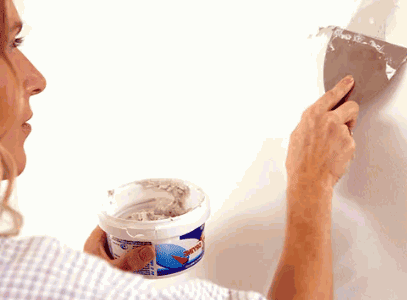
Are you tired of looking at cracked and uneven walls in your home? Plaster skimming is an effective and affordable solution to this common problem. In this article, we'll discuss step-by-step instructions on how to plaster skim a wall, so you can achieve a smooth and flawless finish without breaking the bank. Get ready to transform your walls and create a beautiful living space with these easy techniques.
What Is Plaster Skimming?
Plaster skimming is a popular technique used to achieve a smooth and flawless surface on walls or ceilings. This method involves adding a thin layer of plaster over the existing surface to cover any imperfections and create a fresh and renewed finish. Plaster skimming is commonly utilized for renovating or repairing damaged walls, as well as improving the appearance of textured surfaces. It requires a high level of skill and precision to achieve the desired outcome.
Interestingly, plaster has been used in construction for thousands of years, with evidence dating back to ancient civilizations such as the Egyptians and Romans.
What Tools And Materials Do You Need For Plaster Skimming?
Plaster skimming is a popular technique for creating a smooth and polished surface on walls. But before you can start, it’s important to have the right tools and materials at hand. In this section, we’ll discuss the essential tools you’ll need for a successful plaster skimming project. From the necessary trowel and bucket to the handy plastering hawk and sandpaper, we’ll cover everything you need to get started. So let’s dive in and gather all the necessary supplies for a flawless plaster skim!
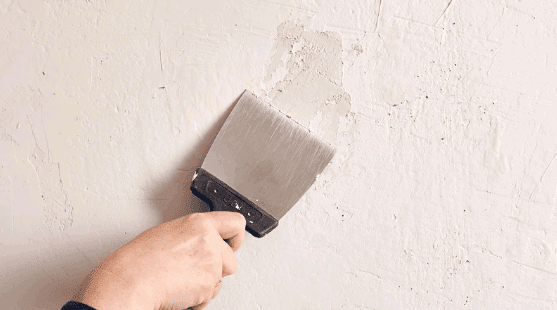
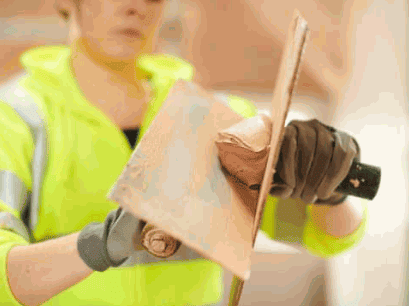
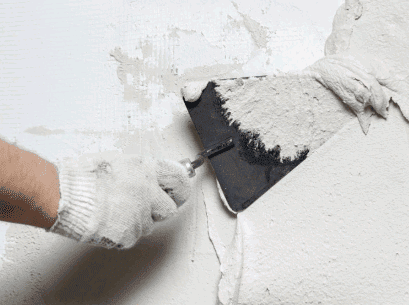
1. Plaster Skimming Trowel
When it comes to plaster skimming, having the right tools is essential. One of the most important tools you'll need is a plaster skimming trowel. Here are the steps to using a plaster skimming trowel effectively:
- Prepare the wall by cleaning it and repairing any damaged areas.
- Apply a bonding agent to ensure the plaster adheres properly.
- Mix the plaster according to the manufacturer's instructions.
- Apply the first coat of plaster using the plaster skimming trowel, spreading it evenly over the wall.
- Smooth out the plaster with the trowel, using long, sweeping motions.
- Apply a second coat of plaster in the same manner as the first.
- Smooth out the second coat to achieve a seamless finish.
- Once the plaster is dry, sand the wall to remove any imperfections.
- Clean the wall to remove any dust or debris.
Remember, practice makes perfect with plaster skimming. Don't be afraid to experiment and find techniques that work best for you. Happy plastering!
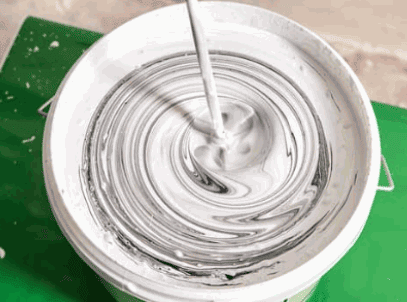
2. Bucket And Mixing Paddle
When it comes to plaster skimming, having the right tools and materials is crucial. Here is a list of steps for using a bucket and mixing paddle in the plaster skimming process:
- Choose a sturdy bucket and a compatible mixing paddle for your drill.
- Measure out the appropriate amount of plaster and pour it into the bucket.
- Attach the mixing paddle to the drill and carefully insert it into the plaster.
- Turn on the drill and mix the plaster thoroughly until it reaches a smooth and lump-free consistency.
- Ensure that the mixing paddle reaches all areas of the bucket to achieve an even mix.
By following these steps and using a bucket and mixing paddle, you can ensure that your plaster skimming project goes smoothly and results in a professionally finished wall.
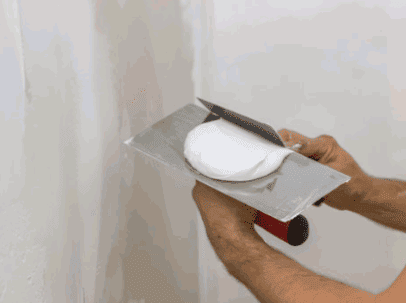
3. Plastering Hawk
A plastering hawk is an essential tool for effectively skimming walls with plaster. Follow these steps to use a plastering hawk properly:
- Secure the plastering hawk by firmly holding onto the handle.
- Load the plaster onto the hawk, making sure it is evenly distributed.
- Position yourself close to the wall and hold the hawk at a slight angle.
- Using a plastering trowel, scoop a small amount of plaster from the hawk.
- Apply the plaster onto the wall in smooth, even strokes.
- Continuously reload the hawk with plaster to maintain a consistent application.
- Scrape off any excess plaster from the hawk to prevent drips or unevenness.
- Repeat the process until the wall is completely covered with plaster.
Using a plastering hawk is a great way to efficiently apply plaster and achieve a smooth finish on walls.
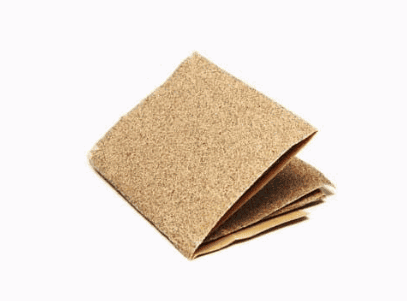
4. Sandpaper
Sandpaper is an essential tool when it comes to plaster skimming. Here are the steps to properly use sandpaper:
- Select the appropriate grit sandpaper based on the condition of the plaster and the desired smoothness.
- Start with sandpaper, such as 80 or 100, to remove any rough patches or imperfections on the plaster surface.
- Use long, even strokes to sand the plaster, applying gentle pressure.
- Once the surface is smooth, switch to a finer grit sandpaper, like 180 or 220, to create an even smoother finish.
- Continue sanding with the finer grit sandpaper until the surface is completely smooth and ready for painting or further finishing.
- After sanding, use a damp sponge or cloth to remove any dust or residue from the plaster.
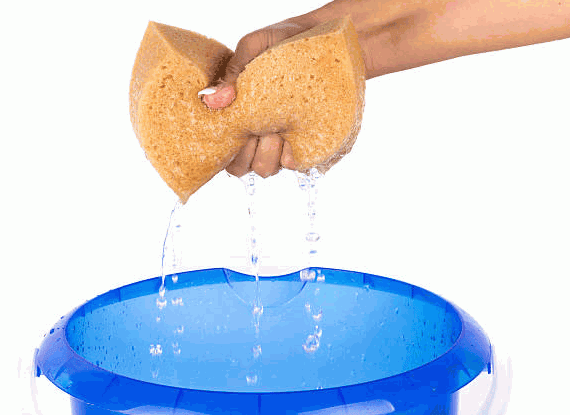
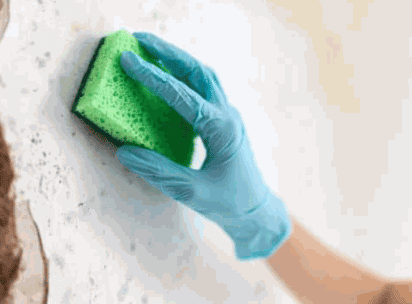
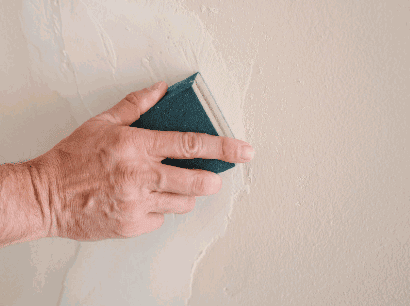
5. Water and Sponge
Plaster skimming requires the use of water and a sponge for various steps during the process. Here are the steps involved when using these tools:
- Dampen the wall: Before applying the plaster, moisten the wall with water using a clean sponge. This helps the plaster adhere better.
- Smooth out the plaster: After applying the first coat of plaster, gently use a damp sponge to smooth out any imperfections or ridges.
- Clean the wall: Once the plaster has dried, use a clean sponge and water to remove any excess plaster or residue from the wall surface.
Some additional suggestions:
- Make sure the sponge is clean and damp, but not soaking wet, to avoid excessive water on the wall.
- Use gentle, circular motions when smoothing out the plaster to achieve a more even finish.
- Regularly rinse the sponge to remove any excess plaster and maintain its effectiveness.
How To Prepare The Wall For Plaster Skimming?
Before diving into the process of plaster skimming a wall, it is important to properly prepare the surface for the best results. This section will cover the necessary steps to get your wall ready for plastering. First, we will discuss the importance of thoroughly cleaning the wall. Next, we will go over how to identify and repair any damaged areas. Lastly, we will explain the application of a bonding agent, which is crucial for ensuring a strong bond between the wall and the plaster. So, let's get started on preparing your wall for a smooth and flawless plaster skim.
1. Clean The Wall
- Remove any loose debris or dirt from the wall surface using a vacuum or broom.
- Wipe down the wall with a damp cloth to remove any surface dust or grease.
- If there are any stains or marks on the wall, use a mild detergent or cleaning solution to gently scrub them away.
- Inspect the wall for any cracks or holes and patch them up with a suitable filler or spackling compound.
- Smooth out the patched areas using sandpaper or a sanding block to create an even surface.
In the 1700s, the process of plaster skimming was commonly used in Europe to repair and refine the interior walls of buildings. Skilled craftsmen would carefully clean the walls before applying a thin layer of plaster to create a smooth and polished finish. This technique not only improved the appearance of the walls but also helped to protect them from damage and wear over time.
2. Repair Any Damaged Areas
When preparing a wall for plaster skimming, it is important to repair any damaged areas to ensure a smooth and even finish. Here are the steps to follow:
- Clean the wall by removing any loose debris or flaking paint.
- Inspect the wall for cracks, holes, or other damaged areas and repair them using a suitable filler or patching compound.
- Smooth out the repaired areas with a putty knife or trowel.
- Allow the repairs to fully dry and cure before proceeding with the plaster skimming process.
By following these steps, you can ensure that the wall is properly prepared and that any damaged areas are addressed before applying the plaster skim coat.
Explore: How To Repair Plaster Walls
3. Apply A Bonding Agent
When preparing a wall for plaster skimming, it is important to follow proper steps to ensure proper adhesion. One crucial step is to apply a bonding agent. Here is a step-by-step guide to properly applying a bonding agent:
- First, clean the wall by removing any dust, dirt, or loose particles.
- Next, use a paintbrush or roller to apply the bonding agent over the entire surface of the wall.
- Allow the bonding agent to dry according to the manufacturer's instructions.
- Once the bonding agent is dry, the wall is ready for the plaster skim coat to be applied.
Pro-tip: To achieve the best results and maximize adhesion between the wall and plaster skim coat, be sure to follow the recommended drying time for the bonding agent.
How To Plaster Skim A Wall?
Are you looking to give your walls a smooth and flawless finish? Plaster skimming is a great way to achieve a professional look for your walls. In this section, we will guide you through the step-by-step process of how to plaster skim a wall. From mixing the plaster to sanding and cleaning the wall, we will cover each important aspect of this technique. Get ready to transform your walls into a smooth canvas for your home decor.
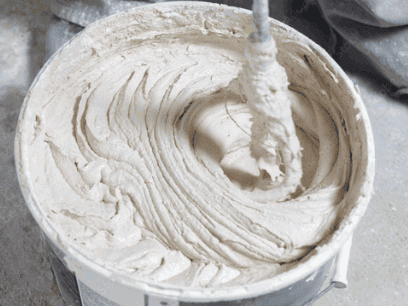
1. Mix The Plaster
Mixing the plaster is an essential step in the plaster skimming process. Here is a step-by-step guide on how to effectively mix the plaster:
- Gather all the necessary materials, including plaster, water, a mixing bucket, and a mixing paddle.
- Measure the appropriate amount of plaster and water, with a recommended ratio of one part water to two parts plaster.
- Pour the water into the mixing bucket.
- Add the plaster gradually to the water while continuously stirring with the mixing paddle.
- Continue mixing until the plaster reaches a smooth, creamy consistency, free of any lumps.
- Allow the plaster to rest for a few minutes before using it.
By following these steps, you can ensure that the plaster is thoroughly mixed and ready for application on the wall during the plaster skimming process.
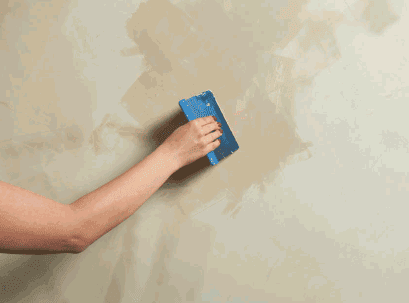
2. Apply The First Coat Of Plaster
To properly apply the first coat of plaster when skimming a wall, follow these steps:
- Prepare the plaster mixture according to the manufacturer's instructions.
- Starting at the top corner of the wall, use a plastering trowel to apply a thin layer of plaster diagonally across the surface.
- Evenly spread the plaster using upward strokes to create a smooth finish.
- Continue applying the plaster in small sections, working from top to bottom and left to right.
- Overlap each section slightly to ensure a seamless finish.
Pro-tip: For a professional result, keep the trowel clean and moist during the process to prevent the plaster from sticking to it.
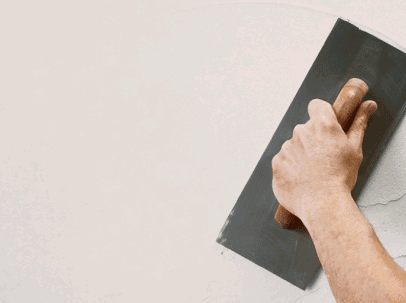
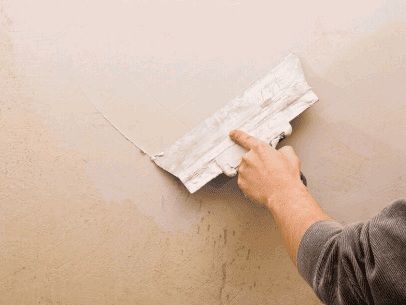
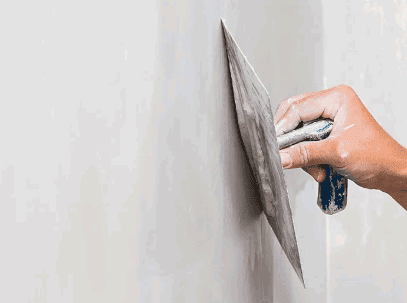
3. Smooth Out The Plaster
To achieve a smooth plaster skim on your wall, follow these steps:
- Mix the plaster to a smooth and creamy consistency.
- Apply the first coat of plaster to the wall using a plastering trowel.
- Use a plastering hawk to hold the plaster and a trowel to smooth it out.
- Apply the second coat of plaster, making sure it is even and level.
- Smooth out the second coat using a trowel and a damp sponge.
- Once the plaster has dried, sand the wall to achieve a smooth finish.
By following these steps, you can easily and professionally smooth out the plaster when skim-coating a wall.
4. Apply The Second Coat Of Plaster
To properly apply the second coat of plaster, please follow these steps:
- Mix the plaster according to the manufacturer's instructions until it reaches a smooth consistency.
- Using a plastering trowel, apply a thin and even layer of plaster over the first coat, ensuring a smooth and uniform surface.
- Fill in any visible gaps, cracks, or imperfections in the first coat with the second coat of plaster.
- Smooth out the second coat with the trowel, making sure to create an even and level surface.
- Allow the second coat to dry completely before proceeding with the rest of the plastering process.
By following these steps, you can achieve a professional and polished finish, preparing the wall for further finishing and painting.
5. Smooth Out The Second Coat
To achieve a smooth finish on the second coat of plaster skimming, follow these steps:
- After applying the second coat of plaster, use a plastering trowel to evenly spread the plaster across the wall.
- Hold the trowel at a slight angle and smoothly sweep it over the plaster to flatten it.
- Start from the top of the wall and work downwards, gradually smoothing out any ridges or imperfections.
- Continue smoothing the plaster until you have a consistent, even surface.
- Inspect the wall for any remaining bumps or uneven areas and gently smooth them out using the trowel.
- Once the second coat is smooth, allow it to dry completely before moving on to sanding and painting.
6. Sand And Clean The Wall
After plaster skimming a wall, it is essential to properly sand and clean the surface to achieve a smooth and polished finish.
- Begin by using fine-grit sandpaper to carefully sand the wall, paying special attention to any rough or uneven areas.
- Next, use a clean, damp sponge to wipe down the wall and remove any dust or debris left from sanding.
- Make sure the wall is completely dry before moving on to the next steps.
- Inspect the wall for any remaining imperfections or dust particles, and repeat the sanding and cleaning process if necessary.
- Finally, use a dry cloth to wipe down the wall one last time, ensuring it is clean and ready for further finishing or painting.
Remember to take your time and be thorough with the sanding and cleaning process to achieve the best results for your plaster-skimmed wall.
What Are Some Tips For Plaster Skimming?
Plaster skimming is a delicate and precise process that requires skill and attention to detail. In this section, we will discuss some helpful tips for achieving a smooth and flawless skim coat on your walls. From working quickly and efficiently to keeping your tools clean and using proper body mechanics, these tips will ensure that your plaster skimming project is a success. Get ready to transform your walls with these expert tips.
1. Work Quickly And Efficiently
To achieve maximum productivity when plaster skimming, it is important to work quickly and efficiently. Follow these steps to ensure success:
- Prepare all necessary tools and materials beforehand.
- Make sure the wall is free of debris and clean.
- Follow the manufacturer's instructions to properly mix the plaster.
- Use a trowel to apply the first coat of plaster.
- Smooth out the plaster to create an even surface.
- Apply a second coat of plaster for added durability.
- Smooth out the second coat to achieve a seamless finish.
- Sand the wall to remove any imperfections.
- Maintain clean tools throughout the process to prevent buildup.
- Use proper body mechanics to avoid strain or injury.
Pro-tip: Keep your workspace organized to minimize downtime and maintain momentum.
2. Keep Your Tools Clean
Keeping your tools clean while plaster skimming is crucial for achieving smooth and professional results. Follow these steps to ensure your tools stay in top condition:
- After each use, remove excess plaster from your tools using a scraper or putty knife.
- Wash your tools with warm water and a mild detergent to keep them clean and free of any remaining plaster.
- For stubborn plaster buildup, use a wire brush or abrasive pad to scrub it away.
- Thoroughly dry your tools to prevent rusting or corrosion.
- Store your clean tools in a dry and protected area to maintain their condition for future use.
Fun Fact: Properly cleaning and maintaining your plastering tools can extend their lifespan and ensure optimal performance for future projects.
3. Use Proper Body Mechanics
Using proper body mechanics is crucial during the plaster skimming process to prevent strain and injury. Here are some important steps to follow:
- Position your body correctly: Stand with your feet shoulder-width apart, knees slightly bent, and maintain a straight back.
- Lift with your legs: When lifting heavy buckets or materials, bend your knees and use your leg muscles to lift, avoiding strain on your back.
- Use your core muscles: Engage your abdominal muscles to stabilize your body and support your back.
- Take regular breaks: Avoid prolonged periods of repetitive motions and take breaks to rest and stretch.
- Use proper tools: Choose tools with ergonomic handles and grips to reduce strain on your hands and wrists.
How To Finish And Paint The Plastered Wall?
Once the plastering process is complete, the next crucial step is finishing and painting the wall. In this section, we will discuss the steps involved in achieving a smooth and flawless finish for your plastered wall. First, we will go over how to properly apply a primer to prepare the surface for painting. Then, we will cover the process of sanding the wall to achieve a smooth and even texture. Finally, we will discuss tips and techniques for painting the plastered wall to achieve a professional and polished look.
1. Apply A Primer
To properly prepare a plastered wall for painting, it is crucial to apply a primer. Follow these steps to ensure the best results:
- Thoroughly clean the wall, removing any dust or debris.
- Repair any imperfections or damaged areas in the plaster.
- Apply a bonding agent to promote better adhesion between the plaster and primer.
A primer serves as a base coat, aiding in paint adhesion, creating a smooth surface, and preventing paint absorption. It also improves color accuracy and durability. Once the primer has been applied, allow it to dry completely before proceeding with sanding and painting.
Remember, using a high-quality primer and following proper application techniques will result in a professional finish for your plastered wall.
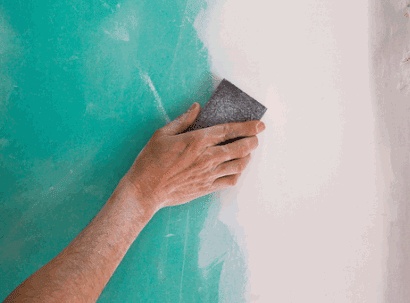
2. Sand The Wall
To properly sand a wall during the plaster skimming process, follow these steps:
- Gather the necessary tools: sandpaper (medium to fine grit), sanding block, or sanding pole.
- Ensure the wall is dry and free from dust or debris.
- Start sanding from the top of the wall and work your way down.
- Use smooth, even strokes while applying gentle pressure.
- Focus on smoothing out any rough or uneven areas.
- Check your progress frequently by running your hand over the sanded surface.
- Wipe away any dust with a clean, damp cloth or sponge.
- Repeat the Sand the Wall process if necessary until the wall is smooth and ready for finishing or painting.
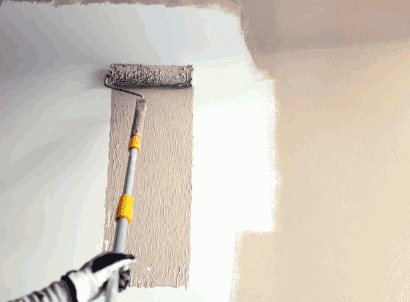
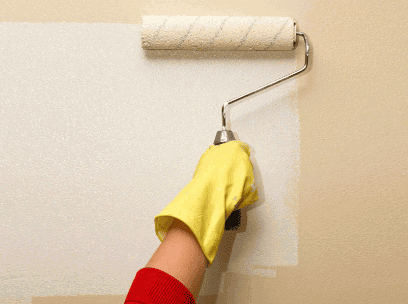
3. Paint The Wall
To paint a plastered wall, follow these steps:
- Apply a primer to create a smooth surface for the paint.
- Sand the wall to remove any imperfections and create a smooth texture.
- Paint the Wall with your desired color using a roller or brush.
Some suggestions to consider:
- Choose high-quality paint and tools for a professional finish.
- Protect surrounding areas with drop cloths or painter's tape.
- Apply multiple coats of paint if necessary for full coverage.