Do you have unsightly cracks and holes in your plaster walls that are ruining the look of your home? Don't worry, you are not alone. Many homeowners struggle with repairing plaster walls, which can be a daunting task. In this article, we will explore the steps and techniques for repairing plaster walls effectively, so you can restore the beauty of your walls and save money on hiring professionals. Let's get started!
What Are Plaster Walls?
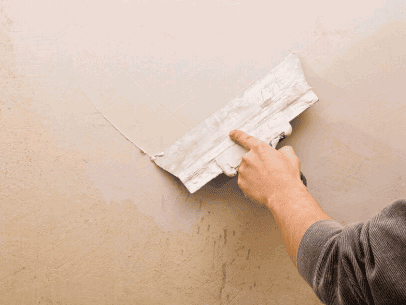
Plaster walls are a type of wall finish commonly found in older homes. They are created by layering plaster over a wooden lath or metal mesh framework. Plaster walls have a durable and smooth surface that can be painted or decorated. They also provide better soundproofing and insulation compared to drywall. However, they may develop cracks and damage over time. To repair plaster walls, one must clean the affected area, apply a patching compound, and smooth it out.
Fun Fact: Plaster has been used as a building material for thousands of years, dating back to ancient civilizations like the Egyptians and Romans.
What Are The Common Causes Of Plaster Wall Damage?
Plaster walls are a classic and durable choice for many homes, but they can still experience damage over time. Understanding the common causes of plaster wall damage is key to knowing how to properly repair it. In this section, we will discuss the four main causes of plaster wall damage: water damage, settlement cracks, impact damage, and age. By identifying the root cause of the damage, we can effectively address and prevent future issues.
Find out more: How To Remove Plaster Walls
1. Water Damage
Water damage is a common issue that can cause damage to plaster walls. To repair water damage, follow these steps:
- Clean the affected area by removing any loose or damaged plaster.
- Allow the area to dry completely to prevent further damage.
- If there is any mold or mildew, treat it with a mixture of water and bleach.
- Apply a coat of primer to the damaged area to seal it and prevent moisture absorption.
- Use joint compound to fill in any cracks or holes, smoothing it with a putty knife.
- Sand the area to create a smooth surface.
- Apply paint or wallpaper to match the surrounding area.
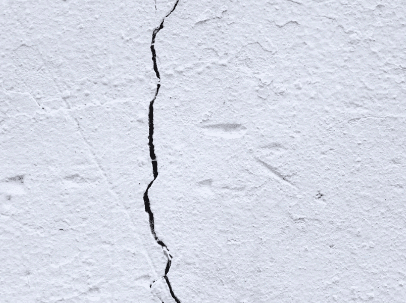
2. Settlement Cracks
Settlement cracks in plaster walls are a common occurrence when a building settles or shifts over time. These cracks are usually vertical and can vary in width. To effectively repair settlement cracks in plaster walls, follow these steps:
- Clean the crack by removing any loose debris or plaster.
- Fill the crack with the joint compound.
- Use sandpaper to smooth the surface of the joint compound.
- Prime and paint over the patched area to match the surrounding wall.
Pro-tip: To prevent settlement cracks, it is important to ensure proper foundation support during construction and promptly address any structural issues.
3. Impact Damage
Impact damage is a common cause of damage to plaster walls. Follow these steps to effectively repair walls that have been impacted:
- Assess the damage: Carefully examine the impacted area to determine the extent of the damage.
- Remove loose debris: Gently remove any loose plaster or debris from the affected area.
- Apply joint compound: Use a drywall knife to apply the joint compound to the damaged area, filling in any cracks or holes.
- Smooth the surface: Use sandpaper to smooth out the patched area, ensuring it seamlessly blends with the rest of the wall.
- Paint: Once the joint compound is dry, paint over the patched area to match the surrounding wall.
These steps will effectively repair plaster walls that have been impacted by damage.
4. Age
Plaster walls can show signs of damage due to aging. As time passes, the plaster may become brittle and develop cracks or holes. To repair small holes, the area should be cleaned before applying the joint compound. Once dry, sand and smooth the surface, and then paint over the patched area.
For larger holes, it may be necessary to cut out the damaged area, install plaster mesh, apply joint compound, sand and smooth the surface, and finish with paint.
Consistent maintenance and repairs can help prolong the lifespan of plaster walls, ensuring they remain in good condition for years to come.
What Tools And Materials Are Needed For Plaster Wall Repair?
When it comes to repairing plaster walls, having the right tools and materials is crucial for a successful outcome. In this section, we will discuss the essential items needed for plaster wall repair. From joint compound and sandpaper to plaster mesh and paint, each tool and material plays a specific role in the repair process. By understanding the purpose of each item, you can ensure that your plaster wall repair project goes smoothly and results in a seamless finish.
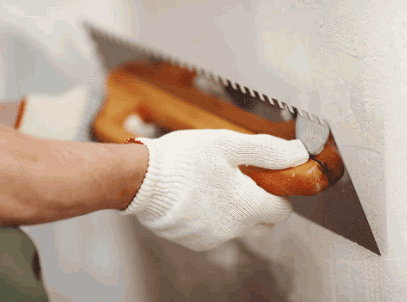
1. Joint Compound
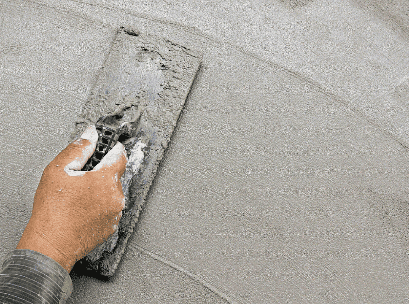
A joint compound is an essential material for repairing plaster walls. Follow these steps to effectively use joint compound:
- Clean the damaged area by removing loose plaster and dust.
- Prepare the joint compound by following the manufacturer's instructions for mixing.
- Using a drywall knife, apply a thin layer of joint compound to the damaged area.
- Smooth the surface of the joint compound with sandpaper to achieve a seamless finish.
- Allow the joint compound to dry completely before adding additional coats if needed.
- Once dried, sand the joint compound to create a smooth and even surface.
- Apply paint over the patched area to match the surrounding wall.
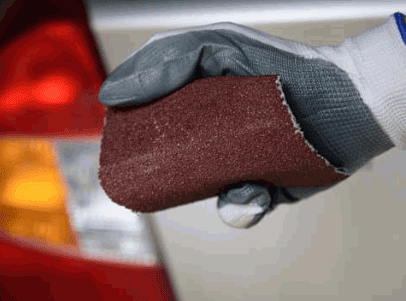
2. Sandpaper
When it comes to repairing plaster walls, sandpaper plays a crucial role in achieving a smooth and even finish. Here are the steps involved in using sandpaper for plaster wall repair:
- Start by cleaning the patched area to remove any dust or debris.
- Choose a fine-grit sandpaper, such as 120 or 150 grit, for smoothing the surface.
- Gently sand the patched area in a circular motion, applying even pressure.
- Continue sanding until the surface feels smooth to the touch and any imperfections are eliminated.
- Wipe away any sanding residue with a clean cloth or sponge.
- Inspect the area for any remaining rough spots and repeat the sanding process if necessary.
Using sandpaper during plaster wall repair is essential in creating a seamless surface that can be easily painted over for a professional-looking finish.
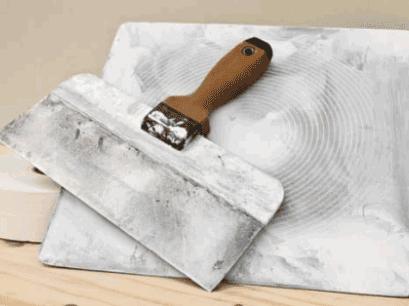
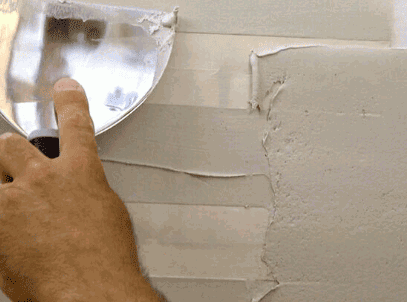
3. Drywall Knife
A drywall knife is an essential tool for repairing plaster walls. Here is a list of steps to effectively use a drywall knife:
- Clean the damaged area by removing loose debris and dust.
- Apply the joint compound with the drywall knife, spreading it evenly over the damaged area.
- Smooth the surface by using the drywall knife to feather the edges of the compound.
- Allow the compound to dry completely before applying additional layers if needed.
- Sand the patched area with sandpaper or a sanding block to create a smooth finish.
- Prime and paint over the patched area to match the surrounding wall.
Using the drywall knife correctly will help achieve a seamless and professional-looking repair on plaster walls.
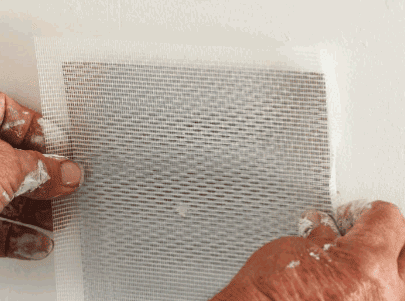
4. Plaster Mesh
Plaster mesh is a crucial material used in repairing large holes in plaster walls. Here are the steps to effectively utilize plaster mesh:
- Cut out the damaged area, creating a clean, rectangular hole.
- Measure and cut a piece of plaster mesh slightly larger than the hole.
- Place the plaster mesh over the damaged area, ensuring it covers the entire hole.
- Apply joint compound over the mesh, pressing it into the holes of the mesh.
- Smooth the surface with a drywall knife, blending it with the surrounding wall.
- Allow the compound to dry completely before sanding it to achieve a smooth finish.
- Finally, paint over the patched area, matching it with the rest of the wall.
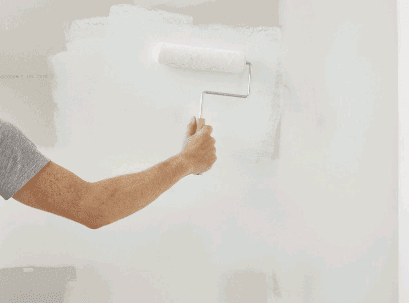
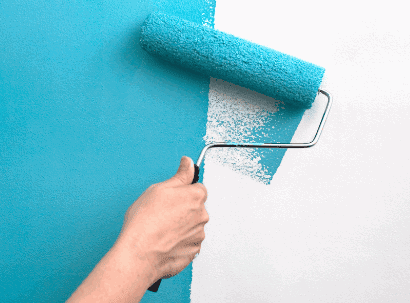
5. Paint
To properly paint plaster walls, follow these steps:
- Clean the wall surface by removing any dust or debris.
- Apply a coat of primer to ensure the paint adheres properly to the plaster.
- Choose a high-quality paint specifically designed for plaster surfaces.
- Use a brush or roller to apply the paint evenly, starting from the top and working your way down.
- Allow the first coat to dry completely before applying the Paint a second coat if necessary.
Did you know that painting plaster walls not only enhances their appearance but also helps protect the plaster from damage and deterioration?
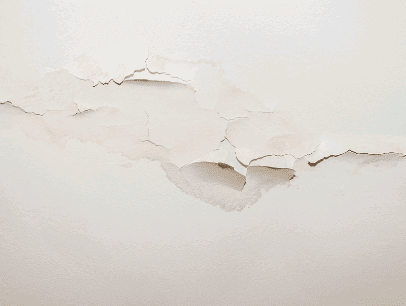
How To Repair Small Holes In Plaster Walls?
If you've noticed small holes in your plaster walls, don't panic. They can easily be repaired with a few simple steps. In this section, we'll guide you through the process of repairing small holes in plaster walls. From cleaning the area to applying joint compound and painting over the patched area, we'll cover all the necessary steps to restore your walls to their original condition. So let's get started and say goodbye to those pesky holes!
1. Clean The Area
To properly clean the area before repairing plaster walls, follow these steps:
- Remove any loose plaster or debris using a putty knife.
- Use a damp cloth or sponge to wipe down the damaged area, removing any dust or dirt.
- If there is any grease or grime, mix a solution of warm water and mild detergent, then gently scrub the area.
- Rinse the area with clean water and allow it to dry completely before proceeding with the repair.
Fun Fact: Cleaning the area thoroughly ensures better adhesion of the joint compound, resulting in a more durable and seamless repair.
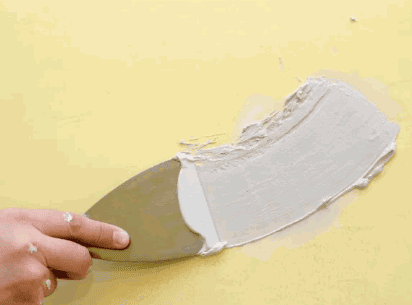
2. Apply Joint Compound
To properly apply joint compound for plaster wall repair, follow these steps:
- Clean the damaged area by removing any loose plaster and dust.
- Prepare the joint compound by mixing it according to the manufacturer's instructions.
- Using a putty knife, carefully apply a thin layer of joint compound over the hole or crack, making sure to smooth it out evenly.
- Allow the joint compound to dry completely, which typically takes around 24 hours.
- Once the compound is dry, gently sand the patched area with sandpaper to achieve a smooth finish.
Pro-tip: For a professional-looking finish, it is recommended to apply multiple thin layers of joint compound, allowing each layer to dry and sand between coats. This technique will help achieve a seamless repair.
3. Sand And Smooth The Surface
To properly sand and smooth the surface of a plaster wall during repair, follow these steps:
- Begin by thoroughly cleaning the patched area, making sure to remove any dust or debris.
- Using sandpaper, gently sand the surface of the patch to smooth out any rough edges or uneven areas.
- Wipe away any sanding residue with a clean cloth or sponge.
- Inspect the surface for any remaining imperfections and repeat the sanding process as necessary.
- Once the surface is smooth and even, it is ready for painting or further finishing.
4. Paint Over The Patched Area
To successfully paint over a patched area on plaster walls, follow these steps:
- Clean the patched area to remove any dust or debris.
- Apply a thin layer of joint compound over the patched area, using a putty knife.
- Allow the joint compound to dry completely.
- Sand the surface smooth, ensuring it blends seamlessly with the surrounding wall.
- Wipe away any dust from sanding and apply a coat of primer to the patched area.
- Once the primer is dry, carefully paint over the patched area using the desired color.
By following these steps, you can achieve a seamless finish when painting over a patched area on plaster walls.
How To Repair Large Holes In Plaster Walls?
Are you tired of looking at that unsightly hole in your plaster wall? Don't worry, we've got you covered. In this section, we'll discuss the step-by-step process for repairing large holes in plaster walls. From cutting out the damaged area to painting over the patched area, we'll cover all the necessary steps to restore your wall to its former glory. Get ready to tackle this DIY project and say goodbye to those pesky holes.
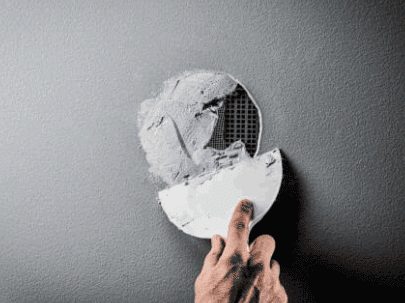
1. Cut Out The Damaged Area
To repair a damaged area in plaster walls, follow these steps:
- Assess the damage: Determine the extent of the damage and mark the area that needs to be cut out.
- Gather the necessary tools: Prepare a utility knife, a straight edge, and a dust mask for safety.
- Protect the surrounding area: Cover the floor and nearby surfaces with drop cloths to catch any debris.
- Cut out the damaged area: Using a utility knife, carefully cut along the marked lines to remove the damaged plaster. Make clean, straight cuts for easier patching.
- Remove any loose debris: Use a brush or vacuum to clean out any loose plaster or dust from the cut-out area.
By following these steps, you can successfully cut out the damaged area in plaster walls.
2. Install Plaster Mesh
Installing plaster mesh is an essential step in repairing large holes in plaster walls. Here is a step-by-step guide:
- Cut out the damaged area of the plaster wall, creating a clean and smooth edge.
- Measure and cut a piece of plaster mesh that is slightly larger than the hole.
- Position the plaster mesh over the hole, ensuring that it covers the entire area.
- Secure the plaster mesh to the surrounding plaster using drywall screws or nails.
- Apply a layer of joint compound over the plaster mesh, extending it slightly beyond the edges of the mesh.
- Smooth out the joint compound using a drywall knife, ensuring a flat and even surface.
- Allow the joint compound to dry completely, following the manufacturer's instructions.
- Sand the patched area gently to create a seamless finish with the surrounding plaster.
- Wipe away any dust or debris from sanding, ensuring a clean surface.
- Apply a coat of paint to the patched area, matching the color of the surrounding wall.
3. Apply Joint Compound
Applying a joint compound is a crucial step in repairing plaster walls. Here is a step-by-step guide to help:
- Clean the damaged area by removing loose plaster and debris.
- Prepare the joint compound by mixing it according to the manufacturer's instructions.
- Using a putty knife, apply a thin layer of joint compound over the damaged area, ensuring it fills any gaps or holes.
- Smooth the surface by feathering the edges of the compound with the putty knife.
- Allow the joint compound to dry completely, following the recommended drying time on the product label.
- Once dry, sand the patched area gently with fine-grit sandpaper until it is smooth and level with the surrounding wall.
- Wipe away any dust with a clean cloth.
- Now, the repaired area is ready for painting or any other finishing touches.
4. Sand And Smooth The Surface
To properly sand and smooth the surface while repairing plaster walls, follow these steps:
- Clean the area thoroughly, removing any loose debris or dust.
- Using sandpaper, gently sand the patched area in smooth, even strokes. Begin with a coarse grit for larger imperfections, and then switch to a finer grit for a smoother finish.
- Wipe away any dust or residue with a damp cloth or sponge.
- Inspect the surface for any remaining rough spots. If necessary, repeat the sanding process until the surface is uniformly smooth.
- After sanding, apply a layer of primer to prepare the surface for painting or further finishing.
5. Paint Over The Patched Area
To paint over a patched area on plaster walls, follow these steps:
- Clean the area to remove any dust or debris.
- Apply a thin layer of joint compound over the patched area, using a drywall knife.
- Allow the joint compound to dry completely, then sand and smooth the surface until it is even.
- Wipe away any dust from sanding, and prime the patched area with a suitable primer.
- Finally, once the primer is dry, paint over the patched area with your desired paint color, using a roller or brush.