Are you tired of the old, cracked plaster walls in your home? Do you want to update the look of your space but don't know where to start? Look no further! In this article, we will guide you through the steps to remove plaster walls and give your home a fresh new look. Say goodbye to outdated walls and hello to a modern, stylish space!
What Are Plaster Walls?
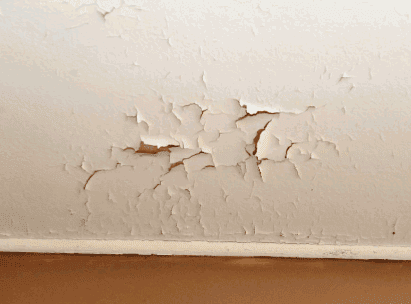
Plaster walls are a traditional wall-finishing method that dates back centuries. This technique involves applying layers of a mixture of lime, sand, and water to a lath or masonry surface. Plaster walls are highly regarded for their durability, soundproofing capabilities, and smooth appearance. However, as time passes, they may become damaged or outdated, prompting homeowners to contemplate their removal.
Removing plaster walls can be a labor-intensive task that requires careful preparation and the use of suitable tools. It is crucial to take necessary safety measures and seek professional assistance if necessary.
Why Would Someone Want To Remove Plaster Walls?
Plaster walls have been a popular choice for interior walls for centuries, but there may come a time when homeowners or renovators want to remove them. There are a few reasons why one might want to remove plaster walls, whether it’s due to damage or simply an outdated design. In this section, we will discuss the main reasons why someone would want to remove plaster walls and the steps involved in doing so.
1. Damaged Plaster Walls
Damaged plaster walls can be a hassle, but with the right tools and steps, you can effectively remove them.
- Before beginning, prepare the room by removing furniture and covering the floor.
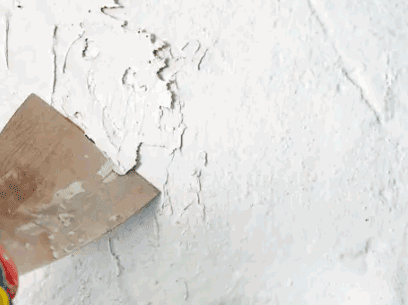
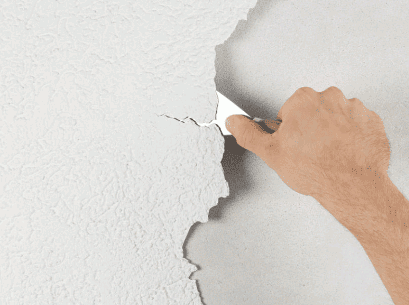
- To start, score the plaster using a utility knife to create a starting point for removal.
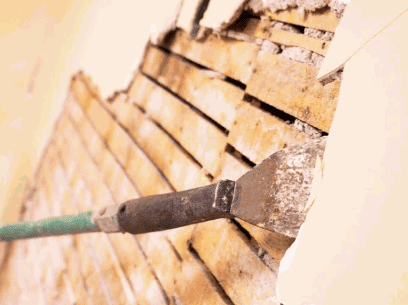
- Next, use a hammer and chisel to remove the plaster pieces, working in sections.
- Then, remove the lath strips behind the plaster using a pry bar.
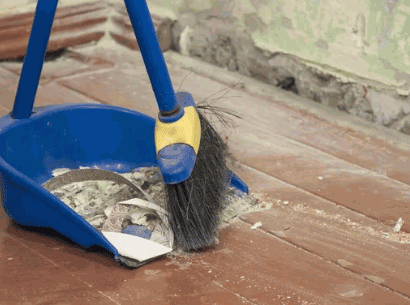
- Finally, clean up the debris by sweeping and vacuuming the area.
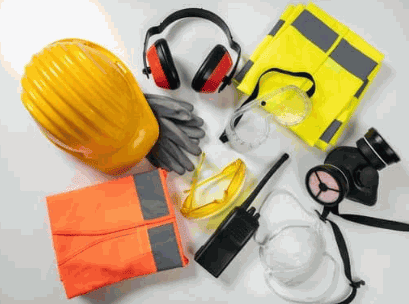
Remember to prioritize safety by wearing protective gear, turning off electricity, and being cautious of sharp edges. If removing plaster walls seems overwhelming, consider alternatives such as covering them with drywall or skim coating.
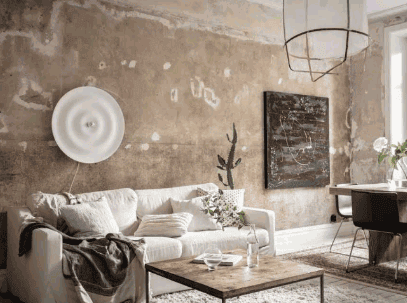
2. Outdated Design
Removing plaster walls can be a great idea if you want to update your space and get rid of an outdated design. Here are the steps to remove plaster walls:
- Prepare the room by removing furniture and protecting floors.
- Score the plaster using a utility knife in a crisscross pattern.
- Remove the plaster pieces using a hammer and chisel.
- Take out the lath strips behind the plaster.
- Clean up the debris and dispose of it properly.
Pro tip: Before removing plaster walls, make sure to check if there are any electrical wires or plumbing behind the walls to avoid any accidents.
What Tools Are Needed To Remove Plaster Walls?
When it comes to removing plaster walls, having the right tools is essential for a successful and efficient process. In this section, we will discuss the necessary tools for removing plaster walls and their specific purposes. From the strength of a hammer to the precision of a utility knife, each tool plays a critical role in the removal process. So, let's take a closer look at the essential tools needed for removing plaster walls.
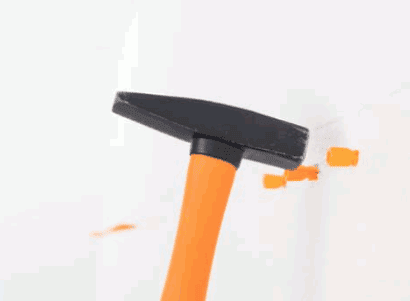
1. Hammer
Removing plaster walls requires specific tools, such as a hammer, to complete the task effectively. Here is a step-by-step guide on using a hammer to remove plaster walls:
- Prepare the room by removing any furniture or objects that may obstruct the process.
- Score the plaster using the hammer by tapping it gently to create cracks in the surface.
- Remove the plaster pieces by hitting them with the hammer, starting from the scored areas and working your way around.
- Remove the lath strips behind the plaster by prying them off with the hammer.
- Clean up the debris by using a hammer to break down larger pieces and a broom to collect the smaller ones.
Remember to follow safety precautions, such as wearing protective gear, turning off electricity, and being cautious of sharp edges. If removing plaster walls is not desired, alternatives like covering with drywall or skim coating the plaster can be considered.
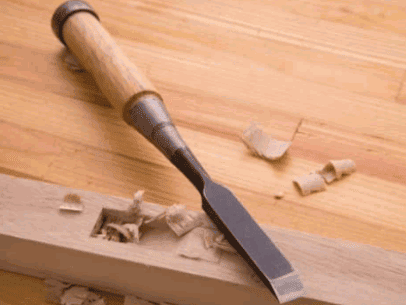
2. Chisel
A chisel is a necessary tool when it comes to removing plaster walls. It is specifically designed to break apart the plaster and separate it from the underlying lath strips with precision and control. To ensure safety, it is important to wear protective gear such as safety goggles and gloves when using a chisel as it can create flying debris. It is also recommended to turn off the electricity in the room to avoid any potential electrical hazards. Overall, utilizing a chisel is an efficient and safe method for removing plaster walls.
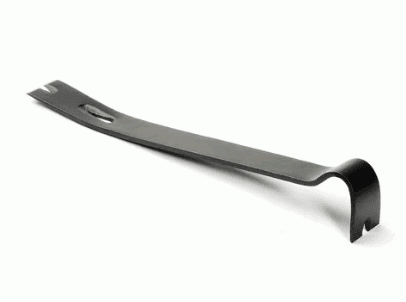
3. Pry Bar
A pry bar is an essential tool for removing plaster walls. Here are the steps to use a pry bar effectively:
- Start by preparing the room, removing furniture, and covering the floor with a drop cloth.
- Using a utility knife, score the plaster along the edges to create clean lines for removal.
- Position the pry bar between the plaster and the wood lath strips behind it.
- Gently apply pressure and use the pry bar to carefully pry away the plaster from the wall, working in small sections.
- Continue removing the plaster pieces until the entire wall is cleared.
- Once the plaster is removed, use the pry bar to carefully remove the lath strips.
- Finally, clean up the debris and dispose of it properly.
Remember to always wear protective gear, turn off the electricity, and be cautious of sharp edges while using a pry bar to remove plaster walls.
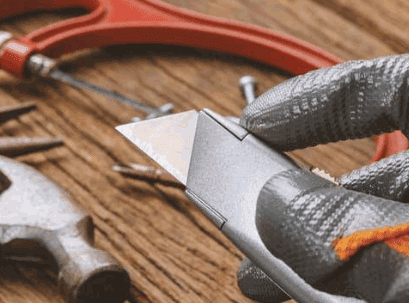
4. Utility Knife
A utility knife is an essential tool when removing plaster walls. Here are the steps to follow when using a utility knife:
- Prepare the room by removing furniture and covering the floor with a drop cloth.
- Score the plaster by making shallow cuts along the surface using the utility knife.
- Remove the plaster pieces by gently prying them away from the wall using the utility knife as leverage.
- Remove the lath strips by cutting through them with the utility knife and prying them off the wall.
- Clean up the debris by disposing of the plaster and lath strips properly.
Remember to wear protective gear, turn off electricity, and be cautious of sharp edges when using a utility knife.
What Are The Steps To Remove Plaster Walls?
Removing plaster walls can be a daunting task, but with the right steps, it can be done efficiently and effectively. In this section, we will discuss the step-by-step process of removing plaster walls. From preparing the room to cleaning up the debris, we will cover all the necessary steps to make this project a success. So let's dive in and learn how to remove plaster walls like a pro.
1. Prepare The Room
Preparing the room is an essential step when removing plaster walls. To ensure a smooth and efficient process, follow these steps:
- Clear the area: Remove furniture, decorations, and other items from the room.
- Protect surfaces: Cover the floors, furniture, and any other surfaces with drop cloths or plastic sheets to prevent damage.
- Turn off utilities: Switch off the electricity and water supply to avoid any accidents.
- Open windows: Provide ventilation by opening windows or using fans to reduce dust and fumes.
- Wear protective gear: Put on safety goggles, gloves, and a dust mask to protect yourself from debris and dust.
- Create a designated work zone: Set up a designated area with tools, trash bags, and a disposal system for easy cleanup.
By following these steps, you can effectively prepare the room before removing plaster walls.
2. Score The Plaster
Scoring the plaster is a crucial step in the process of removing plaster walls. Follow these steps to effectively and safely score the plaster:
- Begin by using a utility knife to create vertical lines on the plaster surface.
- Ensure that the lines are evenly spaced, with a distance of approximately 12 inches between each one.
- Apply light pressure while scoring to avoid causing damage to the underlying lath.
- Repeat the process horizontally, creating a grid pattern on the plaster.
- Make sure that each section that has been scored is small enough to be easily removed.
Fact: Scoring the plaster helps weaken its bond with the lath, making it easier to remove.
3. Remove The Plaster Pieces
To remove plaster pieces from walls, follow these steps:
- Start by wearing protective gear, including gloves, goggles, and a dust mask.
- Use a hammer to create cracks in the plaster, making it easier to remove.
- Insert a chisel into the cracks and gently pry the plaster away from the wall.
- Continue breaking off pieces of plaster until the entire wall is clear.
- Dispose of the plaster debris properly.
Fact: Removing plaster walls can be a dusty and labor-intensive process.
4. Remove The Lath Strips
Removing lath strips is a crucial step in the process of removing plaster walls. Follow these steps to guide you through the process:
- Prepare the room by removing furniture and covering the floors.
- Score the plaster along the lath strips using a utility knife.
- Gently use a pry bar to remove the plaster pieces and expose the lath strips.
- Locate the nails securing the lath strips to the studs.
- Carefully remove the nails and detach the lath strips from the studs using a hammer or pry bar.
- Repeat this process until all lath strips have been removed.
- Dispose of the lath strips and plaster debris properly.
The use of lath and plaster dates back centuries, with ancient Romans and Egyptians using this technique in their construction. Lath strips, typically made from wood or metal, served as a base for applying plaster. However, with advancements in construction materials and techniques, lath and plaster walls have become less popular, with many homeowners choosing drywall instead. Nevertheless, when renovating older buildings, the removal of lath strips is still a necessary step.
5. Clean Up The Debris
Cleaning up the debris after removing plaster walls is an important step in the process. Here are the steps to effectively clean up the debris:
- Collect the larger pieces of plaster and place them in a sturdy garbage bag.
- Use a broom and dustpan to sweep up the smaller debris, being careful to remove all loose plaster.
- Vacuum the area to ensure all fine dust particles are removed.
- Wipe down surfaces with a damp cloth to remove any remaining dust.
- Dispose of the garbage bag containing the debris properly.
By following these steps, you can ensure that the area is clean and ready for the next stage of your project.
What Are The Safety Precautions When Removing Plaster Walls?
When removing plaster walls, safety should always be a top priority. In this section, we will discuss the necessary safety precautions to take before starting the removal process. These precautions include wearing protective gear to prevent any potential injuries, turning off electricity to avoid any accidents, and being cautious of sharp edges while removing the plaster. By following these safety measures, you can ensure a safe and successful removal of plaster walls in your home.
1. Wear Protective Gear
When removing plaster walls, it is crucial to prioritize safety by wearing protective gear. Follow these steps to ensure a safe removal process:
- Cover your body: Wear long sleeves, pants, gloves, and safety goggles to protect against dust, debris, and sharp edges.
- Respiratory protection: Use a dust mask or respirator to prevent inhalation of plaster dust.
- Head protection: Wear a hard hat to shield your head from falling plaster or debris.
- Footwear: Use sturdy, closed-toe shoes or boots to protect your feet from potential injury.
2. Turn Off Electricity
When removing plaster walls, it is crucial to prioritize safety by turning off the electricity. Follow these steps to ensure a safe process:
- Identify the circuit breaker that controls the power to the room.
- Switch off the circuit breaker to cut off the electricity supply to the area.
- Use a voltage tester to double-check that the power is indeed off.
- Proceed with caution and avoid touching any electrical outlets or wires.
- Keep the circuit breaker off until the removal process is complete.
3. Be Careful of Sharp Edges
When removing plaster walls, it is crucial to be cautious of sharp edges to avoid injuries. Follow these steps to ensure your safety:
- Wear protective gloves and goggles.
- Use a utility knife to score along the edges of the plaster.
- Remove plaster pieces carefully, avoiding contact with any sharp edges.
- Take extra care while removing lath strips, as they may have splintered edges.
- Dispose of debris safely and clean up the area thoroughly.
In ancient times, when plaster walls were commonly used, craftsmen would often adorn them with intricate carvings. These ornate designs added beauty and elegance to the walls, but it was important to be mindful of sharp edges. Skilled artisans would carefully smooth and round the edges to ensure safety while still maintaining the aesthetic appeal.
What Are the Alternatives to Removing Plaster Walls?
Removing plaster walls can be a daunting and messy task, but did you know there are alternatives? In this section, we will explore the different options for dealing with plaster walls that don't involve tearing them down. We will discuss the process of covering the plaster with drywall, as well as the technique of skim-coating the plaster to create a smooth surface. By the end, you will have a better understanding of the alternatives to removing plaster walls and which method may be best for your specific situation.
1. Covering With Drywall
Covering plaster walls with drywall is a simpler and less time-consuming alternative to completely removing them. This process can give your walls a fresh and updated look. Here are the steps to follow for covering plaster walls with drywall:
- Clear the room of any furniture or decorations.
- Measure and cut the drywall panels to fit the wall.
- Secure the drywall panels to the plaster walls using screws.
- Use tape and mud to seal the seams between the drywall panels.
- Sand the seams and apply a second coat of mud if needed.
- Prime the drywall and then paint it to match your desired aesthetic.
By following these steps, you can easily transform your outdated plaster walls into smooth and modern surfaces without the need for complete removal.
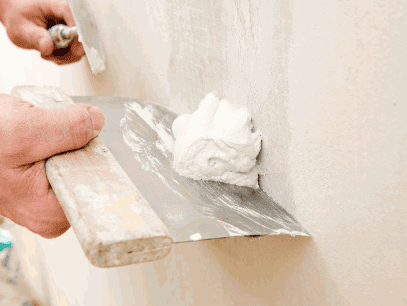
2. Skim Coating The Plaster
Skim coating is a great alternative to removing plaster walls. This process involves applying a thin layer of joint compound to create a smooth surface, which can be time-consuming but less messy than removing plaster. Here are the steps to skim-coat plaster walls:
- Clean the walls and remove any loose plaster.
- Apply a primer to the walls to promote adhesion.
- Mix the joint compound according to the manufacturer's instructions.
- Using a trowel, apply a thin layer of joint compound to the walls, working in small sections.
- Smooth the compound using a wide putty knife, feathering the edges to blend with the existing plaster.
- Allow the compound to dry completely.
- Sand the surface lightly to remove any imperfections.
- Apply a second coat of joint compound if necessary.
- Finish by sanding the surface again and applying a coat of primer before painting.
Uncover more: How To Plaster Skim A Wall