Looking to upgrade the lighting in your home to a more energy-efficient option? LED recessed lighting could be the perfect solution for you.
We explore what LED recessed lighting is and the benefits it offers. We also provide a detailed step-by-step guide on how to install LED recessed lighting in an existing light fixture, including the tools and materials you will need.
Get started and brighten up your space with LED recessed lighting!
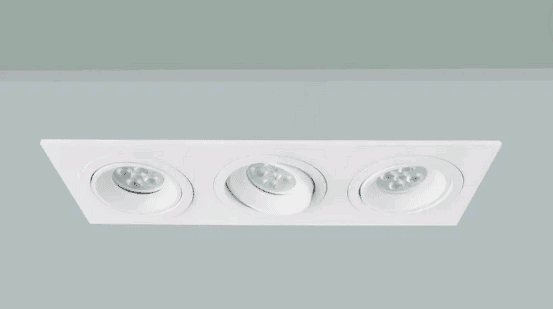
What Is LED Recessed Lighting?
LED Recessed Lighting refers to the installation of LED light fittings into the ceiling or wall to provide illumination while maintaining a low-profile appearance in a room. It is a popular choice for modern kitchen lighting projects due to its energy efficiency and stylish design.
LED Recessed Lighting offers a range of benefits for kitchen applications. The directional lighting provided by these fittings creates a focused and even illumination, perfect for tasks such as food preparation and cooking. LED lights are long-lasting, reducing the frequency of bulb replacements compared to traditional incandescent or fluorescent lighting. The ability to dim LED lights allows for customizable ambient lighting options, enhancing the overall aesthetics of the kitchen space. The versatility and cost-effectiveness make LED Recessed Lighting an ideal choice for both residential and commercial lighting projects.
Dig deeper: Are LED Ceiling Lights Any Good
What Are The Benefits Of LED Recessed Lighting?
The benefits of LED Recessed Lighting, such as Halo LEDs and Eaton products, include energy efficiency, long lifespan, control over colour temperature, and compatibility with transformers for varying power supplies.
LED Recessed Lighting offers numerous advantages, making it a popular choice for residential and commercial spaces alike. Utilising advanced LED technology, these lighting fixtures consume significantly less energy than traditional lighting options, leading to reduced electricity bills and environmental impact. In addition, their long lifespan eliminates the need for frequent replacements, saving both time and money in the long run.
With colour temperature options ranging from cool white to warm white, LED Recessed Lighting allows users to create the desired ambiance and tailor the lighting to suit different activities or settings. Compatibility with transformers enables these fixtures to adapt to various power supplies, ensuring consistent performance and versatility in installation.
What Tools And Materials Do You Need For Installation?
To install LED Recessed Lighting, you will need essential tools such as a drill, drywall circle cutter, wire cutter/stripper, and materials that can be found at hardware stores like Home Depot.
Having a voltage tester, junction box, and fish tape can make the installation process smoother and more efficient. These tools are readily available online or at local electrical supply stores.
It's crucial to ensure that you have the correct size of LED recessed lights for the area you are working on, so measuring tape or a ruler is essential. A stud finder can also be handy for locating ceiling joists to anchor the fixtures securely.
How To Prepare For Installation?
Before starting the LED Recessed Lighting installation project, it is crucial to check the attic for joists, assess insulation, and plan the layout for optimal lighting placement.
When inspecting the attic, ensure that the joists are strong enough to support the weight of the fittings. Assess the attic conditions to determine if any modifications are needed for wiring or structural support.
Conduct a thorough inspection of the insulation to confirm that it meets safety standards and does not obstruct the installation process. Proper insulation assessment can also help optimise energy efficiency and minimise heat loss.
Before diving into the project, take time to plan the layout of the LED recessed lights. Consider factors such as room size, ceiling height, furniture placement, and desired lighting effects to create a well-balanced and functional lighting design.
Step-By-Step Guide For Installing LED Recessed Lighting
The step-by-step guide for installing LED Recessed Lighting involves cutting holes in the ceiling, using electrical tools for wiring, and mounting the can lights securely for a seamless installation process.
Before you begin, ensure the power to the existing light fixture is turned off at the breaker panel to avoid any electrical hazards. Mark the locations for the recessed lights on the ceiling, considering spacing recommendations for even light distribution.
- Cutting the holes: Utilise a hole saw or a keyhole saw to create openings based on the dimensions of the can lights. Be cautious not to damage any existing wiring or structural components.
- Wiring instructions: Connect the wiring from the new lights to the existing electrical circuit, following the manufacturer's guidelines. Use wire nuts to securely join the wires together and ensure proper insulation.
- Securing the can lights: Insert the lights into the ceiling openings carefully, adjusting them so they sit flush with the surface. Secure the lights in place using the provided mounting brackets or clips, ensuring they are stable and aligned correctly.
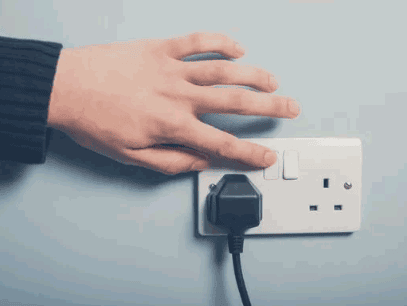
Step 1: Turn Off Power
The first step in installing LED Recessed Lighting is to turn off the power supply to the area, locate the wires in the junction box, and correctly identify the wire colours for safety.
Before beginning any electrical work, it's crucial to turn off the power supply to avoid any risk of electrocution. This can be done by switching off the circuit breaker associated with the area you are working in. Once the power is safely off, the next step involves locating the junction box where the wires are housed. Opening the junction box will reveal a cluster of wires, and it's vital to correctly identify which ones you need to work with.
Identifying wire colours, such as red and black, is essential in ensuring that the electrical connections are made correctly. These wire colours signify specific functions, and mixing them up can lead to a malfunction or even a hazardous situation. By paying close attention to these details and following the correct wiring diagrams, you can successfully install LED recessed lighting fixtures in a safe and efficient manner.
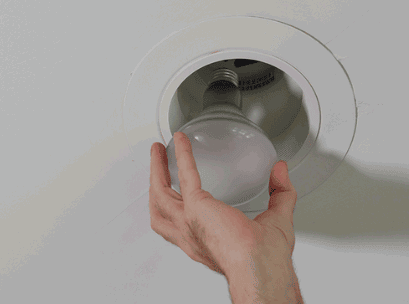
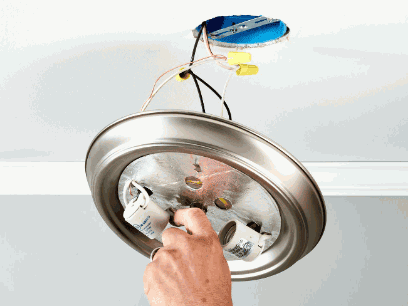
Step 2: Remove Existing Light Fixture
Next, remove the existing light fitting using a wire stripper to disconnect the twin and earth cable, ensuring a tidy removal before proceeding with the LED Recessed Lighting installation.
- First, switch off the power to the light fitting at the consumer unit to ensure safety during the removal process.
- Then, use a ladder to reach the fitting and carefully unscrew any bolts holding it in place.
- Once the fitting is detached from the ceiling, locate the twin and earth cable connected to it.
- Use a wire stripper to remove the insulation from the cable carefully.
- After disconnecting the wires, gently pull the twin and earth cable out of the fitting's mounting bracket.
- Ensure there are no tangles or knots in the cable.
- Dispose of the old fitting responsibly, keeping the area clear for the new installation.
Step 3: Measure And Mark The Placement Of Recessed Lights
Use tools like Sketchup to measure and mark the exact placement of LED Recessed Lights, ensuring compliance with IC-rated fixtures and proper use of 14/3 Romex wiring for safety.
Accurate measurements and markings are crucial when installing LED recessed lights to achieve optimal lighting effects. Utilising a platform like Sketchup allows for precise calculations and placements, guaranteeing a seamless installation process.
When working with recessed lighting, it's essential to prioritise safety by using IC-rated fixtures and ensuring that the 14/3 romex wiring is correctly executed. This not only adheres to safety standards but also enhances the longevity and efficiency of the lighting system.
Step 4: Cut Holes For Recessed Lights
Proceed to cut holes in the plasterboard using suitable tools like a Husky Diamond Tip Magnetic screwdriver, ensuring precise cuts for accommodating the LED Recessed Lights securely.
- Start by measuring the exact location of the recessed lights on the ceiling, ensuring proper spacing and alignment for a uniform appearance. Use a pencil to mark the outline of the hole to be cut, keeping in mind the dimensions of the light fitting.
- Once the cutting area is marked, make sure to use a stud finder to locate any obstacles behind the plasterboard that might interfere with the installation process. Carefully score the outline with the screwdriver before gradually enlarging the hole to fit the light fitting perfectly.
Step 5: Run Electrical Wiring
Use fish tape to run electrical wiring from the junction box to the designated locations, ensuring proper connections of red and black wires for each LED Recessed Light fitting.
When running the electrical wiring with fish tape, it's crucial to maintain the integrity of the wires and ensure they are securely fastened to prevent any potential hazards. Proper connection of the red and black wires is essential to ensure that the LED Recessed Lights function correctly without any issues.
To wire LED Recessed Lights, start by connecting the black wire to the black or red/live wire in the junction box and the red wire to the white/negative wire. It's imperative to follow the manufacturer's instructions and local electrical regulations for a safe and efficient installation.
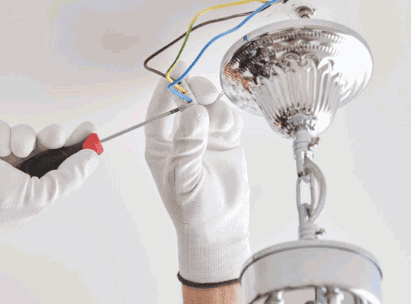
Step 6: Connect Wires To Recessed Light
In the loft space, connect the wires from the consumer unit to the wafer lights, ensuring secure connections and proper utilization of 14/3 Romex cables for a safe and efficient lighting setup.
When connecting the wires, it is crucial to match the right wires together - black to black, white to white, and green to green or bare copper for earthing. This helps maintain the integrity of the electrical system and ensures a reliable power supply to the lights.
Remember to use insulating tape to properly insulate the connections once they have been securely fastened together. This additional layer of protection helps prevent any accidental contact or short circuits, safeguarding both the wiring and the fittings.
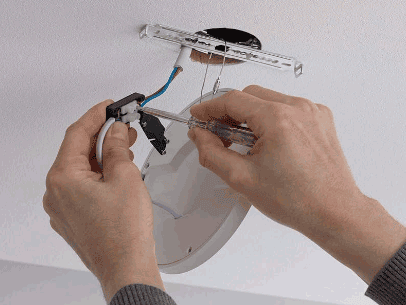
Step 7: Install Recessed Light Fixture
Install each LED Recessed Light fitting in the designated locations, ensuring proper insulation around the lights and sourcing quality fittings from reliable suppliers like The Home Depot.
When installing LED Recessed Light fittings, it's essential to place them strategically to achieve optimal lighting effects throughout the space. Proper insulation plays a crucial role in maintaining energy efficiency and preventing heat loss. By ensuring a snug fit around each fitting, you can enhance the overall performance and longevity of the lights. The Home Depot offers a wide selection of high-quality fittings that are not only durable but also designed to meet various aesthetic preferences. When selecting fittings, consider factors like colour temperature, dimming capabilities, and energy efficiency to create the desired ambience in your space.
Step 8: Repeat For Each Light
Repeat the installation process for each LED Recessed Light, ensuring a consistent power supply connection and proper installation of can lights throughout the project for uniform illumination.
Start by switching off the mains power to ensure safety during the installation process. Use a voltage tester to confirm that the power is indeed off before proceeding. Begin by connecting the black wire of the LED light to the black wire from the power source, and repeat this for the white wires. Secure the connections with wire nuts and ensure they are tightly fastened. Make sure the earth wires are properly connected.
Next, carefully insert the LED Recessed Light into the corresponding cutout in the ceiling. Follow the manufacturer's instructions for any specific mounting requirements. Once the light is in place, use the provided hardware to secure it firmly to the ceiling. Test the light by turning the power back on and verifying that it functions correctly. Repeat these steps for each LED Recessed Light to achieve consistent and reliable illumination across the entire project.
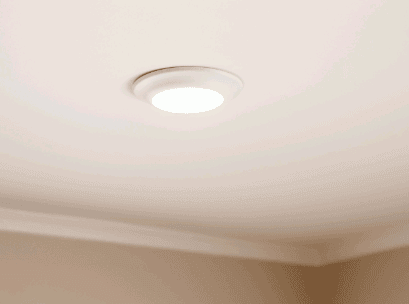
How To Finish The Installation?
- To complete the LED Recessed Lighting installation, install trim and bulbs, restore the power supply, and test the lights to ensure proper functionality and illumination in the room.
Installing the trim involves attaching it securely to the recessed housing, ensuring a snug fit. This step not only adds a finished look to the lights but also helps direct the light output effectively.
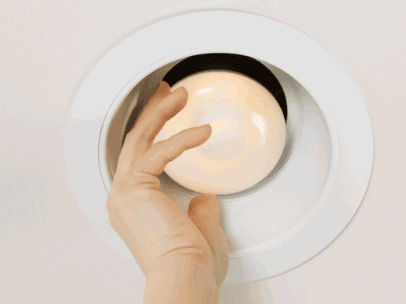
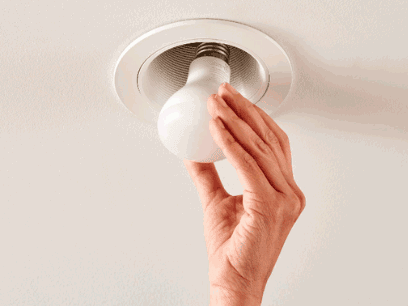
After the trim is in place, it's time to insert the LED bulbs carefully into the fixtures. Make sure to match the bulb type with the fitting for optimal performance.
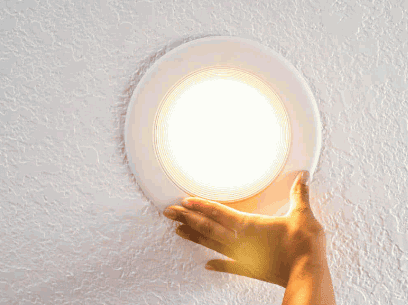
Once the trim and bulbs are securely installed, proceed with testing the lights by switching them on. Check each light individually to confirm that they are working correctly and emitting the desired level of brightness.
With the lights tested and functioning as intended, the final step is to restore power supply to the room. Flick the circuit breaker back on or reconnect the power source to illuminate the LED recessed lights and enjoy the enhanced illumination they provide.
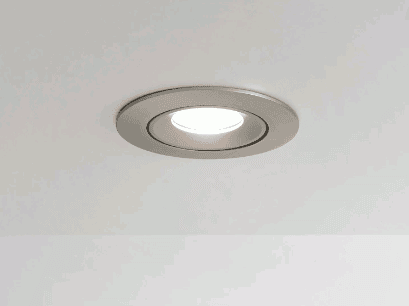
Step 1: Install Trim And Bulbs
Begin by installing trim and bulbs in the designated areas, covering any remaining holes, and ensuring a seamless integration of wafer lights for a polished look in the room.
Before starting the installation process, make sure that you have all the necessary tools and materials at hand. Check that the trim and bulbs are compatible with the wafer lights you will be integrating. When positioning the trim and bulbs, ensure they are securely placed and aligned correctly.
As you cover any holes left from previous fixtures, pay attention to the size and shape of the opening to achieve a snug fit. This will guarantee a professional finish that enhances the overall aesthetics of the room.
Step 2: Turn On The Power And Test Lights
Once the trim and bulbs are in place, switch on the power supply, use electrical tools to test the lights, and ensure that the LED Recessed Lighting project has been successfully completed with proper functionality.
Make sure that the power supply is securely connected to avoid any electrical hazards. Use a voltage tester to check if the current is flowing to the lights. Verify that each LED light is emitting a consistent and bright illumination.
In case of any flickering or dimming issues, double-check the connections and the compatibility of the bulbs. Measure the light levels to ensure they meet the desired brightness specifications for the specific area.
Once all these steps are completed, you can confidently admire the transformation that the LED Recessed Lighting has brought to the space.