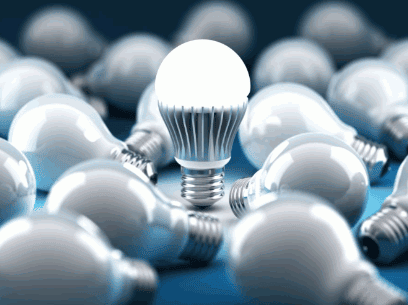
LED lighting has become increasingly popular in recent years due to its numerous benefits.
From energy efficiency to cost savings, LED lighting offers a wide range of advantages for both residential and commercial spaces.
We will explore what LED lighting is, how it works, and the benefits it provides, such as long lifespan and environmental friendliness.
Discover the different types of LED lighting available and get tips on how to choose the right LED lighting for your needs.
If you are considering upgrading your lighting system, this article will help you make an informed decision.
What Is LED Lighting?
LED lighting refers to the technology that uses Light Emitting Diodes (LEDs) to produce light. These light sources are becoming increasingly popular due to their energy efficiency and versatility in various applications.
LEDs work on the principle of electroluminescence, where electricity passes through a semiconductor material to produce light. Unlike traditional bulbs, LEDs do not rely on heating a filament to produce light, making them much more energy-efficient. They also have a longer lifespan, emit less heat, and are more durable. This technology allows LEDs to be used in a wide range of lighting products, including bulbs, strips, panels, fixtures, and lamps, catering to different needs and aesthetics.
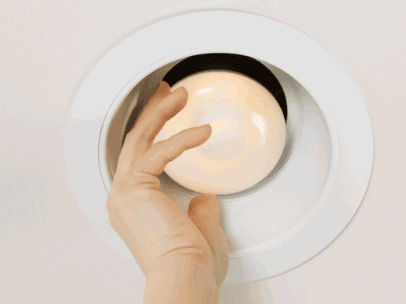
Gain insights: How To Install LED Recessed Lighting In Existing Light Fixture
How Does LED Lighting Work?
LED lighting works by passing an electric current through a semiconductor diode, which emits light energy.
Unlike traditional incandescent bulbs that rely on a heated filament to produce light, LEDs generate illumination through a process called electroluminescence. Within the LED diode, when electrons combine with electron holes, they release energy in the form of photons. This phenomenon is what enables LEDs to emit light efficiently without the need for a filament. LEDs are highly efficient because they produce very little heat in comparison to incandescent bulbs, resulting in less energy wastage.
What Are The Benefits Of LED Lighting?
LED lighting offers a multitude of benefits including energy efficiency, long lifespan, significant cost savings, environmental friendliness, and exceptional durability. Switching to LEDs can lead to a reduction in energy consumption and maintenance costs.
- LED lighting is also renowned for its resilience to harsh conditions, making it suitable for various settings like outdoor lighting or industrial applications where durability is essential.
- The quality of light produced by LEDs is superior, offering better colour rendering and distribution compared to traditional lighting options.
Energy Efficiency
LED lighting stands out for its unparalleled energy efficiency, consuming significantly less power compared to traditional incandescent, fluorescent, and halogen bulbs. The use of LEDs contributes to reducing overall energy consumption and CO2 emissions.
By utilising LED lights, households and businesses can experience substantial energy savings over time. Not only do LEDs use less power, but they also emit less heat during operation, making them a safer and more efficient lighting choice. This reduction in heat generation not only saves energy consumption further but also minimises the need for extra cooling in indoor spaces. Thus, the widespread adoption of LED lighting plays a crucial role in promoting energy conservation and advancing environmental sustainability.
Long Lifespan
LEDs have a remarkably long lifespan, lasting up to 25 times longer than incandescent bulbs and significantly longer than fluorescent and halogen lighting.
The extended lifespan of LEDs reduces the frequency of replacements and maintenance costs. This durability is further enhanced by their resistance to temperature fluctuations, making them ideal for various environments. LED lights are not only long-lasting but also highly energy-efficient, helping users save on electricity bills in the long run. Due to their longevity, LEDs are increasingly being used in commercial and residential settings, providing both economic and environmental benefits. With fewer replacements needed, consumers can enjoy hassle-free lighting solutions that last for years.
Cost Savings
LED lighting offers substantial cost savings over time due to its energy efficiency and long lifespan. Although LEDs may have a higher upfront cost, the reduced energy bills and maintenance expenses make them a cost-effective lighting solution in the long term.
The longevity of LED bulbs translates to fewer replacements, lowering overall expenses for both businesses and households. The return on investment for LED lighting is impressive, as the initial investment is typically recouped through energy savings within a relatively short period. This not only benefits the financial bottom line but also contributes to environmental sustainability by reducing energy consumption. In addition, the reduced heat output of LEDs compared to traditional lighting options can lead to cost savings on cooling systems, further enhancing the financial advantages of incorporating LED lighting.
Environmentally Friendly
LED lighting is environmentally friendly, as LEDs consume less energy and contain no harmful substances like mercury found in fluorescent bulbs. Opting for LEDs contributes to lower CO2 emissions and reduces the environmental impact of lighting.
Another eco-friendly aspect of LED lighting is the recyclability of LEDs. Unlike traditional lighting sources that often end up in landfills, LEDs can be easily recycled. The materials used in LEDs, such as aluminium and semiconductors, are valuable and can be repurposed for other products. This helps reduce waste and conserves resources, further minimising the environmental footprint associated with lighting.
Durability
LEDs are known for their durability and reliability, making them ideal for various applications and environments. The robust construction of LED light fittings ensures longevity and consistent performance even in inclement weather conditions.
LED lighting is particularly resistant to knocks and vibrations due to its solid-state construction, unlike delicate traditional lighting options. This quality makes them a popular choice for outdoor settings where weather elements and rough handling are common. The ability of LEDs to operate efficiently across a wide range of temperatures further highlights their adaptability for industrial applications.
What Are The Different Types Of LED Lighting?
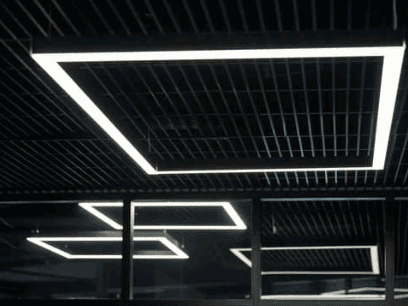
LED lighting comes in various forms, including LED light bulbs, strips, panels, tubes, and floodlights, each designed for specific lighting needs and applications. These diverse options offer flexibility and customisation in lighting setups.
LED light bulbs are commonly used in homes and offices for general lighting, providing bright and energy-efficient illumination.
LED strips are versatile and popular for accent lighting, allowing for creative installations in spaces like bars or under cabinets.
LED panels are excellent for even and diffused lighting, often used in commercial settings or photography studios due to their consistent output.
LED tubes are ideal for replacing fluorescent tubes, offering a longer lifespan and better energy efficiency.
LED floodlights are perfect for outdoor spaces, providing powerful and focused illumination for security or highlighting landscaping features.
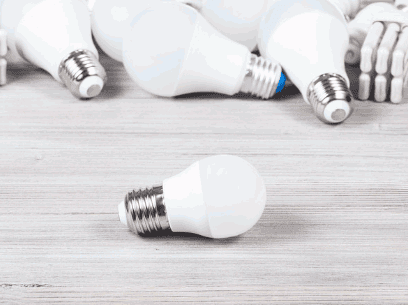
LED Light Bulbs
LED light bulbs are a popular choice for residential and commercial lighting, offering energy efficiency, brightness, and a wide colour range. They are suitable replacements for incandescent, fluorescent, and halogen bulbs, providing superior illumination and directional lighting.
The energy-saving capabilities of LED light bulbs make them an environmentally friendly option, helping to reduce electricity consumption and lower utility costs. The colour options available with LED bulbs range from warm white to cool daylight, allowing for customizable lighting to suit various environments and moods.
LED Strips
LED strips are flexible lighting solutions that can be easily installed in various settings such as under cupboards, shelves, or in decorative displays. These versatile light strips offer customisable illumination in different colours and brightness levels.
The applications of LED light strips are truly endless. They are commonly used in interior design to create ambient lighting, highlight architectural features, or add a splash of colour to a room. With their adhesive backing, these strips can be effortlessly affixed to almost any surface, making them a user-friendly lighting option for DIY enthusiasts and professionals alike. The range of colour and brightness options available ensures that you can easily find the perfect lighting scheme to suit your specific needs.
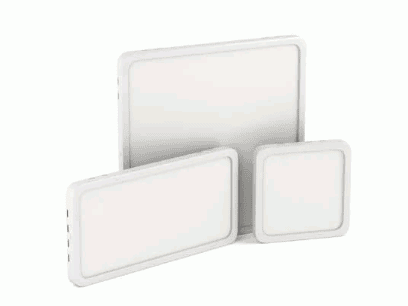
LED Panels
LED panels are flat lighting fixtures that provide uniform and diffused light, making them ideal for office spaces, schools, and commercial buildings. These panels offer a smart and modern lighting solution with energy-efficient performance.
LED panels are specifically designed to distribute light evenly across a space, eliminating harsh shadows and minimising eye strain. Their low glare feature makes them comfortable for extended use, perfect for environments where people spend long hours working or studying. Plus their functional benefits, LED panels also contribute to the aesthetic appeal of indoor settings, creating a clean and contemporary look. Their slim profile and versatility in terms of installation make them a popular choice for architects and interior designers seeking a seamless lighting solution.
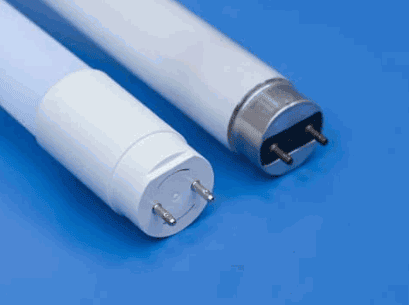
LED Tubes
LED tubes are tube-shaped lighting solutions commonly used to replace fluorescent tubes in various settings like offices, warehouses, and retail spaces. These energy-efficient tubes offer superior brightness, longevity, and reduced maintenance costs.
LED tubes have revolutionised the lighting industry by significantly lowering energy consumption. Their extended lifespan not only reduces the frequency of replacements but also results in less waste generation, making them an environmentally friendly choice. The reduced maintenance costs translate into long-term financial savings for businesses. The bright and uniform light distribution provided by LED tubes enhances visibility and creates a more comfortable working environment for employees. Making the switch to LED tubes is a smart investment that pays off in multiple ways.
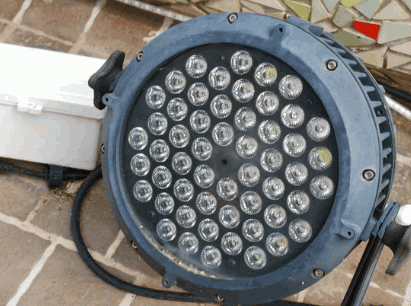
LED Floodlights
LED floodlights are powerful outdoor lighting fittings that emit wide beams of light, ideal for illuminating large areas such as building facades, sports fields, or car parks. These floodlights offer high-lumen output, durability, and directional lighting capabilities.
One of the key advantages of LED floodlights is their energy efficiency, helping to reduce electricity costs and environmental impact. Their long lifespan and low maintenance requirements make them a cost-effective lighting solution in the long term. LED technology allows for instant illumination without any warm-up time, perfect for applications where immediate lighting is essential.
Plus their performance benefits, LED floodlights are available in a variety of designs and sizes, catering to different outdoor lighting needs. Their ability to withstand harsh weather conditions, such as rain, snow, and extreme temperatures, makes them reliable options for outdoor use all year round.
How To Choose The Right LED Lighting?
Selecting the appropriate LED lighting involves considerations such as determining your lighting needs, understanding colour temperature preferences, checking lumens and wattage for brightness levels, looking for Energy Star Certification for efficiency, and evaluating the cost and warranty benefits.
When choosing LED lighting products, it's crucial to take into account the light output to ensure it meets the required level for the intended space. Consider the colour quality of the light emitted, aiming for a natural and pleasing ambiance. Energy efficiency ratings, often displayed as lumens per watt, offer insight into how effectively the bulbs convert energy into visible light. Opting for Energy Star-certified products can lead to long-term cost-effectiveness due to energy savings. It's essential to balance upfront costs with long-term benefits to make a well-informed decision.
Determine Your Lighting Needs
Begin by assessing your specific lighting requirements, considering factors such as the intended usage area, desired brightness levels, and the ambiance you wish to create with LED lighting. Illumination preferences play a crucial role in determining the suitable LED products for your space.
Understanding lighting needs goes beyond just selecting fixtures; it involves grasping the fundamental principles that can significantly impact the functionality and aesthetics of a space. Different lighting scenarios require various approaches, from task lighting for focused work areas to ambient lighting for relaxation zones. Additionally, colour rendering requirements should not be underestimated, as the accurate portrayal of colours enhances the overall look and feel of a room.
Consider Colour Temperature
Colour temperature plays a significant role in setting the mood and ambience of a space.
By adjusting the Kelvin scale, you can create a warm and cosy atmosphere with lower Kelvin values or a bright and energising feel with higher values. Warm tones, typically ranging from 2000K to 3500K, evoke a sense of comfort and relaxation, ideal for living rooms or bedrooms. On the other hand, cool tones around 5000K to 6500K simulate daylight and help boost concentration, perfect for offices or task-oriented areas.
Consistency in colour temperature across different LED installations is crucial to maintain uniformity and avoid mismatched lighting effects throughout a space, ensuring a cohesive and harmonious visual experience.
Check Lumens And Wattage
Lumens and wattage are essential metrics to consider when selecting LED lighting. Understanding the lumen output helps determine the brightness level of the light fitting, while wattage indicates the energy consumption. Higher lumens typically translate to brighter light output.
It's crucial to match the lumens to the specific lighting task and environment to ensure optimal illumination. For instance, a workspace may require higher lumens for task lighting compared to ambient lighting in a living room. By choosing the right lumen output for each setting, you can achieve the desired lighting effect effectively.
Look For Energy Star Certification
Energy Star Certification serves as a reliable indicator of a product's energy efficiency and performance standards. Choosing LED lighting products with Energy Star Certification ensures greater energy savings, reduced environmental impact, and higher quality lighting solutions.
Plus the immediate benefits of reduced energy consumption and cost savings, Energy Star Certification plays a vital role in promoting sustainability in the lighting industry. By encouraging manufacturers to meet stringent efficiency criteria, Energy Star Certification drives innovation towards more eco-friendly lighting solutions.
Opting for certified LEDs not only benefits the consumer but also contributes to a healthier environment by reducing greenhouse gas emissions and overall energy usage. This conscious choice aligns with global efforts towards a greener future, making a positive impact on both individual households and the planet as a whole.
Consider The Cost And Warranty
When selecting LED lighting, it's important to weigh the initial cost against long-term savings and benefits. Considering the total cost of ownership, including maintenance and energy expenses, as well as evaluating warranty coverage, ensures a cost-effective and reliable lighting investment.
One of the key advantages of assessing the cost-effectiveness and warranty terms of LED lighting products is that it gives you a comprehensive understanding of the financial implications of your purchase decision. By taking into account not just the upfront price but also the ongoing expenses related to maintenance and operation, you can make a more informed choice that aligns with your budget and sustainability goals.
Examining the warranty terms allows you to safeguard your investment. Quality LED solutions often come with extended warranty periods, providing you with peace of mind and protection against unexpected failures or defects.
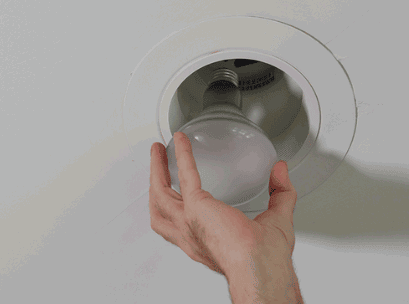
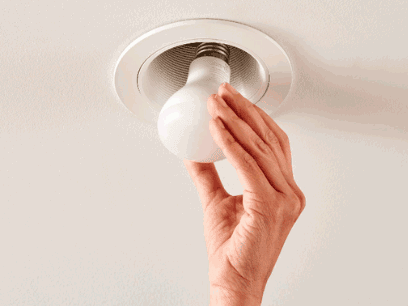
Looking to upgrade the lighting in your home to a more energy-efficient option? LED recessed lighting could be the perfect solution for you.
We explore what LED recessed lighting is and the benefits it offers. We also provide a detailed step-by-step guide on how to install LED recessed lighting in an existing light fixture, including the tools and materials you will need.
Get started and brighten up your space with LED recessed lighting!
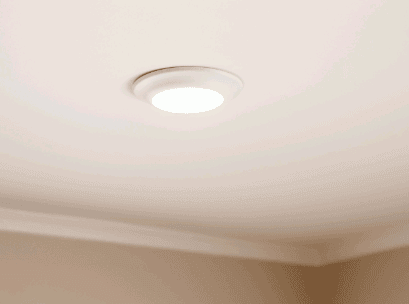
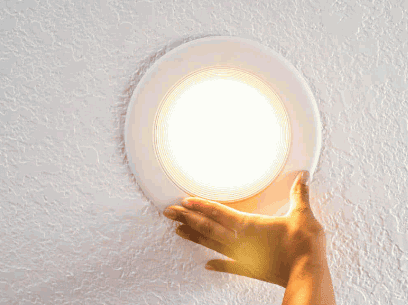
What Is LED Recessed Lighting?
LED Recessed Lighting refers to the installation of LED light fittings into the ceiling or wall to provide illumination while maintaining a low-profile appearance in a room. It is a popular choice for modern kitchen lighting projects due to its energy efficiency and stylish design.
LED Recessed Lighting offers a range of benefits for kitchen applications. The directional lighting provided by these fittings creates a focused and even illumination, perfect for tasks such as food preparation and cooking. LED lights are long-lasting, reducing the frequency of bulb replacements compared to traditional incandescent or fluorescent lighting. The ability to dim LED lights allows for customizable ambient lighting options, enhancing the overall aesthetics of the kitchen space. The versatility and cost-effectiveness make LED Recessed Lighting an ideal choice for both residential and commercial lighting projects.
Dig deeper: Are LED Ceiling Lights Any Good
What Are The Benefits Of LED Recessed Lighting?
The benefits of LED Recessed Lighting, such as Halo LEDs and Eaton products, include energy efficiency, long lifespan, control over colour temperature, and compatibility with transformers for varying power supplies.
LED Recessed Lighting offers numerous advantages, making it a popular choice for residential and commercial spaces alike. Utilising advanced LED technology, these lighting fixtures consume significantly less energy than traditional lighting options, leading to reduced electricity bills and environmental impact. In addition, their long lifespan eliminates the need for frequent replacements, saving both time and money in the long run.
With colour temperature options ranging from cool white to warm white, LED Recessed Lighting allows users to create the desired ambiance and tailor the lighting to suit different activities or settings. Compatibility with transformers enables these fixtures to adapt to various power supplies, ensuring consistent performance and versatility in installation.
What Tools And Materials Do You Need For Installation?
To install LED Recessed Lighting, you will need essential tools such as a drill, drywall circle cutter, wire cutter/stripper, and materials that can be found at hardware stores like Home Depot.
Having a voltage tester, junction box, and fish tape can make the installation process smoother and more efficient. These tools are readily available online or at local electrical supply stores.
It's crucial to ensure that you have the correct size of LED recessed lights for the area you are working on, so measuring tape or a ruler is essential. A stud finder can also be handy for locating ceiling joists to anchor the fixtures securely.
How To Prepare For Installation?
Before starting the LED Recessed Lighting installation project, it is crucial to check the attic for joists, assess insulation, and plan the layout for optimal lighting placement.
When inspecting the attic, ensure that the joists are strong enough to support the weight of the fittings. Assess the attic conditions to determine if any modifications are needed for wiring or structural support.
Conduct a thorough inspection of the insulation to confirm that it meets safety standards and does not obstruct the installation process. Proper insulation assessment can also help optimise energy efficiency and minimise heat loss.
Before diving into the project, take time to plan the layout of the LED recessed lights. Consider factors such as room size, ceiling height, furniture placement, and desired lighting effects to create a well-balanced and functional lighting design.
Step-By-Step Guide For Installing LED Recessed Lighting
The step-by-step guide for installing LED Recessed Lighting involves cutting holes in the ceiling, using electrical tools for wiring, and mounting the can lights securely for a seamless installation process.
Before you begin, ensure the power to the existing light fixture is turned off at the breaker panel to avoid any electrical hazards. Mark the locations for the recessed lights on the ceiling, considering spacing recommendations for even light distribution.
- Cutting the holes: Utilise a hole saw or a keyhole saw to create openings based on the dimensions of the can lights. Be cautious not to damage any existing wiring or structural components.
- Wiring instructions: Connect the wiring from the new lights to the existing electrical circuit, following the manufacturer's guidelines. Use wire nuts to securely join the wires together and ensure proper insulation.
- Securing the can lights: Insert the lights into the ceiling openings carefully, adjusting them so they sit flush with the surface. Secure the lights in place using the provided mounting brackets or clips, ensuring they are stable and aligned correctly.
Step 1: Turn Off Power
The first step in installing LED Recessed Lighting is to turn off the power supply to the area, locate the wires in the junction box, and correctly identify the wire colours for safety.
Before beginning any electrical work, it's crucial to turn off the power supply to avoid any risk of electrocution. This can be done by switching off the circuit breaker associated with the area you are working in. Once the power is safely off, the next step involves locating the junction box where the wires are housed. Opening the junction box will reveal a cluster of wires, and it's vital to correctly identify which ones you need to work with.
Identifying wire colours, such as red and black, is essential in ensuring that the electrical connections are made correctly. These wire colours signify specific functions, and mixing them up can lead to a malfunction or even a hazardous situation. By paying close attention to these details and following the correct wiring diagrams, you can successfully install LED recessed lighting fixtures in a safe and efficient manner.
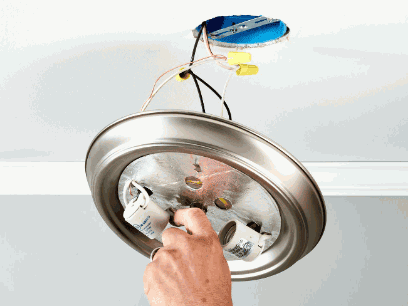
Step 2: Remove Existing Light Fixture
Next, remove the existing light fitting using a wire stripper to disconnect the twin and earth cable, ensuring a tidy removal before proceeding with the LED Recessed Lighting installation.
- First, switch off the power to the light fitting at the consumer unit to ensure safety during the removal process.
- Then, use a ladder to reach the fitting and carefully unscrew any bolts holding it in place.
- Once the fitting is detached from the ceiling, locate the twin and earth cable connected to it.
- Use a wire stripper to remove the insulation from the cable carefully.
- After disconnecting the wires, gently pull the twin and earth cable out of the fitting's mounting bracket.
- Ensure there are no tangles or knots in the cable.
- Dispose of the old fitting responsibly, keeping the area clear for the new installation.
Step 3: Measure And Mark The Placement Of Recessed Lights
Use tools like Sketchup to measure and mark the exact placement of LED Recessed Lights, ensuring compliance with IC-rated fixtures and proper use of 14/3 Romex wiring for safety.
Accurate measurements and markings are crucial when installing LED recessed lights to achieve optimal lighting effects. Utilising a platform like Sketchup allows for precise calculations and placements, guaranteeing a seamless installation process.
When working with recessed lighting, it's essential to prioritise safety by using IC-rated fixtures and ensuring that the 14/3 romex wiring is correctly executed. This not only adheres to safety standards but also enhances the longevity and efficiency of the lighting system.
Step 4: Cut Holes For Recessed Lights
Proceed to cut holes in the plasterboard using suitable tools like a Husky Diamond Tip Magnetic screwdriver, ensuring precise cuts for accommodating the LED Recessed Lights securely.
- Start by measuring the exact location of the recessed lights on the ceiling, ensuring proper spacing and alignment for a uniform appearance. Use a pencil to mark the outline of the hole to be cut, keeping in mind the dimensions of the light fitting.
- Once the cutting area is marked, make sure to use a stud finder to locate any obstacles behind the plasterboard that might interfere with the installation process. Carefully score the outline with the screwdriver before gradually enlarging the hole to fit the light fitting perfectly.
Step 5: Run Electrical Wiring
Use fish tape to run electrical wiring from the junction box to the designated locations, ensuring proper connections of red and black wires for each LED Recessed Light fitting.
When running the electrical wiring with fish tape, it's crucial to maintain the integrity of the wires and ensure they are securely fastened to prevent any potential hazards. Proper connection of the red and black wires is essential to ensure that the LED Recessed Lights function correctly without any issues.
To wire LED Recessed Lights, start by connecting the black wire to the black or red/live wire in the junction box and the red wire to the white/negative wire. It's imperative to follow the manufacturer's instructions and local electrical regulations for a safe and efficient installation.
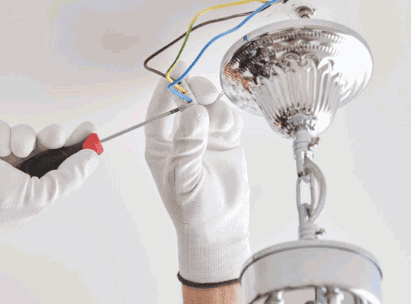
Step 6: Connect Wires To Recessed Light
In the loft space, connect the wires from the consumer unit to the wafer lights, ensuring secure connections and proper utilization of 14/3 Romex cables for a safe and efficient lighting setup.
When connecting the wires, it is crucial to match the right wires together - black to black, white to white, and green to green or bare copper for earthing. This helps maintain the integrity of the electrical system and ensures a reliable power supply to the lights.
Remember to use insulating tape to properly insulate the connections once they have been securely fastened together. This additional layer of protection helps prevent any accidental contact or short circuits, safeguarding both the wiring and the fittings.
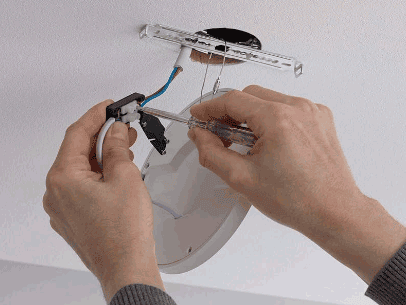
Step 7: Install Recessed Light Fixture
Install each LED Recessed Light fitting in the designated locations, ensuring proper insulation around the lights and sourcing quality fittings from reliable suppliers like The Home Depot.
When installing LED Recessed Light fittings, it's essential to place them strategically to achieve optimal lighting effects throughout the space. Proper insulation plays a crucial role in maintaining energy efficiency and preventing heat loss. By ensuring a snug fit around each fitting, you can enhance the overall performance and longevity of the lights. The Home Depot offers a wide selection of high-quality fittings that are not only durable but also designed to meet various aesthetic preferences. When selecting fittings, consider factors like colour temperature, dimming capabilities, and energy efficiency to create the desired ambience in your space.
Step 8: Repeat For Each Light
Repeat the installation process for each LED Recessed Light, ensuring a consistent power supply connection and proper installation of can lights throughout the project for uniform illumination.
Start by switching off the mains power to ensure safety during the installation process. Use a voltage tester to confirm that the power is indeed off before proceeding. Begin by connecting the black wire of the LED light to the black wire from the power source, and repeat this for the white wires. Secure the connections with wire nuts and ensure they are tightly fastened. Make sure the earth wires are properly connected.
Next, carefully insert the LED Recessed Light into the corresponding cutout in the ceiling. Follow the manufacturer's instructions for any specific mounting requirements. Once the light is in place, use the provided hardware to secure it firmly to the ceiling. Test the light by turning the power back on and verifying that it functions correctly. Repeat these steps for each LED Recessed Light to achieve consistent and reliable illumination across the entire project.
How To Finish The Installation?
- To complete the LED Recessed Lighting installation, install trim and bulbs, restore the power supply, and test the lights to ensure proper functionality and illumination in the room.
Installing the trim involves attaching it securely to the recessed housing, ensuring a snug fit. This step not only adds a finished look to the lights but also helps direct the light output effectively.
After the trim is in place, it's time to insert the LED bulbs carefully into the fixtures. Make sure to match the bulb type with the fitting for optimal performance.
Once the trim and bulbs are securely installed, proceed with testing the lights by switching them on. Check each light individually to confirm that they are working correctly and emitting the desired level of brightness.
With the lights tested and functioning as intended, the final step is to restore power supply to the room. Flick the circuit breaker back on or reconnect the power source to illuminate the LED recessed lights and enjoy the enhanced illumination they provide.
Step 1: Install Trim And Bulbs
Begin by installing trim and bulbs in the designated areas, covering any remaining holes, and ensuring a seamless integration of wafer lights for a polished look in the room.
Before starting the installation process, make sure that you have all the necessary tools and materials at hand. Check that the trim and bulbs are compatible with the wafer lights you will be integrating. When positioning the trim and bulbs, ensure they are securely placed and aligned correctly.
As you cover any holes left from previous fixtures, pay attention to the size and shape of the opening to achieve a snug fit. This will guarantee a professional finish that enhances the overall aesthetics of the room.
Step 2: Turn On The Power And Test Lights
Once the trim and bulbs are in place, switch on the power supply, use electrical tools to test the lights, and ensure that the LED Recessed Lighting project has been successfully completed with proper functionality.
Make sure that the power supply is securely connected to avoid any electrical hazards. Use a voltage tester to check if the current is flowing to the lights. Verify that each LED light is emitting a consistent and bright illumination.
In case of any flickering or dimming issues, double-check the connections and the compatibility of the bulbs. Measure the light levels to ensure they meet the desired brightness specifications for the specific area.
Once all these steps are completed, you can confidently admire the transformation that the LED Recessed Lighting has brought to the space.
LED ceiling lights have become increasingly popular in recent years due to their energy efficiency, long lifespan, and versatile design options.
In this article, we will explore what LED ceiling lights are, how they work, and the benefits they offer. We will also discuss the drawbacks of using LED ceiling lights, compare them to other types of lighting, and provide factors to consider when choosing the right LED ceiling lights for your space.
Stay tuned to find out if LED ceiling lights are a good choice for you.
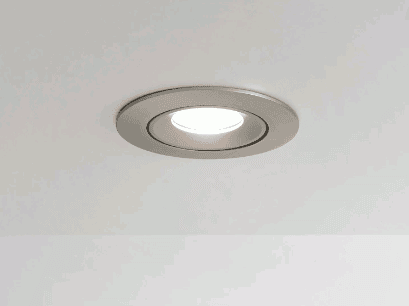
What Are LED Ceiling Lights?
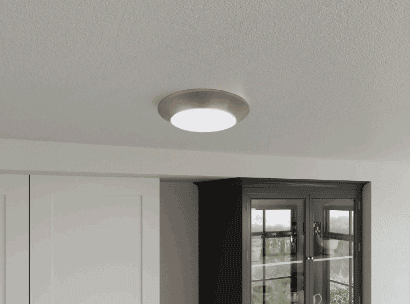
LED ceiling lights are fittings that are mounted on ceilings and utilise LED technology to provide illumination in various settings such as bedrooms, kitchens, and bathrooms. These lights offer a modern and energy-efficient lighting solution compared to traditional options.
- Recessed LED ceiling lights are popular for creating a sleek and streamlined look, ideal for modern interiors.
- Surface-mounted LED lights are versatile and easy to install, making them suitable for a wide range of applications.
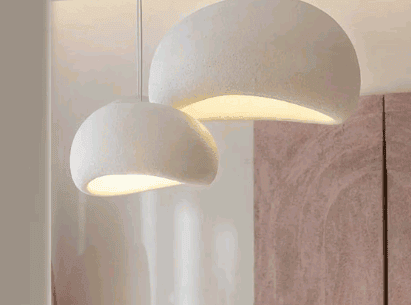
- Pendant LED lights offer a decorative touch while providing focused lighting in areas like dining rooms or over kitchen islands.
How Do LED Ceiling Lights Work?
LED ceiling lights operate by utilising LED technology, which converts electricity into light through the movement of electrons in a semiconductor material. When electricity flows through the LED, it emits photons that produce visible light, resulting in efficient and long-lasting illumination.
One of the key advantages of LED ceiling lights is their energy efficiency. Unlike traditional incandescent bulbs, LEDs do not waste energy through heat production, making them more environmentally friendly and cost-effective in the long run. This energy-saving characteristic of LEDs stems from their ability to emit light in a specific direction, minimising light loss and maximising brightness.
LED technology boasts a significantly longer lifespan compared to conventional lighting sources. LEDs can last up to 25 times longer, reducing the frequency of replacements and maintenance costs. This durability is attributed to the absence of filaments or glass components that are prone to breaking in traditional bulbs. LED ceiling lights are also known for their instant brightness and dimmability, allowing users to adjust the light intensity to suit different activities and moods.
Due to these innovative features, LED ceiling lights have become the preferred choice for residential, commercial, and industrial lighting applications, providing superior performance, energy savings, and longevity.
What Are The Benefits Of Using LED Ceiling Lights?
LED ceiling lights offer numerous benefits, including exceptional energy efficiency, extended lifespan, eco-friendliness, and versatile design options. These lights provide a reliable and sustainable lighting solution for diverse applications.
One of the key advantages of LED ceiling lights is their energy efficiency. They consume significantly less power compared to traditional lighting sources, leading to reduced electricity bills and lower carbon emissions. The extended lifespan of LED lights means they require less frequent replacement, contributing to cost savings and reduced waste. In terms of environmental benefits, LED lights are free from harmful substances like mercury, making them an eco-friendly lighting choice.
Find out more: What Are The Advantages Of LED Lighting
Energy Efficiency
Energy efficiency is a key advantage of LED ceiling lights, as they consume significantly less energy compared to traditional lighting fittings. LED lights can be paired with efficient drivers to optimise their operation and reduce overall energy consumption.
LED ceiling lights have become a popular choice for those looking to decrease their energy usage and environmental impact. The drivers, which regulate the power supply to the LEDs, play a crucial role in enhancing the efficiency of these lights by maintaining a consistent and steady flow of electricity.
By incorporating smart controls and sensors, such as motion detectors or daylight sensors, LED ceiling lights can further optimise their operation by adjusting brightness levels based on occupancy and natural light availability. This dynamic feature not only contributes to energy savings but also prolongs the lifespan of the LEDs.
Long Lifespan
LED ceiling lights are known for their long lifespan, outlasting traditional lighting sources by a significant margin. Their reliability and extended service life make them a durable and cost-effective lighting solution.
Along with their remarkable longevity, LED ceiling lights require less frequent replacements, reducing maintenance costs and hassle for homeowners or businesses. The economic benefits of choosing LED lights, such as those offered by Aura, are further amplified by their energy efficiency, leading to lower electricity bills over time. Their consistent performance and reduced environmental impact also contribute to their growing popularity in both residential and commercial settings.
Environmentally Friendly
LED ceiling lights contribute to environmental sustainability due to their low energy consumption and eco-friendly design. These lights are often built using modular units that enhance their sustainability and recyclability.
The manufacturing process of LED ceiling lights focuses on reducing carbon footprint and waste generation, aligning with the principles of sustainable production. JCC LED lighting models, for instance, incorporate innovative technologies like dimmable features and sensors to further optimise energy usage.
The long lifespan of LED lights minimizes the need for frequent replacements, reducing overall material consumption and waste generation. These lights emit less heat, which not only saves energy but also contributes to a more comfortable indoor environment, thus promoting energy efficiency and reducing greenhouse gas emissions.
Versatility In Design
LED ceiling lights offer unparalleled versatility in design, providing creative freedom to designers and homeowners. These fittings come in a wide range of styles and configurations, allowing for customised lighting solutions.
Whether you prefer sleek and modern designs or intricate and ornate fittings, LED ceiling lights can cater to a myriad of design preferences and themes. The Halers H2 Pro brand, for example, is known for its innovative designs that seamlessly blend functionality with style, making it a popular choice among interior designers looking to elevate their spaces. The integration of LED technology in these ceiling lights not only enhances energy efficiency but also opens up a whole new world of design possibilities.
What Are The Drawbacks Of LED Ceiling Lights?
Whilst LED ceiling lights offer numerous benefits, they also come with some drawbacks, including a higher upfront cost compared to traditional lighting, limited colour options, and the potential for the glare in certain settings.
One of the main drawbacks of LED ceiling lights is the cost implication. Although they are energy-efficient and have a longer lifespan, the initial investment can be significantly higher than traditional lighting options, leading to higher upfront expenses. This can be a deterrent for those on a tight budget or looking to minimise expenses.
Another limitation of LED ceiling lights is the limited colour options available. While white light LEDs have become popular for their brightness and energy efficiency, they may not cater to those looking for warmer or more colourful illumination in their living spaces. This can restrict the creative freedom in interior design and ambiance setting.
LED ceiling lights can pose challenges related to glare in certain environments. Particularly in spaces with shiny surfaces or open layouts, the concentrated light emitted by LEDs can create unwanted reflections and glare, causing discomfort and potentially affecting visibility. This issue can be especially prominent in commercial settings where glare can impact productivity and user experience.
Higher Upfront Cost
The higher upfront cost of LED ceiling lights is attributed to the quality of fittings and the need for occasional replacement of components. Whilst the initial investment may be higher, the long-term savings in energy and maintenance costs justify the expenditure.
LED ceiling lights are renowned for their durability, efficiency, and longevity, making them a cost-effective lighting solution in the long term. The quality of fittings used in LED lights ensures better light output and consistency, offering enhanced illumination in any space. The maintenance requirements of LED fittings are minimal compared to traditional lighting technologies like incandescent or fluorescent bulbs. LED downlights, in particular, have a longer lifespan and require fewer replacements, reducing the inconvenience and costs associated with frequent maintenance.
Limited Colour Options
LED ceiling lights may have limited colour options based on the Kelvin level of the light emitted, such as white LED, warm white, and cool white variations. Whilst these options cover a broad spectrum, some users may find the colour choices restrictive.
In terms of the ambience of a room, the Kelvin level plays a crucial role in creating the desired atmosphere. For instance, white LEDs with higher Kelvin levels tend to emit cooler, bluish light, perfect for task-oriented spaces like kitchens or offices.
On the other hand, warm white LEDs, with their lower Kelvin ratings, offer a cosy, inviting glow, making them ideal for living rooms or bedrooms where a relaxing ambience is desired.
Cool white LEDs fall somewhere in between, balancing brightness and warmth, making them versatile for various settings, such as bathrooms or workspaces.
Potential For Glare
LED ceiling lights have a potential for glare, especially when operated at full brightness without dimmer switches. Glare can be mitigated by adjusting the lighting intensity to suit the environment and using compatible dimmers for optimal control.
Glare from LED ceiling lights can cause discomfort and even affect productivity in work or relaxation spaces. By incorporating dimmer switches into the lighting setup, users can easily adjust the brightness levels to create a more comfortable ambiance.
Dimmer switches play a crucial role in regulating illumination and reducing the harshness of the light, offering better control over the lighting atmosphere. This not only enhances visual comfort but also provides energy-saving benefits by allowing users to customise the light output to their specific needs.
How Do LED Ceiling Lights Compare To Other Types Of Lighting?
LED ceiling lights offer significant advantages over other types of lighting technologies, including incandescent, fluorescent, and halogen lights.
LED lights stand out for their exceptional energy efficiency, consuming much less power while producing the same, if not more, illumination. LED technology boasts an impressive lifespan, lasting up to 25 times longer than traditional incandescent bulbs, reducing the frequency of replacements and maintenance costs. In terms of overall performance, LED ceiling lights offer consistent brightness, colour accuracy, and instant illumination without flickering, unlike fluorescent or halogen options.
LED Vs Incandescent Lights
LED ceiling lights outperform incandescent lights in terms of energy consumption and longevity. Whilst incandescent bulbs like Edison bulbs have a shorter lifespan and higher energy consumption, LED lights offer superior efficiency and durability.
One of the key advantages of LED ceiling lights is their significantly lower energy consumption compared to traditional incandescent bulbs. LEDs are known for their energy efficiency, converting a higher percentage of electricity into light rather than heat, which minimises wastage and contributes to reduced electricity costs. The lifespan of LED bulbs is much longer, lasting up to tens of thousands of hours, making them a cost-effective and eco-friendly lighting solution.
LED Vs. Fluorescent Lights
LED ceiling lights surpass fluorescent lights in terms of efficiency and performance. While fluorescent lighting requires ballasts and starters for operation, LED luminaires offer instant illumination, superior energy efficiency, and a longer service life.
LED ceiling lights do not contain hazardous materials like mercury found in fluorescent lights, making them environmentally friendly and easier to dispose of responsibly. The energy efficiency of LEDs is further highlighted by their ability to emit minimal heat compared to fluorescent bulbs, reducing the strain on cooling systems and cutting down on air conditioning costs. Moreover, Collingwood LED lights are known for their high-quality construction and innovative designs, which complement modern interior aesthetics while providing optimal lighting performance.
LED Vs. Halogen Lights
LED ceiling lights outshine halogen lights like GU10 bulbs in terms of reliability and energy efficiency.
Halogen lights have a reputation for burning out quickly, requiring frequent replacements, and resulting in higher electricity bills compared to their LED counterparts. In contrast, LED lights are designed to last much longer, saving both energy and money in the long run. Their sustainable design not only benefits the environment but also reduces the hassle of constantly changing bulbs. Brands like DM Lights have embraced LED technology, offering customers a more efficient and eco-friendly lighting option.
What Are The Factors To Consider When Choosing LED Ceiling Lights?
Several key factors should be considered when selecting LED ceiling lights, including brightness levels, colour temperature preferences, dimming capabilities, fitting sizes, and shapes, as well as the reputation of the brand and the overall quality of the lighting product.
In terms of brightness levels, it's crucial to determine the lumen output required for the specific area where the LED ceiling lights will be installed. This helps in ensuring adequate illumination without causing glare or shadows.
Colour temperature variations play a significant role in setting the ambiance of a room, ranging from warm, cosy tones to cooler, more productive lighting. Having dimming options allows for customisable lighting levels based on different activities or times of the day.
Choosing reputable brands like Studio Job ensures that you are investing in quality standards and durable fittings that will last longer and perform efficiently. It's essential to prioritise both aesthetics and functionality when making your selection.
Brightness And Colour Temperature
Brightness and colour temperature are crucial considerations when selecting LED ceiling lights. The Kelvin level determines the colour output, ranging from warm white to cool white and even daylight options, allowing users to customise the ambiance to their preferences.
LED ceiling lights offer various Kelvin levels to cater to different lighting needs. Lower Kelvin levels around 2700-3000K produce a warm, cosy glow resembling traditional incandescent lighting, ideal for living rooms and bedrooms. On the other hand, higher Kelvin levels above 4000K emit a cool, energising light suitable for task-oriented areas like kitchens and offices.
The colour temperature influences the mood and perception of a space. Warmer tones create a welcoming and intimate atmosphere, while cooler tones enhance focus and productivity. The ability to switch between different colour temperatures is beneficial for creating versatile lighting settings to suit various activities and preferences.
Dimming Capabilities
Dimming capabilities enhance the versatility of LED ceiling lights, allowing users to adjust the light intensity according to their preferences. Utilising dimmer switches provides control over the illumination levels and creates the desired ambiance in different settings.
Having the ability to dim LED ceiling lights is particularly valuable in spaces where versatility is key, such as living rooms, bedrooms, or restaurants. With the option to adjust the brightness, individuals can create a cosy atmosphere for relaxation or increase the light output for tasks that require more focus.
Dimmer switches play a crucial role in these scenarios by allowing users to fine-tune the lighting to suit specific activities or moods. This level of control can significantly impact the overall feel of a room, enhancing comfort and functionality.
Size And Shape
The size and shape of LED ceiling lights play a crucial role in their compatibility with different spaces and applications. Selecting fixtures that align with the room's layout and design preferences ensures optimal operation and aesthetic appeal.
Consider the dimensions of the room when choosing LED ceiling lights, ensuring that the size of the fixtures complements the space without overwhelming it. Proper sizing helps in creating a balanced and harmonious lighting scheme throughout the room. The shape of the fixtures can influence the distribution of light and the overall ambiance of the space. Rectangular or circular designs may work better in certain settings than others, depending on the desired lighting impact.
Brand And Quality
When choosing LED ceiling lights, considering the brand and quality is essential to ensure reliability and performance. Reputable manufacturers like Philips Lighting and Halers H2 Pro offer superior design options and dependable products that meet high-quality standards.
Philips Lighting, a renowned name in the lighting industry, is known for its innovation and cutting-edge technology. Their LED ceiling lights not only provide energy efficiency but also offer durability and style. With a focus on sustainability and user experience, Philips Lighting ensures that its products not only illuminate a space but also enhance its aesthetics.
Halers H2 Pro, on the other hand, prides itself on delivering premium quality lighting solutions that cater to various needs. Their attention to detail and commitment to creating products that blend functionality with elegance makes them a popular choice among consumers looking for reliable LED ceiling lights.
Conclusion: Are LED Ceiling Lights A Good Choice?
LED ceiling lights emerge as a favourable choice in the light fitting market due to their energy efficiency, reliability, and innovative designs. The availability of LED-ready fittings further enhances the appeal of LED lighting solutions for various residential and commercial settings.
LED ceiling lights have become increasingly popular as they offer exceptional energy efficiency, consuming significantly less power compared to traditional lighting options. The long lifespan of LEDs not only reduces maintenance costs but also contributes to a more sustainable environment, aligning with the growing focus on eco-friendly practices. The innovative designs of LED fittings cater to diverse aesthetic preferences, allowing for customised lighting solutions that enhance the ambience of any space.
Are you tired of spending money on expensive carpet cleaning solutions that are filled with harsh chemicals?
Have you ever considered making your own homemade carpet cleaning solution?
Not only is it cost-effective, but it is also environmentally friendly and customizable for different types of stains.
In this article, we will explore the ingredients needed to create a homemade carpet cleaning solution, the steps to making it, and tips for effectively cleaning your carpets.
Say goodbye to store-bought solutions and hello to a natural alternative that will leave your carpets looking fresh and clean!
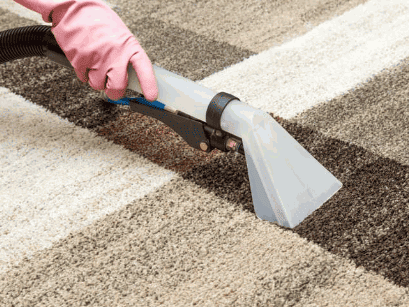
What Is A Carpet Cleaning Solution?
A carpet cleaning solution is a specialised formula designed to effectively clean and remove stains from carpets and rugs.
These solutions are carefully formulated to target different types of stains, whether it's pet messes, food spills, or general dirt build-up. The powerful ingredients in the solution work together to break down the stains and lift them from the carpet fibres, restoring the carpet's original appearance.
Using a carpet cleaning solution regularly is crucial in maintaining the cleanliness and longevity of your carpets. Not only does it eliminate visible stains, but it also helps to remove deep-seated dirt and bacteria that may be lurking within the fibres.
Why Use A Homemade Carpet Cleaning Solution?
Using a homemade carpet cleaning solution offers several benefits that make it a preferred choice for many individuals.
- One of the notable advantages of using a homemade carpet cleaning solution is its cost-effectiveness. Not only are the ingredients typically readily available at home, but they are also much cheaper than commercial cleaning products. This can result in substantial savings over time, especially for households with large carpeted areas that require regular cleaning.
- Homemade solutions are environmentally friendly as they often use natural ingredients that are safer for both the environment and the health of those living in the household. By avoiding harsh chemicals, homemade carpet cleaning solutions help in reducing overall chemical exposure and their negative impact on the environment.
- Another benefit is the customizability of homemade cleaning solutions to address different types of stains effectively. By adjusting the ingredients and ratios, individuals can tailor their cleaning solutions to tackle specific stains such as pet accidents, food spills, or mud tracks, ensuring better cleaning efficiency and results.
Cost-Effective
One of the primary reasons to opt for a homemade carpet cleaning solution is its cost-effectiveness compared to commercial products.
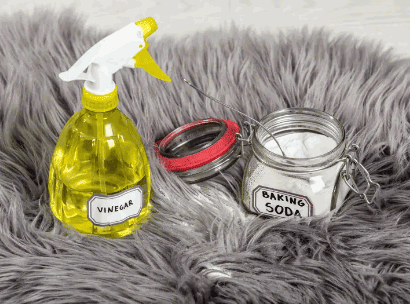
Using common household ingredients like vinegar, bicarbonate of soda, and washing-up liquid can be highly economical when it comes to cleaning your carpets.
Homemade solutions not only save money but also eliminate the need for frequent trips to the shop for expensive cleaning products. These DIY remedies are often gentler on carpet fibers, making them a practical choice for regular maintenance.
Environmentally Friendly
Homemade carpet cleaning solutions are environmentally friendly as they reduce the use of harsh chemicals and minimise environmental impact.
By opting for natural ingredients like vinegar, bicarbonate of soda, and essential oils, you not only ensure a cleaner environment, but also promote sustainable cleaning practices. These homemade solutions not only effectively clean your carpets but also contribute to a safer living environment for your family and pets. Natural ingredients are gentle on carpet fibers, prolonging their lifespan and reducing the need for harsh chemical treatments that can harm the environment. Transitioning to homemade solutions for carpet maintenance is a small yet impactful step towards a greener, healthier home.
Customisable For Different Stains
Homemade carpet cleaning solutions offer the advantage of being customisable to tackle various types of stains effectively.
For instance, to combat a red wine spill, a mixture of fizzy water and mild washing-up liquid can be effective in lifting the stain. For greasy stains like fat or butter, a combination of bicarbonate of soda and vinegar can work wonders due to their grease-cutting properties.
Alternatively, for pet urine accidents, a solution of water, white vinegar, and a touch of bicarbonate or soda can help neutralise the odour and remove the stain without harsh chemicals that pets may be sensitive to.
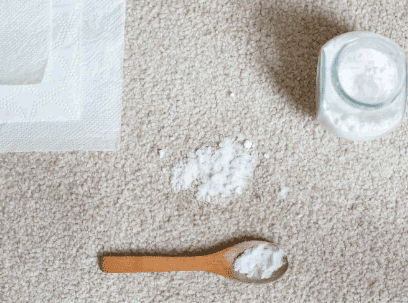
What Are The Ingredients Of A Homemade Carpet Cleaning Solution?
The ingredients of a homemade carpet cleaning solution typically include common household items that are effective in cleaning and removing stains from carpets.
- One of the key ingredients in homemade carpet cleaning solutions is bicarbonate of soda. Bicarbonate of soda acts as a natural deodorizer and abrasive cleanser, helping to lift dirt and odors from the carpet fibers.
- White vinegar is another essential component, known for its antibacterial and deodorizing properties. It helps to break down stains and disinfect the carpet surface.
- Hydrogen peroxide is commonly used to bleach and lighten tough stains, making it effective for brightening the carpet.
- Lastly, washing-up liquid is included for its grease-cutting abilities, aiding in the removal of oily residues and grime.
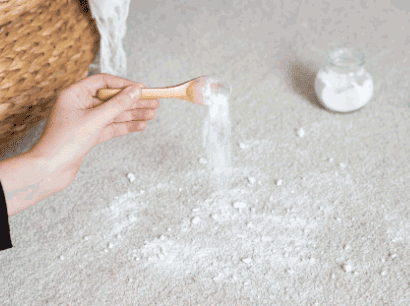
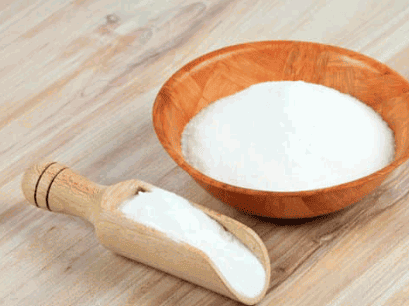
Baking Soda
Bicarbonate of soda is a versatile ingredient in homemade carpet cleaning solutions, known for its ability to absorb odours and lift stains effectively.
One of the remarkable properties of bicarbonate of soda is its natural ability to neutralise odours that can get trapped in carpet fibres over time. By simply sprinkling a generous amount of bicarbonate of soda onto the carpet surface and letting it sit for at least 15-30 minutes, you can effectively deodorise and freshen up your living space.
When combined with a few drops of essential oils such as lavender or tea tree, bicarbonate of soda not only cleanses but also leaves a pleasant fragrance behind, creating an inviting ambience in your home.
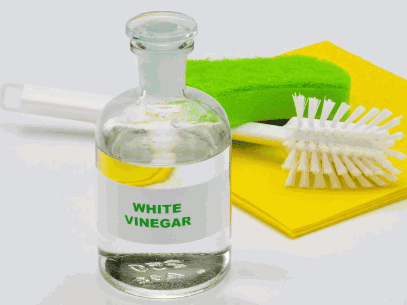
White Vinegar
White vinegar is a common ingredient in homemade carpet cleaning solutions due to its acidic properties that help dissolve stains and eliminate odours.
Regarding tackling tough stains, white vinegar stands out as a potent ally. Its acidic nature not only helps to break down stubborn marks on carpets but also works wonders in eliminating lingering odours, leaving your space fresh and clean. White vinegar boasts impressive antimicrobial properties, making it an effective agent in fighting off germs and bacteria that may be lurking in your carpets.
To ensure safe and efficient carpet cleaning, it is recommended to dilute white vinegar with water. A common ratio is a 1:1 mixture of white vinegar and water in a spray bottle for spot treatments. For larger carpet areas, a mixture of 1 cup of white vinegar to 2.5 gallons of water works effectively to lift stains and refresh your carpet fibres.
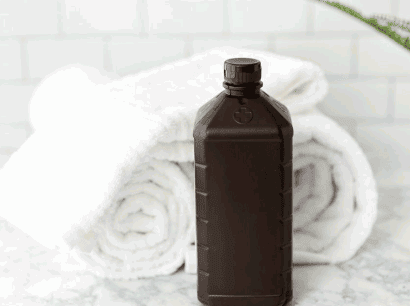
Hydrogen Peroxide
Hydrogen peroxide is a powerful cleaning agent that is used in homemade carpet cleaning solutions to tackle tough stains and disinfect carpet fibres.
One of the key benefits of hydrogen peroxide is its ability to penetrate deep into carpet fibres, targeting stubborn stains and eliminating harmful bacteria. This versatile solution is particularly effective in removing organic stains like blood, wine, or pet accidents, making it a popular choice for carpet cleaning enthusiasts.
When using hydrogen peroxide for carpet cleaning, it is important to dilute it properly to avoid damaging the carpet fibres or causing discolouration. Always test a small, inconspicuous area of the carpet first to ensure compatibility.
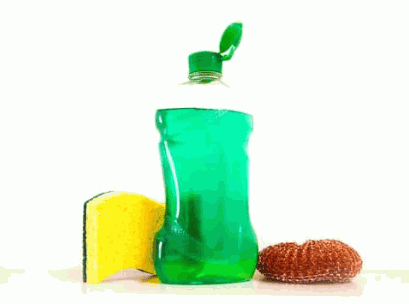
Dish Soap
Washing-up liquid is a gentle yet effective ingredient in homemade carpet cleaning solutions, ideal for breaking down greasy stains and dirt particles.
Due to its grease-cutting properties, washing-up liquid can penetrate deep into the carpet fibres, loosening tough oily residues. When applied properly, it helps in lifting the greasy spots and leaving the carpet cleaner and fresher.
When choosing a washing-up liquid for carpet cleaning, opt for a mild and gentle formula without harsh chemicals or added fragrances. Look for labels indicating 'gentle' or 'safe for hands' to ensure it won't damage your carpets.
How To Make A Homemade Carpet Cleaning Solution?
Creating a homemade carpet cleaning solution is a simple and cost-effective process that requires a few key ingredients and minimal preparation.
To start, gather together white vinegar, bicarbonate of soda, hot water, and a few drops of your favourite essential oil for a pleasant fragrance.
- In a large bowl, mix a cup of white vinegar with two cups of hot water.
- Add a tablespoon of bicarbonate of soda to the mixture and carefully stir until it dissolves.
- For tough stains or odours, you can increase the amount of white vinegar slightly.
The small addition of essential oil not only leaves your carpets smelling delightful but also helps in neutralising any lingering odours.
Basic Solution
The basic homemade carpet cleaning solution consists of a blend of water, white vinegar, and dish soap, creating a versatile cleaner for general carpet maintenance.
- Vinegar acts as a natural deodoriser and disinfectant, cutting through odour-causing bacteria and stains.
- Dish soap, with its surfactant properties, helps to break down greasy residue and dirt, leaving the carpet refreshed and clean.
Water serves as the base of the solution, providing the necessary dilution for the cleaning agents to work effectively.
The combination of these ingredients forms a powerful yet gentle cleaning solution that is safe for most carpet types, offering a cost-effective and eco-friendly alternative to commercial cleaners.
Tough Stain Solution
For stubborn stains, a homemade carpet cleaning solution with bicarbonate of soda, hydrogen peroxide, and white vinegar can offer enhanced stain-fighting power.
Bicarbonate of soda acts as a natural deodoriser and gentle abrasive, making it effective at loosening tough stains on carpets. When combined with hydrogen peroxide, it forms a powerful cleaning agent that breaks down organic matter and lifts stains from carpet fibres. White vinegar, with its acidic properties, helps to dissolve alkaline stains and neutralise odours, leaving your carpets refreshed and spotless.
What Are The Steps For Cleaning Carpets With A Homemade Solution?
Cleaning carpets with a homemade solution involves a series of systematic steps to ensure thorough cleaning and effective stain removal.
- Hoovering the carpet is the first crucial step to remove loose dirt and debris before applying any cleaning solution. This helps in preventing dirt from getting embedded deeper into the carpet fibres during the cleaning process.
- Spot testing the cleaning solution on a hidden area of the carpet is essential to check for any adverse reactions that may occur. After determining the solution is safe, the next step involves applying the cleaning mixture onto the stained areas of the carpet and allowing it to sit for a few minutes to break down the dirt.
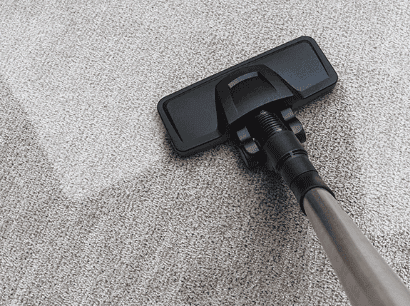
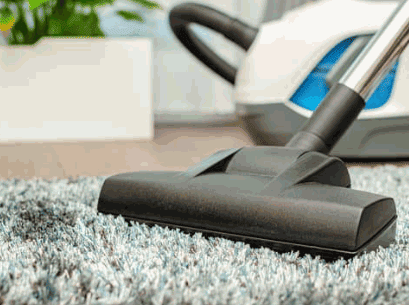
Vacuum The Carpet
Before applying the homemade cleaning solution, it is essential to hoover the carpet to remove surface debris and prepare it for deep cleaning.
Hoovering is the first and crucial step in maintaining the cleanliness and longevity of your carpets. By removing loose dirt, dust, and other particles, hoovering prevents these from embedding deeper into the carpet fibres during the cleaning process. A key tip for effective hoovering is to go over each area multiple times, especially high-traffic zones, to ensure thorough removal of debris. Using the right attachment tools, such as a crevice tool for corners and edges, can help reach hidden dirt and achieve a more comprehensive clean.
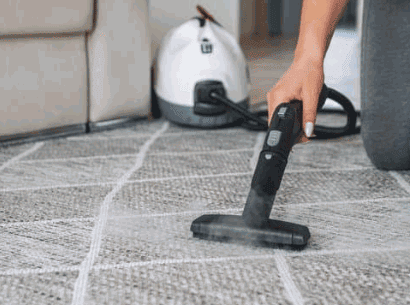
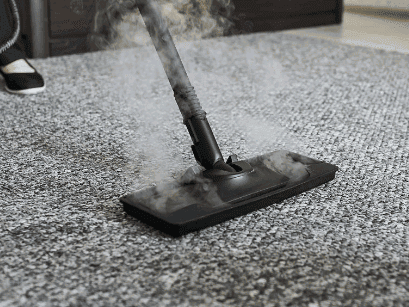
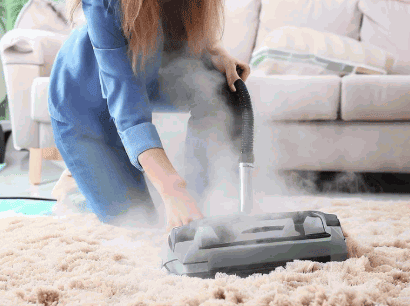
Dig deeper: Can You Steam Clean Carpets
Test The Solution On A Small Area
Before full application, always test the homemade cleaning solution on a small inconspicuous area of the carpet to ensure compatibility and avoid potential damage.
By conducting a patch test, you can identify any colourfastness issues that might arise when applying the solution. This small precaution can save you from ruining the entire carpet due to incompatibility with the cleaning ingredients. It also serves as a preventive measure against adverse reactions, ensuring that the cleaning solution is safe for use on your carpet. Remember, a simple test spot can help you gauge the effectiveness and safety of the cleaning solution, giving you peace of mind when treating the entire carpet.
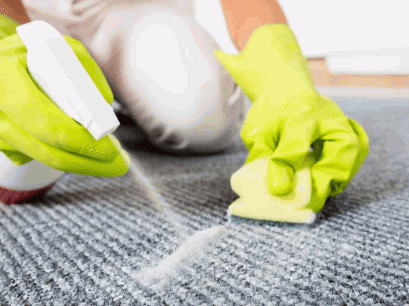
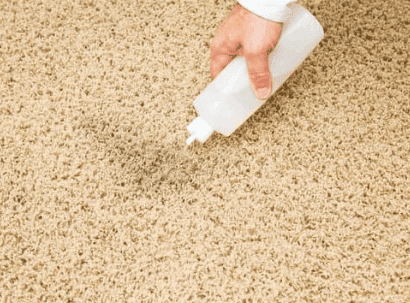
Apply The Solution To The Stained Area
Using a spray bottle or cloth, apply the homemade cleaning solution to the stained area of the carpet, ensuring thorough coverage for effective stain removal.
- When applying the solution, make sure to focus on the most heavily stained areas but also extend the application slightly beyond the visible stain to prevent any potential residue. This will aid in targeting underlying dirt that might not be immediately visible.
- It's crucial to allow the cleaning solution to sit and work its magic for a few minutes, letting it penetrate the fibres thoroughly. This dwell time enhances the solution's ability to break down the stain particles, making them easier to lift during the cleaning process.
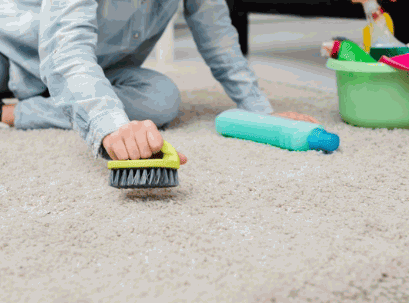
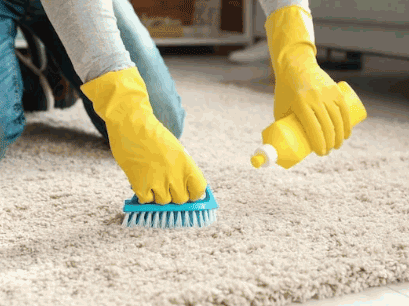
Scrub The Stain With A Brush
Gently scrub the stained area with a soft-bristled brush or cloth to agitate the cleaning solution and lift the stain from the carpet fibres.
When scrubbing, it is crucial to use gentle motions to prevent any potential damage to the delicate carpet fibres. Avoid harsh scrubbing as it can fray or weaken the fibres, leading to permanent damage.
For different carpet textures, choose appropriate brush types. A soft-bristled brush works well for most carpets, but for shaggy or high-pile carpets, opt for a brush with longer bristles to reach deep into the fibres without causing tangling.
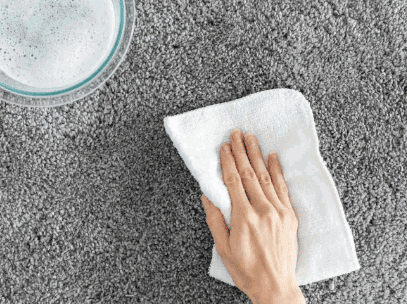
Blot The Area With A Clean Cloth
After scrubbing, blot the treated area with a clean cloth or kitchen roll to absorb excess moisture and lift the loosened stain particles from the carpet.
Remember, when blotting, avoid rubbing back and forth as this can push the stain deeper into the fibres of the carpet. Instead, gently press the cloth onto the stained area, allowing it to soak up the moisture and residue without spreading it. Ensure the cloth is clean and absorbent to effectively lift the stain without causing further damage.
Rinse The Area With Water
Thoroughly rinse the cleaned area with water to remove any remaining cleaning solution and residue, ensuring a fresh and residue-free carpet surface.
To effectively carry out the rinsing process, it is recommended to use lukewarm water for optimal results. Lukewarm water helps to break down any remaining soap residue while not damaging the fibres of the carpet. Employing gentle pressure when rinsing is crucial to thoroughly flush out any cleaning solution remnants. You can use a spray bottle or a hose attachment with a gentle spray setting to evenly distribute the water across the cleaned area.
Remember that inadequate rinsing can lead to soap buildup on the carpet, causing it to attract more dirt and grime over time. Proper rinsing ensures that your carpet remains clean and fresh for a longer period. A helpful tip is to blot the area with a clean towel after rinsing to absorb excess water and aid in faster drying.
Allow The Carpet To Dry
Once the cleaning process is complete, allow the carpet to air dry or use fans to expedite the drying process and prevent mould or mildew growth.
Proper drying is crucial in maintaining the freshness and longevity of your cleaned carpet. Moisture trapped in the fibres can lead to odours and potential mould issues.
To enhance air circulation, open windows and doors in the room. You can also position fans strategically around the carpet to speed up the drying time. A dehumidifier can be useful in removing excess moisture from the air. Remember, a well-dried carpet not only looks better but also ensures a healthier environment in your living space.
What Are The Tips For Using A Homemade Carpet Cleaning Solution?
To maximise the effectiveness of a homemade carpet cleaning solution, follow these essential tips for optimal results and carpet maintenance.
- When using a homemade cleaning solution on your carpet, it's crucial to avoid over-saturation as excess moisture can lead to mould and mildew growth.
- Remember to always use clean cloths for blotting to prevent transferring dirt or stains back onto the carpet surface.
- Before applying the solution, it's recommended to carry out a patch test in an inconspicuous area to ensure compatibility with your carpet.
- To maintain the cleanliness and appearance of your carpet for a longer period, consider vacuuming regularly to remove surface dirt and debris.
Do Not Over-Saturate The Carpet
Avoid over-saturating the carpet with the cleaning solution to prevent excessive moisture build-up and potential damage to the carpet fibres.
When applying a cleaning solution, remember that less is more. It's crucial to strike a balance between effectively removing stains and preserving the integrity of your carpet.
- Start by testing the solution in a small, inconspicuous area to ensure compatibility.
- Follow the manufacturer's instructions for dilution ratios to avoid harsh chemical concentrations.
- Consider using a spray bottle for controlled application rather than pouring directly onto the carpet.
Monitoring the saturation level and blotting excess solution promptly can make a significant difference in the cleaning process.
Use A Clean Cloth For Blotting
When blotting the carpet, always use a clean cloth or kitchen towel to absorb moisture and stain residues without transferring dirt or contaminants back onto the carpet.
Using a clean and absorbent cloth is crucial in this process to ensure that the stain is effectively lifted without causing further damage to the carpet fibres. Opt for microfibre cloths, white cotton cloths, or soft towels as they are gentle on the carpet surface and have good absorbency properties.
These cloth types are ideal for blotting because they do not leave fluff or fibres behind, which could potentially stick to the damp carpet and complicate the cleaning process. By using the right cloth, you can effectively target the stain and prevent it from spreading or setting deeper into the carpet fibres.
Test The Solution On A Hidden Area Of The Carpet
Before applying the cleaning solution to visible areas, always test it on a small, inconspicuous section of the carpet to verify compatibility and avoid unexpected damage.
Conducting a patch test prior to full application is a crucial step in ensuring that the cleaning solution does not harm the carpet fibres or cause discolouration. This simple test can save you from potentially costly mistakes.
Choose a spot that is hidden from view, such as under furniture or along the edges, and follow the instructions provided by the manufacturer of the cleaning product. Taking these precautions can prevent undesirable outcomes and preserve the quality of your carpet.
Keeping your carpet clean is crucial for maintaining a healthy and comfortable home environment.
From preventing dirt and allergens from accumulating to extending the lifespan of your carpet, regular cleaning is key. But how often should you clean your carpet?
Factors like foot traffic, pets or children, allergies, and carpet material all play a role.
We will explore the importance of regular carpet cleaning, how it benefits your health, and provide tips on how often to vacuum and deep clean your carpet.
Let's dive in!
Why Is It Important To Clean Your Carpet Regularly?
Regular carpet cleaning is crucial for maintaining a healthy indoor environment and extending the lifespan of your carpets.
By eliminating trapped dirt, dust, pet dander, and other contaminants, frequent carpet cleaning not only enhances the appearance of your home but also contributes significantly to the overall air quality. When carpets are left uncleaned, they can become breeding grounds for bacteria and allergens, leading to potential health risks, especially for individuals with respiratory conditions.
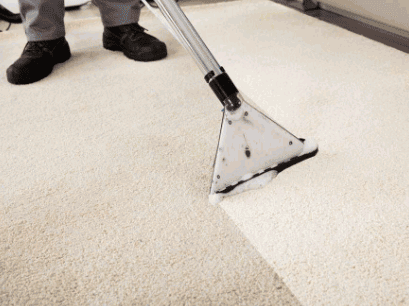
Regular maintenance also plays a key role in protecting your investment in carpets. Stains and embedded debris can wear down the fibers over time, affecting the carpet's durability and visual appeal. To ensure thorough cleaning and proper care, professional carpet cleaning services offer expertise and specialised equipment that go beyond standard vacuuming.
Learn more: What Is The Best Homemade Carpet Cleaning Solution
What Happens If You Don't Clean Your Carpet?
Neglecting to clean your carpets can lead to the accumulation of dust, dirt, allergens, and even mould, posing health risks and diminishing indoor air quality.
Not cleaning carpets regularly not only affects the health of the occupants but also impacts the overall look and feel of a room. Dust and dirt particles trapped in the carpet fibres can create an unsightly appearance, making a space look unkempt and dull. Neglecting carpet maintenance can lead to the fibres breaking down more quickly, causing the carpet to lose its original texture and colour.
How Does Regular Carpet Cleaning Benefit Your Health?
Regular carpet cleaning plays a vital role in reducing allergens, dust mites, and other pollutants that trigger respiratory issues and allergies, promoting a healthier indoor environment.
Through frequent carpet cleaning, you can significantly lower the levels of allergens and bacteria embedded deep within the fibers of your carpets. By removing these harmful particles regularly, you create a more hygienic living space that fosters better respiratory health.
Not only does clean carpeting help in reducing allergy symptoms, but it also enhances the overall air quality in your home. Eliminating dust mites and allergens through proper cleaning routines can make a notable difference in preventing health issues related to indoor air pollution.
Factors To Consider When Deciding How Often To Clean Your Carpet
When determining the frequency of carpet cleaning, factors such as foot traffic, the presence of pets or children, allergies, and the type of carpet material should be taken into account.
Foot traffic plays a significant role in dictating how often carpets should be cleaned. Areas with high foot traffic, such as hallways or living rooms, may require more frequent cleaning compared to less frequently used rooms. If there are pets or children in the household, spills, and accidents are more likely to occur, warranting more regular cleaning. Allergies also come into play, as dust, pollen, and other allergens can accumulate in carpets, necessitating more frequent cleaning for those with sensitivities. Different carpet materials have unique maintenance requirements, with some needing more frequent cleaning than others.
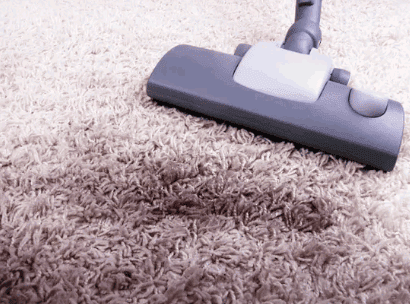
Amount Of Foot Traffic
High foot traffic areas like entryways and living rooms may require more frequent carpet cleaning to prevent soil build-up and maintain a clean appearance.
When people constantly walk over the same spots, it's no surprise that dirt and debris can accumulate quickly, making the carpet look dingy and unkempt. The dirt particles brought in from outside can embed themselves deep within the fibres, causing damage and discolouration over time.
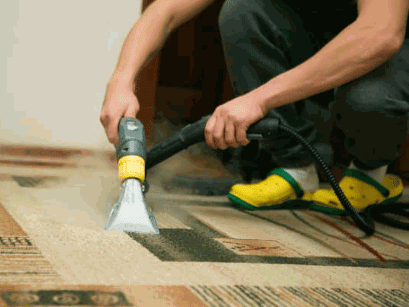
Regular vacuuming helps, but deeper cleaning methods like hot water extraction or steam cleaning are crucial to lifting out the deeply embedded grime. Professional carpet cleaners are adept at targeting these high-traffic zones to ensure a thorough and effective clean, extending the lifespan of the carpet and maintaining a welcoming ambiance in your space.
Presence Of Pets Or Children
Homes with pets or children may need more frequent carpet cleaning due to pet dander, spills, and accidents that can soil and stain carpets.
Regular maintenance is essential to preserve the cleanliness and longevity of carpets in such households. Using pet-friendly cleaning products can help eliminate stains and odours without posing risks to the health of your furry friends. Investing in child-safe carpet care solutions ensures a safe environment for your little ones. By promptly addressing spills and accidents, you can prevent permanent damage and keep allergens at bay.
Allergies Or Sensitivities
Individuals with allergies or sensitivities may benefit from more frequent carpet cleaning to reduce exposure to allergens and maintain a healthy living environment.
Regular carpet cleaning plays a crucial role in managing indoor allergens, dust mites, pet dander, pollen, and other particles that can trigger allergic reactions and worsen respiratory conditions. By regularly cleaning carpets, you can significantly improve indoor air quality, creating a safer and healthier space for everyone in the household.
Utilising hypoallergenic cleaning methods and allergy-friendly products during carpet cleaning can further enhance the effectiveness of allergen control. These specialised cleaning techniques help in removing allergens without introducing harsh chemicals that may aggravate sensitivities or allergies.
Maintaining clean carpets through regular vacuuming and professional cleaning not only extends the lifespan of the carpet but also ensures a fresher and healthier living environment. This proactive approach to carpet care is especially beneficial for individuals with allergies, asthma, or respiratory issues, as it aids in mitigating potential triggers and promoting overall well-being.
Type Of Carpet Material
Different carpet materials such as wool, synthetic fibres, or blends may require specific cleaning methods and schedules to preserve their appearance and longevity.
For example, wool carpets are known for their luxurious feel and natural durability but can be more susceptible to staining compared to synthetic fibres. Cleaning wool carpets involves gentle methods to avoid damaging the delicate fibres, such as regular vacuuming with a suction-only vacuum cleaner and using mild detergent solutions. On the other hand, synthetic fibre carpets, like nylon or polyester, are more stain-resistant and easier to clean, typically requiring less maintenance. Blended carpets, combining different fibres, may need a customised cleaning approach depending on the predominant fibre type.
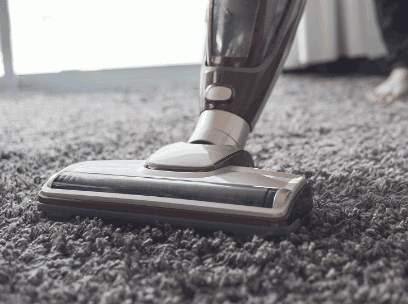
How Often Should You Vacuum Your Carpet?
Hoovering your carpet at least once a week helps remove surface dirt, dust, and debris, maintaining a cleaner and healthier indoor environment.
Along with removing visible dirt, regular hoovering plays a crucial role in controlling allergens such as dust mites and pet dander that can accumulate in carpets over time. By incorporating this simple maintenance routine into your weekly cleaning schedule, you can significantly reduce indoor allergens, contributing to better air quality and overall well-being.
Proper hoovering techniques are essential for maximising the effectiveness of your cleaning efforts. Make sure to hoover in different directions to lift up embedded dirt and ensure thorough cleaning. Varying your patterns and overlapping strokes can help loosen debris trapped deep within carpet fibres.
How Often Should You Deep Clean Your Carpet?
Deep cleaning your carpet every 12 to 18 months is recommended to eliminate embedded dirt, stains, and allergens that regular vacuuming may not remove.
A periodic deep cleaning session for your carpet goes beyond surface dust removal. It involves techniques like carpet shampooing and steam cleaning that can effectively target deep-seated dirt and stubborn stains. These methods help in not just enhancing the appearance of your carpet but also in prolonging its lifespan. Professional deep cleaning services offer specialised equipment and expertise to ensure a thorough cleaning process that tackles odours and allergens too. Moreover, carpet restoration through deep cleaning can rejuvenate old and worn-out carpets, giving them a new lease of life.
What Is Deep Cleaning?
Deep cleaning involves thorough cleaning methods such as hot water extraction or steam cleaning to penetrate carpet fibres and extract stubborn dirt and contaminants.
These techniques are especially vital for removing deeply embedded debris, stains, and allergens that regular vacuuming might not address. During the process, specialised equipment is used to agitate the fibres, releasing dirt and grime, which are then effectively extracted, leaving the carpet revitalised and refreshed.
How To Deep Clean Your Carpet?
To deep clean your carpet, start by vacuuming thoroughly, treating stains, and then using a deep cleaning method like hot water extraction or a carpet cleaner.
Before diving into the deep cleaning process, it's essential to prep your carpet by removing any small objects or furniture on the surface. This gives you a clear workspace and prevents any hindrances during the cleaning process. Pre-treat visible stains with a suitable cleaner or homemade solution to break down the grime effectively. Allow the pre-treatment to sit for the recommended time to maximise its stain-fighting efficacy. Once the pre-treatment is completed, it's time to decide on the best deep cleaning technique based on your carpet's fabric and the level of dirt accumulation.
Signs That Your Carpet Needs To Be Cleaned
Visible stains, lingering odours, increased allergies, and matting or discolouration are common signs that indicate your carpet requires cleaning and maintenance.
When visual cues like obvious spills or dirt patches are noticeable on your carpet, it's often a clear signal that it's time for a thorough cleaning. In addition, unpleasant odours that don't dissipate even after airing out the room can indicate deep-seated dirt and bacteria harbouring in the fibres.
For individuals experiencing heightened allergies indoors, dirty carpets can be a significant contributor, triggering respiratory issues and other health concerns. When your once plush carpet starts looking flat, matted, or displays uneven colouring, it not only affects the overall aesthetic appeal of the room but also suggests the accumulation of dirt and grime over time.
Tips For Maintaining A Clean Carpet
Regular vacuuming, prompt stain removal, using doormats, and scheduling professional cleanings are effective strategies for preserving the cleanliness and appearance of your carpets.
To enhance the longevity of your carpets, it is advisable to use carpet protectors in high-traffic areas and under furniture. Placing rugs in key spots can also prevent excessive wear and tear. When spills occur, blot them immediately using a clean cloth and mild detergent – avoid rubbing to prevent spreading the stain. For DIY cleaning solutions, a mixture of vinegar and water can effectively tackle most stains. For tougher stains or overall deep cleaning, consider hiring a professional carpet cleaning service for thorough maintenance.
Conclusion
Regular carpet cleaning is essential for a healthy indoor environment, allergen control, and the longevity of your carpets.
By removing dirt, dust, bacteria, and other pollutants trapped in the carpets, regular cleaning helps prevent respiratory issues and allergies. It also enhances the overall air quality in your home, making it a more comfortable and safer space for inhabitants. Moreover, professional carpet cleaning services play a vital role in deep cleaning, removing stubborn stains, and rejuvenating the appearance of your carpets, thereby extending their lifespan and preserving their original condition.
Are you tired of dealing with stubborn stains and trapped dirt in your carpets?
Steam cleaning could be the solution you are looking for.
We will explore what steam cleaning is, how it works, and whether it can be used on different types of carpets.
We will also discuss the benefits of steam cleaning, and potential risks to be aware of, and provide you with tips on how to properly steam clean your carpets to keep them looking fresh and clean.
Let's dive in and discover the world of steam cleaning for carpets!
Take a look: How Often Should You Clean Your Carpet
What Is Steam Cleaning?
Steam cleaning is a process that utilises hot water and steam to clean various surfaces, including carpets and upholstery.
Hot water and steam serve as powerful tools in the fight against stubborn dirt and grime, as the high temperatures help to break down and dissolve stains more effectively than traditional cleaning methods. By utilising a specialised cleaning machine that generates steam and hot water, homeowners and businesses can achieve a deeper level of cleanliness, penetrating into the fibres of carpets and upholstery to lift away hidden debris. The use of water in steam cleaning also ensures that no harsh chemicals are needed, making it an eco-friendly and safe option for maintaining a clean environment.
How Does Steam Cleaning Work?
Steam cleaning works by using a specialised steam cleaner that heats water to produce steam, which is then applied to the carpet surface to loosen dirt and debris.
This process relies on the principle that steam's high temperature softens and dissolves grime, allowing for easier extraction during the cleaning process. The water reservoir in the steam cleaner is heated to a high temperature, converting it into steam, which is expelled through a nozzle onto the carpet fibers. As the steam interacts with the dirt, it helps to break down stubborn stains and embedded particles, making them easier to remove. The hot steam also sanitizes the carpet, killing bacteria and allergens for a thorough cleaning.
Yes, carpets can be effectively cleaned using steam cleaning methods that involve the use of specialised machines to eliminate dirt and stains.
Steam cleaning is a popular choice for homeowners seeking a thorough and environmentally friendly cleaning solution for their carpets. With the power of high-temperature steam, these specialised machines can penetrate deep into the carpet fibres, loosening dirt, grime, and stubborn stains that regular vacuuming may not be able to remove.
The process not only leaves carpets looking visibly cleaner but also sanitises them by killing off bacteria, dust mites, and other allergens that can accumulate over time. Moreover, steam cleaning is a non-toxic method that doesn't rely on harsh chemicals, making it safe for both your family and pets.
What Types Of Carpets Can Be Steam Cleaned?
Various types of carpets can undergo steam cleaning, ranging from synthetic fibres to wool and blends, ensuring a thorough cleaning process for different materials.
In terms of steam cleaning, it's essential to understand that the method is versatile and effective across a wide range of carpet materials. Synthetic fibre carpets, such as polyester and nylon, benefit from the deep cleaning provided by steam. On the other hand, wool carpets, known for their durability and luxurious feel, can also be safely cleaned using steam without causing damage to the fibres. Blends of different materials, like wool and synthetic fibres, can be effectively cleaned using the steam cleaning method, making it a reliable option for various carpet types.
What Types Of Carpets Should Not Be Steam Cleaned?
Certain delicate carpets, such as antique rugs or those made of delicate materials like silk, may not be suitable for steam cleaning to prevent damage or colour bleeding.
These types of carpets require more gentle cleaning methods to retain their beauty and integrity. Handwoven rugs, intricate Persian carpets, and delicate oriental designs fall into this category, needing specialised care.
In such cases, it is advisable to opt for alternative cleaning techniques like dry cleaning or foam cleaning. These methods ensure thorough cleaning without the risk of damage that steam cleaning may pose to these delicate carpet types.
What Are The Benefits Of Steam Cleaning Carpets?
Steam cleaning carpets offer numerous benefits, including deep cleaning capabilities, effective stain removal, and the ability to eliminate germs and bacteria from the carpet fibres.
One of the significant advantages of utilising steam cleaning for carpets is the ability to penetrate deep into the fibres, lifting dirt and grime that traditional vacuuming may not reach. Not only does steam cleaning effectively remove visible stains, but it also tackles embedded allergens and bacteria, promoting a healthier indoor environment. The high-temperature steam used in the cleaning process acts as a natural sanitiser, killing germs and bacteria without the need for harsh chemicals. This method not only ensures a clean appearance but also enhances the longevity of your carpets by eliminating contaminants that can break down fibres over time.
Deep Cleaning
One of the primary benefits of steam cleaning carpets is their ability to provide deep cleaning by reaching into the carpet fibres and extracting embedded dirt particles effectively. Utilising high-temperature steam, this cleaning method can effectively break down stubborn dirt particles that may have accumulated deep within the carpet fibres over time. The steam application not only cleans the surface but also reaches down to the roots of the carpet, ensuring a thorough cleanse. By combining heat and pressure, steam cleaning not only eliminates visible dirt but also addresses allergens and bacteria that can be lurking within the carpet, promoting a healthier indoor environment.
Removes Stubborn Stains
Steam cleaning carpets is highly effective in removing stubborn stains, such as food spills or pet accidents, restoring the carpet's appearance and freshness.
One of the remarkable features of steam cleaning is its ability to tackle even the toughest of stains. The hot steam penetrates deep into the fibres of the carpet, breaking down dirt and grime effortlessly. Whether it's a red wine spill from a dinner party or a muddy paw print from your furry friend, steam cleaning can work wonders. Not only does it remove the stains, but it also eliminates any accompanying odours, leaving the carpet looking and smelling brand new.
Kills Germs And Bacteria
Steam cleaning not only cleans carpets but also eliminates harmful germs and bacteria, ensuring a hygienic environment with the use of specialised cleaning solutions.
When you opt for steam cleaning for your carpets, you're not just removing visible dirt and stains, you're delving deep into the fibres to get rid of allergens and contaminants that standard vacuuming might miss. The high temperatures involved in the steam cleaning process are effective in killing germs and bacteria, providing a thorough and sanitised result. This method is particularly beneficial for households with pets or young children, as it helps maintain a healthier indoor environment by reducing the presence of unwanted microorganisms.
Environmentally Friendly
Steam cleaning carpets is an environmentally friendly method as it uses hot water and steam without the need for harsh chemicals, reducing environmental impact.
This method not only helps in achieving a clean and fresh living space but also contributes to a healthier indoor environment by eliminating allergens and bacteria. Water and steam are powerful elements that effectively penetrate deep into the carpet fibres, breaking down dirt and grime without leaving behind any chemical residue. By opting for steam cleaning, individuals can promote sustainability and minimise their carbon footprint as it conserves water and avoids the release of harmful toxins into the environment. It's a win-win solution for both cleanliness and nature.
What Are The Risks Of Steam Cleaning Carpets?
Whilst steam cleaning offers numerous benefits, there are risks involved, such as potential damage to delicate carpets, mould growth due to over-wetting, and exposure to cleaning chemicals.
Delicate carpets, especially those made of natural fibres like wool, can be adversely affected by high temperatures and moisture during the steam cleaning. Excessive heat can weaken the fibres, leading to shrinkage, colour fading, or distortion of the carpet's texture.
Overwetting the carpets during the steam cleaning process can create ideal conditions for mould and mildew growth, especially in humid environments or if the carpets are not dried thoroughly.
Another concern is the exposure to cleaning chemicals used in conjunction with steam cleaning. Residues from these chemicals can linger in the carpet fibres, potentially causing skin irritation, respiratory issues, or allergic reactions over time.
Damage To Delicate Carpets
Delicate carpets, such as antique rugs or those with fragile fibres, may suffer damage during steam cleaning due to the heat and moisture involved, requiring special care.
Steam cleaning can be beneficial for deeply cleaning carpets, but it's crucial to recognise the potential risks associated with it. In terms of delicate carpets, the high temperatures and moisture from the steam can cause shrinkage, colour bleeding, or even structural damage. For antique rugs or those made from fragile fibres like silk, extra caution is necessary. Any mishandling during the process can lead to irreversible harm, diminishing not only the aesthetic appeal but also the overall value of these valuable pieces. It's always recommended to seek professional advice and services to ensure the safe cleaning of such delicate carpets.
Over-Wetting And Mould Growth
Over-wetting carpets during steam cleaning can lead to mould growth, particularly in humid environments, highlighting the importance of proper drying techniques to prevent such issues.
Excessive moisture trapped within the carpet fibres not only prolongs the drying process but also creates a breeding ground for mould spores to thrive. In humid conditions, the risk of mould proliferation escalates, posing potential health hazards and structural damage. To combat this, thorough extraction and adequate ventilation are essential post-steam cleaning.
- Using powerful fans
- Dehumidifiers
- Open windows
These methods accelerate drying times, mitigating the risk of mould infestation and ensuring a clean and healthy indoor environment.
Chemical Exposure
Exposure to cleaning chemicals used in steam cleaning solutions can pose health risks to individuals, necessitating proper ventilation and adherence to safety guidelines during the cleaning process.
Chemical exposure during steam cleaning can result in various health issues such as respiratory problems, skin irritations, and even long-term health implications. Ensuring adequate ventilation in the cleaning area is crucial to minimise the risks associated with inhaling these chemicals. Implementing safety measures like wearing protective gear, such as gloves and masks, can further reduce the chances of exposure. Regular training on handling and storage of cleaning chemicals also plays a vital role in safeguarding the health of individuals in a cleaning environment.
How To Properly Steam Clean Carpets?
To ensure effective steam cleaning of carpets, it is essential to follow a series of steps, including thorough vacuuming, pre-treating stains, using the right equipment and cleaning solutions, allowing for adequate drying time, and regular maintenance.
- Start the carpet steam cleaning process by vacuuming thoroughly to remove loose dirt, dust, and debris.
- Next, inspect the carpet for any stains and pre-treat them with an appropriate solution to increase the chances of successful removal.
- When selecting the steam cleaner, opt for one with the correct temperature settings and attachment for carpets. Be sure to fill the machine with the recommended cleaning solution for carpets to achieve optimal results.
- After steaming the carpet, allow sufficient drying time for it to dry completely. Ensure proper ventilation in the room to aid the drying process and prevent mould or mildew growth.
- To maintain the cleanliness and longevity of your carpets, schedule regular steam cleaning sessions to keep them looking fresh and pristine.
Vacuum The Carpet Thoroughly
Thoroughly vacuuming the carpet before steam cleaning is crucial to remove surface debris, dust, and dirt, ensuring a more effective cleaning process.
By eliminating the superficial particles, the vacuuming stage lays a solid foundation for the steam cleaning to delve into deeper grime and stains embedded in the carpet fibres. This initial step helps prevent the dirt from smearing or spreading during the subsequent steam treatment, thus leading to a more thorough and lasting clean. The vacuuming process also lifts pet hair, food crumbs, and other visible debris that can hinder the steam cleaner's effectiveness if not properly removed prior to the main cleaning process.
Pre-Treat Stains
Pre-treating stubborn stains on the carpet before steam cleaning can enhance the cleaning process's effectiveness, ensuring better removal of tough blemishes.
By applying specific stain removers or solutions to the affected areas prior to steam cleaning, you can break down the stains at a molecular level, making it easier for the steam to lift them from the carpet fibres.
This method maximises the chances of eliminating deep-seated or older stains that might otherwise be resistant to the steam cleaning process alone, ultimately leading to a more thorough and satisfactory cleaning outcome.
Use The Right Equipment And Cleaning Solution
Selecting the appropriate equipment and cleaning solutions tailored to the carpet type is essential for successful steam cleaning, ensuring optimal results without damage.
In terms of steam cleaning, different carpet materials require specific care to maintain their quality and appearance. For instance, wool carpets are more delicate and may need gentler cleaning solutions compared to synthetic fibres. Using the wrong equipment or harsh chemicals can not only fail to effectively clean the carpet but also damage its fibres.
By understanding the unique needs of each carpet type, such as pile height, thickness, and material composition, professionals can devise a customised cleaning approach that delivers superior results. This tailored method ensures that the carpet is thoroughly cleaned while preserving its texture and colour vibrancy.
Allow Time For Drying
After steam cleaning, it is crucial to allow sufficient time for the carpet to dry completely, preventing issues like mould growth and ensuring the longevity of the cleaning effects.
Properly drying the carpet after steam cleaning is essential as it not only helps maintain the cleanliness of the carpet but also plays a vital role in preventing the formation of mould. Mould thrives in damp environments and a carpet that has not been adequately dried post-steam cleaning can be a breeding ground for mould spores. Allowing the carpet to dry completely enhances the effectiveness of the cleaning process, ensuring that the results are long-lasting. Therefore, patience and diligence in allowing drying time are key aspects of post-steam cleaning care.
Regular Maintenance And Professional Cleaning
Regular maintenance practices, including periodic professional steam cleaning sessions, are essential to prolong the carpet's lifespan and maintain its cleanliness and appearance.
Ensuring that your carpet receives regular care not only enhances its longevity but also contributes significantly to a healthier indoor environment. The deep cleaning provided by professional services removes embedded dirt, stains, and allergens that regular vacuuming may not reach. By eliminating these contaminants, you create a hygienic living space that is particularly crucial for individuals with allergies or respiratory issues.
Routine maintenance can help prevent the growth of mould and bacteria within the carpet fibres, reducing the risk of unpleasant odours and potential health hazards. By investing in professional cleaning services at recommended intervals, you actively preserve the condition and aesthetic appeal of your carpet while promoting a cleaner and fresher home environment.
Are you looking to upgrade your garage flooring? Epoxy garage floors are a popular choice for their durability, resistance to chemicals and stains, and easy maintenance. In this article, we will explore the benefits of epoxy garage floors, the different types available, and how to prepare for installation. We will also walk you through the process of applying epoxy with flakes for a decorative finish. Plus, we will provide tips on how to properly maintain your epoxy garage floor for long-lasting results. Let's get started!
What Is Epoxy Garage Floor?
An epoxy garage floor is a durable and protective coating applied to the surface of a garage floor to enhance its durability and aesthetics, providing a seamless and glossy finish.
This type of flooring not only improves the overall look of your garage by giving it a professional and finished appearance but also acts as a shield against staining, cracking, and moisture damage. The protective barrier created by epoxy helps to prevent oil spills, chemical stains, and abrasions from damaging the concrete underneath, extending the lifespan of your garage floor. The glossy finish adds brightness to the space, making it look more spacious and inviting.
What Are The Benefits Of Epoxy Garage Floors?
The benefits of an epoxy garage floor are numerous, ranging from enhanced durability and resistance to chemicals and stains to easy maintenance and an improved garage appearance.
Epoxy garage floors provide a protective layer that helps to shield the concrete underneath from wear and tear, making them incredibly durable in high-traffic areas. Their resistance to chemicals ensures that spills from oil, petrol, or other automotive fluids can be easily cleaned without leaving permanent stains. The smooth, glossy finish of epoxy floors enhances the overall appearance of the garage, creating a more visually appealing and welcoming space for both storage and vehicle maintenance.
Explore: What Is Resin Flooring
Durability
Durability is a key feature of epoxy garage floors, as they provide a long-lasting and protective surface that can withstand wear and tear in high-traffic areas.
By creating a solid barrier against stains, cracks, and impacts, epoxy coatings shield the garage floor from the daily grind of vehicles coming and going. This resilience not only enhances the aesthetic appeal of the space but also contributes to the overall longevity of the floor. With minimal maintenance required to upkeep its luster, the protective nature of epoxy coatings ensures that your garage floor remains in excellent condition for years to come.
Resistance To Chemicals And Stains
Epoxy garage floors offer excellent resistance to chemicals and stains, making them ideal for protecting the floor against spills, oil leaks, and other common garage hazards.
Their chemical-resistant properties create a durable barrier that repels various liquids, including oil, petrol, and solvents, preventing them from seeping into the concrete below. This protective barrier not only safeguards the floor's surface but also enhances its longevity by shielding it from corrosive agents.
In addition to being fully customizable, epoxy coatings are known for their low maintenance requirements, making them a cost-effective and aesthetically pleasing choice for garage flooring solutions.
Easy To Clean And Maintain
Maintaining an epoxy garage floor is effortless as it is easy to clean and requires minimal upkeep, ensuring that the floor remains in top condition with simple cleaning routines.
The smooth surface of an epoxy garage floor makes it a breeze to wipe down and maintain, providing a durable and long-lasting solution for your garage space. By following a few maintenance tips such as regular sweeping and occasional mopping with a gentle cleanser, you can keep your epoxy floor looking pristine for years to come. The high-gloss finish not only adds aesthetic appeal but also repels stains and spills, further simplifying the cleaning process and reducing the need for extensive scrubbing or harsh chemicals.
Enhances The Appearance Of The Garage
An epoxy garage floor not only provides functional benefits but also enhances the overall appearance of the garage, giving it a professional and sleek look that can increase property value.
By opting for an epoxy coating, you can instantly elevate the aesthetics of your garage space, creating a polished finish that adds a touch of sophistication. The seamless and glossy surface provided by epoxy doesn't just improve the visual appeal but also makes the maintenance of the garage easier. This garage improvement not only enhances the overall charm of the space but can also boost property value by transforming a dull and ordinary garage into a modern, stylish area that reflects attention to detail and quality.
What Are The Different Types Of Epoxy Garage Floors?
Epoxy garage floors come in various types, including solid color epoxy, metallic epoxy, and decorative flake epoxy, each offering unique visual effects and protective qualities.
- Solid color epoxy floors provide a sleek and seamless finish, perfect for a modern and clean look in your garage space.
- On the other hand, metallic epoxy options incorporate stunning pigmented colors with metallic flakes to create a luxurious and reflective surface that adds depth and dimension to the floor.
- Decorative flake epoxy floors offer a more textured appearance with colored flakes scattered throughout, providing a slip-resistant and visually appealing finish.
Each type of epoxy flooring not only enhances the aesthetics of your garage but also adds a durable protective layer that resists stains, chemicals, and abrasions, prolonging the lifespan of your floor.
Solid Colour Epoxy
Solid color epoxy garage floors provide a uniform and sleek finish, available in a wide range of colors to suit different design preferences and styles.
The versatility of colors allows homeowners to customize their garage floors with shades ranging from bold reds to calming blues, ensuring a seamless surface that enhances both the durability and aesthetics of the space whether you prefer vibrant colors that make a statement or more neutral tones for a classic look, solid color epoxy floors offer endless possibilities for creating a polished and professional appearance in your garage.
Metallic Epoxy
Metallic epoxy garage floors offer a unique and eye-catching finish with pearlescent or swirled patterns, creating a stunning visual effect that enhances the overall garage aesthetics.
This type of flooring is known for its ability to incorporate metallic flakes, which add depth and dimension to the surface, giving it a shimmering appearance. The customization options are virtually endless, allowing homeowners to choose from a wide range of colors and designs to suit their personal style. The glossy finish of metallic epoxy floors not only looks visually appealing but also reflects light beautifully, creating a bright and inviting atmosphere in the garage space. It's a modern and luxurious choice for those looking to enhance the look of their garage.
Decorative Flake Epoxy
Decorative flake epoxy garage floors feature vinyl chips or flakes scattered over the surface, providing both a decorative element and additional texture for slip resistance.
The vinyl chips or flakes in these epoxy floors come in a variety of colors and sizes, allowing for customization based on personal preferences and design schemes. The decorative aspect of these floors adds a touch of style and personality to an otherwise utilitarian space, making the garage more visually appealing.
The texture variations created by the flakes provide a unique tactile experience underfoot, enhancing the overall look and feel of the flooring. The slip-resistant properties of these decorative epoxy floors make them a practical choice for spaces where safety is a priority.
How To Prepare For Epoxy Garage Floor Installation?
Proper preparation is crucial before installing an epoxy garage floor, involving steps such as cleaning the floor, repairing any damage, etching the surface, and allowing sufficient drying time.
To ensure a clean surface, start by removing any oil stains or debris using a degreaser and a stiff brush. Next, inspect the floor for cracks or holes that need repairing; these can be filled with a suitable epoxy patching compound. Etching the surface is essential for promoting adhesion, which can be done with an etching solution or mechanical grinder. After completing these steps, allow the floor to thoroughly dry before applying the epoxy coating to achieve a durable and long-lasting finish.
Clean And Clear The Garage Floor
Cleaning and clearing the garage floor is the first step in preparing for epoxy installation, ensuring a dust-free and smooth surface for optimal adhesion of the coating.
To achieve a pristine canvas for the epoxy coating, begin by removing all items from the garage floor to access every corner for cleaning. Sweeping and scrubbing the floor thoroughly will eliminate any accumulated dust, oil stains, or debris that could interfere with the bonding process.
After the initial cleaning, it's essential to inspect the surface for any cracks or imperfections that may need repair before proceeding. A clean and level surface ensures that the epoxy coating adheres uniformly, providing a durable and aesthetically pleasing finish.
Repair Any Cracks Or Damage
Repairing any cracks or damage on the garage floor is essential to ensure a smooth and even surface before applying the epoxy coating, preventing future issues with the flooring.
These cracks and damages not only compromise the aesthetics of your garage but also pose safety hazards and can worsen over time if left unattended. To begin the repair process, it's crucial to clean the affected area thoroughly, removing any debris or loose particles.
Next, depending on the size and severity of the damage, you may need to use specific repair materials such as concrete patching compound or epoxy filler. These materials are designed to effectively fill in the cracks and create a seamless surface.
Once the repairs are complete, applying a protective sealant on the garage floor will further enhance its durability and longevity, ensuring it withstands daily wear and tear.
Etch The Floor
Etching the garage floor is a critical step in preparing for epoxy installation, as it creates a rough surface that promotes better adhesion and bonding of the epoxy coating.
By roughening the surface through etching, the epoxy coating can adhere more effectively, ensuring a durable and long-lasting finish. This process involves using acid or other chemicals to clean and roughen the garage floor, allowing for better penetration and grip of the epoxy. The etching process not only enhances adhesion but also helps in removing any contaminants or residues that may hinder the application of the epoxy.
Proper surface preparation, such as etching, is essential to achieve a smooth and consistent application of the epoxy coating, resulting in a professional-looking and resilient garage floor.
Allow Floor To Dry Completely
After cleaning, repairing, and etching, it is crucial to allow the garage floor to dry completely before applying the epoxy coating to ensure proper adhesion and curing of the material.
The drying process is essential as any remaining moisture can negatively impact the application of the epoxy. Moisture trapped beneath the coating can lead to bubbling, cracking, or delamination.
To achieve a successful epoxy application, the curing process demands a completely dry surface. This ensures that the epoxy can bond effectively with the concrete substrate, forming a durable and long-lasting finish.
Waiting for the recommended curing time post-drying also allows the epoxy to fully harden and provide optimal protection for your garage floor.
How To Apply Epoxy Garage Floor With Flakes?
Applying an epoxy garage floor with flakes involves a systematic process that includes mixing epoxy resin, applying a primer coat, broadcasting flakes onto the wet epoxy, and sealing with a top coat for a durable finish.
- To start, ensure that the garage floor is clean, dry, and free of any oil or grease.
- Next, mix the epoxy resin according to the manufacturer's instructions, making sure to blend it thoroughly.
- Once the resin is mixed, apply a primer coat using a roller or brush to promote adhesion.
- Sprinkle flakes over the wet primer, ensuring even coverage for a decorative touch.
- Allow the flakes to fully adhere before applying the final topcoat to seal and protect the floor.
- This topcoat will provide a glossy finish and additional durability to your newly coated garage floor.
Mix Epoxy Resin And Hardener
Steps:
- The first step in applying epoxy garage floor with flakes is to thoroughly mix the epoxy resin and hardener according to the manufacturer's instructions, ensuring a proper chemical reaction and curing process.
Once the epoxy resin and hardener are combined, the mixture needs to be stirred carefully to achieve a uniform consistency. It's crucial to follow the specified mixing ratios precisely to ensure that the epoxy cures properly and adheres effectively to the garage floor. Rushing through this step can lead to uneven curing and compromise the durability of the coating.
Remember, the curing process of epoxy relies heavily on the accurate blending of these components. By following instructions diligently, you can guarantee a smooth and long-lasting finish for your garage floor.
Apply Primer Coat
Once the epoxy resin is mixed, apply a primer coat to the garage floor to enhance adhesion and create a strong bond between the substrate and the epoxy coating, ensuring a durable and long-lasting finish.
The primer coat acts as a preparatory layer that not only aids in better adhesion but also helps in sealing porous areas on the floor, preventing air bubbles or unevenness in the final coating application. It serves as a foundation for the epoxy to adhere securely, allowing for a smoother and more uniform finish. By properly applying the primer, you are significantly increasing the longevity and durability of the overall garage floor coating, providing a high-quality and resilient surface that can withstand daily wear and tear.
Broadcast Flakes Onto Wet Epoxy
After applying the primer coat, broadcast vinyl flakes onto the wet epoxy surface to create a decorative and textured appearance, adding both visual appeal and slip resistance to the garage floor.
This process not only enhances the overall look of the floor but also provides a practical benefit by increasing traction and reducing the risk of slips and falls. The vinyl chips come in various colors and sizes, allowing for customization to match any design aesthetic. The flakes also help to conceal imperfections in the surface, creating a seamless and polished finish. The slip-resistant properties of the vinyl chips make the garage floor safer, especially in areas prone to moisture or spills.
Apply A Top Coat Of Epoxy
To finish the epoxy garage floor with flakes, apply a top coat of epoxy sealant to protect the flakes and create a glossy, durable finish that enhances the overall appearance of the flooring.
The topcoat acts as a protective layer that not only seals in the decorative flakes but also provides added strength and longevity to the epoxy flooring. By applying a top coat, you are ensuring that your garage floor remains resistant to stains, scratches, and general wear and tear, thus maintaining its glossy sheen for years to come. This final step in the epoxy application process is crucial in achieving a professional-looking finish and preserving the beauty of your garage floor while increasing its durability.
How To Maintain Epoxy Garage Floor?
Maintaining an epoxy garage floor is simple and requires regular sweeping and mopping, prompt spill cleanup, minimal use of harsh chemicals, and periodic top coat reapplications to preserve the finish.
To keep your epoxy garage floor looking fresh and glossy, establish a cleaning routine that includes gentle sweeping to remove dirt and debris that can scratch the surface. When spills occur, tackle them immediately using a soft cloth or mop to prevent stains and stickiness. Avoid using abrasive cleaning agents that can damage the protective layer of the epoxy. Regularly inspect your floor for signs of wear and consider reapplying a top coat every 1-3 years to maintain its durability and aesthetic appeal.
Regularly Sweep And Mop
Regular sweeping and mopping of the epoxy garage floor help prevent dirt build-up and maintain the floor's appearance, ensuring a clean and polished surface for an extended period.
This simple maintenance routine plays a crucial role in not only enhancing the aesthetics of your garage but also in prolonging the lifespan of the epoxy coating. By sweeping the floor regularly, you can remove loose debris and dirt, preventing them from scratching the surface. Following up with mopping helps to eliminate any remaining dust or grime, leaving behind a sparkling finish. Keeping the floor clean makes it easier to spot and address any spills or stains promptly, contributing to its easy-to-clean nature.
Clean Up Spills Immediately
Prompt clean-up of spills and stains on the epoxy garage floor is essential to prevent staining and maintain the floor's integrity and appearance, ensuring long-lasting durability.
Spills on epoxy garage floors can not only leave unsightly marks but can also lead to potential hazards if not dealt with promptly. By cleaning spills immediately, you not only protect the aesthetic appeal of your flooring but also maintain its hygiene. Since epoxy floors are known for their chemical-resistant properties, quick clean-up helps prevent any lasting damage that could compromise the floor's longevity. Consistent care in managing spills and stains also contributes to the overall cleanliness and safety of the garage area.
Avoid Using Harsh Chemicals
To protect the epoxy garage floor's finish, it is advisable to avoid harsh chemicals and cleaners that can damage the coating, opting for mild solutions and gentle cleaning methods instead.
These harsh chemicals, although they may appear effective for tough stains, can actually be detrimental to the longevity and appearance of your epoxy floor. They have the potential to break down the protective coating, leading to discoloration and premature wear. Instead, consider using cleaning solutions that are specifically labeled as safe for use on epoxy surfaces. Look for products that are chemical-resistant, pH-neutral, and free from abrasive ingredients.
By taking this gentle approach to maintenance, you can ensure that your epoxy floor retains its shine and durability for years to come.
Reapply Top Coat Every Few Years
Periodically reapplying a top coat of epoxy on the garage floor every few years helps maintain its gloss and protective qualities, ensuring long-term durability and resistance to wear and tear.
This simple yet essential maintenance task can significantly extend the life of your garage floor, saving you from costly repairs or replacements down the line. By reapplying the top coat, you create a barrier that shields the underlying epoxy layer from damage caused by heavy foot traffic, vehicle movement, and chemical spills. In addition to safeguarding the floor against stains and scratches, regular top coat reapplication also enhances its aesthetic appeal, keeping it looking fresh and vibrant for years to come.
Are you considering using epoxy flooring on wood surfaces but unsure if it's the right choice? In this article, we will explore the benefits of epoxy flooring, including durability, easy maintenance, chemical resistance, and aesthetics. We will also discuss the types of wood that can be coated with epoxy, the steps to prepare wood for epoxy application, and factors to consider.
We will look at alternatives to epoxy flooring on wood, such as polyurethane coating, vinyl planks, laminate flooring, tile flooring, and stained or painted wood. We will provide tips on how to maintain epoxy flooring on wood surfaces. If you're looking to enhance your wood floors with epoxy, keep reading to learn more!
What Is Epoxy Flooring?
Epoxy flooring is a type of surface coating that combines epoxy resin with a hardener to create a durable and protective layer over a surface.
This composition makes epoxy flooring highly resistant to chemicals, stains, and abrasions, making it ideal for industrial, commercial, and even residential applications.
The application process involves mixing the resin and hardener and then applying it to a properly prepared surface. Once cured, epoxy flooring provides a seamless and glossy finish that is easy to clean and maintain.
In addition to its durability, epoxy flooring offers a wide range of design options, from solid colors to decorative flakes and metallic effects, allowing for customization to suit any space. Its versatility extends to different surfaces, including concrete, wood, and tiles, making it a popular choice for various flooring needs.
The sealants used in epoxy flooring provide an extra layer of protection, enhancing its longevity and resistance to wear and tear.
What Are The Benefits Of Epoxy Flooring?
Epoxy flooring offers numerous benefits, including exceptional durability, easy maintenance, high chemical resistance, and the ability to enhance the aesthetics of a space.
One of the key advantages of epoxy flooring is its remarkable longevity, making it a cost-effective option in the long run. The scratch resistance of epoxy coatings ensures that the surface maintains its smooth finish even in high-traffic areas, reducing the need for frequent repairs or replacements. The waterproof properties of epoxy make it ideal for spaces exposed to moisture, such as basements or kitchens, providing an extra layer of surface protection against water damage. The hardwearing finish of epoxy also contributes to its ability to withstand heavy loads and impact, making it an excellent choice for industrial and commercial settings.
Discover: How To Epoxy Garage Floor With Flakes
Durability
The durability of epoxy flooring is unmatched, providing a hardwearing, resilient surface that is highly resistant to wear and tear.
This strength and toughness make epoxy flooring ideal for areas that experience heavy foot traffic, such as warehouses, commercial kitchens, and industrial facilities. Its impact resistance ensures that it can withstand the daily grind of forklifts, machinery, and equipment without showing signs of damage or deterioration. Its ability to resist chemicals and stains makes maintenance a breeze, enhancing the overall longevity and appearance of the surface. With epoxy flooring, you can be sure that your floors will stay looking great for years to come.
Easy Maintenance
Epoxy flooring requires minimal maintenance, with simple cleaning routines and occasional resealing to preserve its protective layer and gloss.
Regularly sweeping or hoovering the surface to remove debris and dirt can help prevent scratches and wear on the epoxy finish. For tougher stains, mopping with a mild detergent solution is effective in maintaining the shine of the flooring. Resealing the epoxy every few years can enhance its durability and longevity, providing an extra layer of protection against heavy foot traffic and potential damage. Applying protective sealants can also offer increased resistance to chemical spills and moisture, making the floor easier to clean and maintain in the long run.
Chemical Resistance
Epoxy flooring exhibits excellent chemical resistance, making it a suitable choice for areas prone to spills, stains, and exposure to harsh substances.
Its ability to withstand chemical deterioration makes epoxy flooring a popular option in industrial settings, laboratories, and garage floors. The waterproof nature of epoxy coatings adds an extra layer of protection against moisture intrusion and water damage.
To ensure the longevity of the epoxy surface's protective barrier, regular application of sealants is crucial. Sealants act as a shield, enhancing the durability of the epoxy coating and safeguarding it from wear and tear caused by daily use and environmental factors. Proper sealing treatments play a vital role in maintaining the integrity and performance of epoxy floors over time.
Aesthetics
Epoxy flooring not only provides functional benefits but also enhances the aesthetics of a space with its high gloss finish and customizable design options.
The high gloss appearance of epoxy flooring adds a touch of elegance to any environment, creating a sleek and modern look. Its customizable nature allows for a wide range of design possibilities, from unique patterns to vibrant colors. Whether used indoors or outdoors, epoxy flooring has the ability to transform plain surfaces into eye-catching focal points. By choosing epoxy coatings, individuals can elevate the overall look of their spaces, making them more visually appealing and stylish.
Can Epoxy Flooring Be Used On Wood?
Epoxy flooring can indeed be applied to wooden surfaces, providing a durable and protective coating that enhances the longevity of the wood.
This application process involves thoroughly cleaning and preparing the wooden surface before the epoxy is poured and spread evenly. Once the epoxy cures, it forms a hard, glossy finish that not only protects the wood from moisture, stains, and scratches but also adds a sleek aesthetic to the surface. Epoxy serves as an excellent sealant, preventing water damage and providing a barrier against chemical spills and UV rays that can degrade wood over time. The seamless coating also makes maintenance easier, as it can be simply wiped clean for a fresh look.
What Type Of Wood Can Epoxy Flooring Be Applied On?
Epoxy flooring can be applied to various types of wood surfaces, including hardwood and engineered wood, to provide enhanced protection and durability.
When considering epoxy coatings on hardwood, it is important to note that they can offer a high level of resistance to scratches, stains, and moisture, making them an ideal choice for spaces with heavy foot traffic or potential for spills.
Engineered wood, with its multiple layers of wood, can also benefit from epoxy applications as it adds an extra layer of strength and longevity.
Regardless of the wood type, proper surface preparation is crucial for ensuring optimal adhesion of the epoxy coating, ultimately leading to a long-lasting finish.
What Are The Steps To Prepare Wood For Epoxy Flooring?
Preparing wood for epoxy flooring involves essential steps such as thorough cleaning, sanding, and applying a primer or sealant to ensure proper adhesion and a smooth finish.
Once the wood surface is prepped, it's crucial to choose the right epoxy coating for woodwork. The application process typically involves mixing the epoxy resin and hardener according to the manufacturer's instructions. This mixture is then spread evenly over the prepared wood surface using a squeegee or roller. It's important to work efficiently during the coating process to avoid uneven application. Proper ventilation is essential to facilitate the curing process and ensure a durable finish. Once the epoxy is applied, allowing sufficient drying time is crucial before subjecting the surface to heavy traffic or furniture placement.
What Are The Factors To Consider When Applying Epoxy Flooring On Wood?
When applying epoxy flooring on wood, factors such as moisture resistance, scratch resistance, and adhesion strength should be carefully considered to ensure a long-lasting and durable finish.
Waterproofing is crucial when protecting wooden surfaces, as it prevents moisture from seeping into the wood and causing damage over time. Scratch resistance helps in maintaining the aesthetic appeal of the flooring, especially in high-traffic areas. Proper adhesion is essential for the epoxy to bond effectively with the wood, ensuring a strong and lasting finish. By enhancing the durability of the wooden surface and effectively sealing the surface, the epoxy flooring not only adds a beautiful aesthetic but also protects the wood from wear and tear, making it a smart choice for long-term protection and longevity.
What Are The Alternatives To Epoxy Flooring On Wood?
Whilst epoxy flooring is a popular choice for wood surfaces, alternative options such as polyurethane coatings, vinyl planks, laminate flooring, tile flooring, and stained or painted wood finishes offer different aesthetic and functional qualities.
- Polyurethane coatings are known for their durability and scratch resistance, making them ideal for high-traffic areas.
- Vinyl planks, on the other hand, provide a cost-effective solution that mimics the look of hardwood.
- Laminate flooring combines affordability with easy installation, perfect for DIY projects.
- Tile options offer versatility in design and are highly water-resistant, suitable for kitchens and bathrooms.
- Stained or painted wood finishes allow for customization and can enhance the natural beauty of wood surfaces.
Polyurethane Coating
Polyurethane coating is a popular alternative to epoxy flooring for wood, providing a durable sealant and varnish that enhances the natural beauty of the wood surface.
It offers excellent protection against scratches, moisture, and UV rays, making it an ideal choice for high-traffic areas. The versatile nature of polyurethane coatings allows for application on various wooden surfaces, from floors to furniture. In addition to its protective qualities, polyurethane coatings create a smooth and glossy finish that adds a touch of elegance to any room. Unlike traditional varnishes, polyurethane coatings are known for their long-lasting durability and resistance to wear and tear, making them a top choice for homeowners looking to preserve and beautify their wooden floors.
Vinyl Planks
Vinyl planks are a resilient and waterproof alternative to epoxy flooring on wood, offering easy installation, low maintenance, and excellent water resistance.
Their waterproof properties make them ideal for areas prone to moisture, such as kitchens and bathrooms. In addition to being resilient, vinyl planks can withstand heavy foot traffic without showing wear and tear like traditional hardwood floors. With simple maintenance requirements, these floorings can be easily cleaned with a damp cloth, eliminating the need for specialized cleaning products. The protective layer on vinyl planks also helps prevent scratches and scuffs, maintaining the floor's aesthetic appeal for years to come.
Laminate Flooring
Laminate flooring offers a hardwearing and scratch-resistant alternative to epoxy coatings for timber, providing a durable surface with a variety of design options.
The scratch-resistant finishes on laminate flooring make it an ideal choice for high-traffic areas, such as corridors and kitchens, where durability is key.
The versatile coatings available for laminate floors allow for a range of styles, from realistic timber grain patterns to modern tile designs, offering a cost-effective way to enhance the aesthetic appeal of any room.
With laminate flooring, homeowners can enjoy the beauty of timber without worrying about potential damage or maintenance issues.
Tile Flooring
Tile flooring presents a strong and improvement-oriented option for wood surfaces, combining durability with aesthetic appeal for a long-lasting and attractive flooring solution.
By opting for tile flooring on wooden surfaces, you not only add a layer of protection to the wood but also create a versatile and customizable design element. The strength of the tile helps prevent scratches and dents on the underlying wood, prolonging its lifespan. Tile offers a wide range of colors, patterns, and textures, allowing you to enhance the natural beauty of the wood while adding a touch of modernity and style to your interiors or exteriors. This fusion of strength and enhancement can elevate the overall look and feel of your space.
Stained Or Painted Wood
Staining or painting wood surfaces is a versatile way to enhance and repurpose them, offering a cost-effective and customizable alternative to epoxy flooring for wood.
By choosing to stain or paint wood instead of opting for epoxy flooring, one can achieve a unique aesthetic appeal that complements various interior styles. These finishes not only enhance the natural beauty of the wood but also provide an opportunity to breathe new life into old furniture or structures.
The process of staining or painting allows for easy color customization to match specific preferences or design schemes, making it a flexible and creative choice for wood beautification and preservation.
How To Maintain Epoxy Flooring On Wood?
Maintaining epoxy flooring on wood involves regular cleaning, occasional resealing, and addressing any scratches or damages promptly to ensure the longevity and appearance of the surface.
To keep your epoxy flooring looking its best, use a soft-bristled broom or a vacuum with a brush attachment for regular cleaning. Avoid strong chemicals or abrasive cleaning agents that can damage the epoxy finish. For resealing, follow the manufacturer's recommendations for the specific epoxy product used on your wooden surface. Promptly addressing scratches or damages with a wood-safe epoxy filler can prevent moisture from seeping into the wood, maintaining both the protection and visual appeal of your flooring.
Resin flooring is a popular choice for a variety of spaces due to its durability, chemical resistance, and easy maintenance. From industrial to residential settings, resin flooring offers a range of benefits including aesthetics and longevity.
In this article, we will explore the different types of resin flooring, its applications, installation process, and factors to consider before choosing the right type for your space. Whether you are looking for a sleek and modern flooring solution or a durable option for high-traffic areas, resin flooring may be the perfect choice for you.
What Is Resin Flooring?
Resin flooring, also known as epoxy or polyurethane flooring, is a seamless and highly durable flooring solution commonly used in industrial, commercial, and residential settings.
Its durability is one of its primary advantages, as resin flooring is highly resistant to heavy foot traffic and various chemicals, making it ideal for spaces that require a tough and long-lasting flooring solution. The seamless nature of resin flooring not only enhances its durability but also makes it easy to maintain, as there are no grout lines where dirt and grime can accumulate.
The installation process for resin flooring involves applying multiple layers of resin to create a strong, smooth, and attractive finish, offering endless design possibilities for creating personalized and aesthetically pleasing spaces.
What Are The Types Of Resin Flooring?
Resin flooring encompasses various types such as epoxy, polyurethane, and decorative options, each tailored for specific environments and aesthetic preferences.
Epoxy resin flooring, known for its high durability, is a popular choice for industrial settings due to its resistance to chemicals and heavy foot traffic. On the other hand, polyurethane resin flooring offers a more flexible and UV-resistant solution, making it ideal for outdoor applications. Decorative resin flooring, with endless customization possibilities, adds a touch of creativity to commercial spaces, such as restaurants and retail stores, enhancing the overall ambiance. The versatility of resinous flooring systems lies in their ability to combine durability, aesthetics, and customization tailored to diverse needs.
Check out: Can Epoxy Flooring Be Used On Wood
What Are The Benefits Of Resin Flooring?
Resin flooring offers a multitude of benefits, including exceptional durability, chemical resistance, easy maintenance, and enhanced aesthetic appeal.
These characteristics make resin flooring an ideal choice for various settings, such as industrial facilities, commercial spaces, healthcare facilities, and even residential areas. The durability of resin flooring ensures that it can withstand heavy foot traffic, impacts, and wear, making it a long-lasting solution that can maintain its quality over time. Its chemical resistance properties protect against spills and stains, making it suitable for areas prone to frequent exposure to harsh substances. The easy maintenance requirements of resin flooring make it a practical and cost-effective choice for busy environments, where regular cleaning is essential to uphold hygiene standards.
Durability
One of the key benefits of resin flooring is its exceptional durability, providing long-lasting performance due to its seamless application and robust composition.
Resin flooring stands out for its ability to withstand heavy foot traffic, impact, and chemical exposure, making it ideal for high-traffic areas like commercial spaces and industrial facilities. Its wear resistance ensures that it maintains its quality and appearance over time, reducing the need for frequent repairs or replacements. The structural integrity of resin flooring adds to its longevity, offering a reliable solution for environments that require a durable and low-maintenance flooring option.
Chemical Resistance
Resin flooring is renowned for its exceptional chemical resistance, making it an ideal choice for industrial settings where exposure to harsh chemicals is common.
The chemical-resistant properties of resin flooring stem from its composition, usually comprising epoxy, polyurethane, or methyl methacrylate resins. These materials create a seamless, impermeable surface that can withstand corrosive substances, oils, acids, and solvents commonly found in industrial environments. This durability not only protects the substrate beneath the flooring but also ensures a safe and clean environment for workers. Given its ability to resist chemical spills and stains, resin flooring is often preferred for areas such as manufacturing plants, laboratories, warehouses, and processing facilities where liquid resin applications are prevalent.
Easy Maintenance
Maintaining resin flooring is a breeze, thanks to its easy-to-clean surface, making it a preferred choice for commercial spaces that require regular upkeep.
This type of flooring offers several maintenance advantages that benefit busy commercial environments. To keep resin flooring in top condition, regular sweeping and mopping with a mild detergent solution is usually all that's required. For tougher stains or scuff marks, a gentle scrub with a soft-bristled brush can easily remove them. Applying a sealant every few years helps prolong the lifespan of the flooring and maintains its shine. These simple upkeep practices not only keep the flooring looking sleek but also contribute to its long-term durability, making it a cost-effective choice for businesses.
Aesthetics
Beyond its practical benefits, resin flooring offers a wide range of aesthetic options, including decorative finishes and customizable designs that enhance the visual appeal of any space.
Resin floors can be customized to mimic various materials such as marble, wood, or even metallic surfaces, giving the flexibility to create unique and luxurious looks. The decorative possibilities are endless, from incorporating patterns, logos, and intricate designs to playing with colors and textures. Whether you prefer a sleek and modern finish or a more artistic and expressive look, resin flooring allows for the seamless integration of various styles to match the ambiance and theme of your space.
What Are The Applications Of Resin Flooring?
Resin flooring finds extensive applications across industrial, commercial, and residential sectors, offering versatile solutions for diverse spaces and environments.
In industrial settings, resin flooring proves to be a durable and chemical-resistant option, ideal for factories, warehouses, and manufacturing plants where heavy machinery and high foot traffic are prevalent.
For commercial establishments such as retail stores, restaurants, and offices, resin floors offer an aesthetic appeal with various design options, while being easy to maintain and clean, making them a practical choice for busy spaces.
In residential spaces like kitchens, bathrooms, and basements, resin flooring provides a seamless, waterproof surface that withstands daily wear and tear, offering a modern and functional flooring solution.
Industrial
In industrial settings, resin flooring serves as a high-performance solution, delivering durability, chemical resistance, and long-lasting performance in demanding environments.
This type of flooring is specifically designed to withstand the heavy machinery and equipment commonly used in industrial facilities, making it an ideal choice for areas with high traffic and potential impact. Its seamless surface not only provides a sleek appearance but also prevents the accumulation of dirt and debris, promoting a cleaner and safer work environment.
Resin flooring is known for its resistance to a wide range of chemicals, acids, and solvents, ensuring that it can maintain its integrity even in the face of harsh industrial substances.
Commercial
Commercial spaces benefit greatly from resin flooring due to its seamless application, sustainable features, and aesthetic appeal that create a welcoming and professional environment.
This type of flooring is particularly well-suited for various commercial settings such as retail stores, restaurants, and office buildings where durability and aesthetics are essential. The seamless installation of resin flooring ensures a smooth surface without any grout lines or seams, making it easy to clean and maintain. Its sustainable attributes, including low VOC emissions and recyclability, align well with businesses looking to reduce their environmental impact.
The diverse range of colors and finishes available in resin flooring allows businesses to customize the look of their space to reflect their brand identity and create a visually appealing ambiance for customers and employees.
Residential
Resin Flooring offers innovative solutions for residential spaces, providing customizable designs, modern aesthetics, and a durable flooring solution that enhances the overall appeal of homes.
These versatile flooring options are not only visually appealing but also highly practical for everyday living. With resin flooring, homeowners can choose from a wide range of colors, textures, and patterns to perfectly complement their interior décor.
The seamless nature of resin flooring eliminates grout lines, making it easy to clean and maintain, ideal for busy households. Its durability ensures that it can withstand heavy foot traffic, spills, and general wear and tear, making it a long-lasting investment for any home.
The smooth surface of resin flooring provides a sleek, contemporary look that can elevate the style of any room.
How Is Resin Flooring Installed?
The installation of resin flooring involves several key steps, including surface preparation, primer application, resin coating, and topcoat finishing to ensure a seamless and durable floor surface.
- Surface preparation is a critical initial step that involves thorough cleaning, repairing any cracks or imperfections, and ensuring the substrate is level.
- The primer application follows, creating a strong bond between the substrate and the resin coating.
- The resin coating is then applied, providing the desired aesthetic finish and protective layer.
- The topcoat finish enhances durability and resistance to wear and tear, making the resin floor surface long-lasting and easy to maintain.
Surface Preparation
Surface preparation is a critical initial step in resin flooring installation, involving thorough cleaning, repair, and priming to ensure proper adhesion and long-term performance of the floor coating. Without adequate surface preparation, even the most advanced resin systems will fail to deliver their full potential.
Cleaning the surface removes any contaminants that could interfere with the bonding of the resin to the substrate. Repairing cracks and imperfections ensures a smooth and even base for the coating to adhere to, preventing future issues. Priming further enhances the bond between the substrate and the topcoat finish, creating a strong foundation for a durable and aesthetically pleasing resin floor.
Investing time and effort in surface preparation pays off in the form of a resilient and long-lasting flooring solution.
Primer Application
The application of a primer is essential in resin flooring projects to enhance adhesion, promote uniformity, and prepare the surface for the subsequent resin coating and topcoat finish.
By acting as a bonding agent between the substrate and the resin, the primer helps promote strong adhesion, which is crucial for the longevity and durability of the flooring system. Primers also play a vital role in sealing porous surfaces, preventing issues such as outgassing and bubbling that can occur if the resin is directly applied to untreated substrates.
This step not only ensures a smoother finish but also aids in the overall aesthetics and performance of the topcoat, resulting in a professional and long-lasting resin flooring installation.
Resin Coating Application
The application of resin coatings is a pivotal stage in resin flooring installation, where liquid resins are applied and spread evenly to create a seamless and protective layer over the prepared substrate.
During the liquid resin application process, the installers carefully pour the resin over the surface, ensuring consistent coverage. To achieve a level finish, specialized tools such as leveling rakes or squeegees are used to spread the resin evenly. This helps in eliminating any air bubbles or uneven patches. Once the resin is spread uniformly, the seamless finish is achieved by allowing it to self-level. This self-leveling property of the resin contributes to a smooth and flawless topcoat finish, enhancing both the aesthetic and functional aspects of the resin flooring.
Topcoat Application
The final step in resin flooring installation involves applying a topcoat finish, which seals the resin layers, enhances durability, and provides a seamless and polished appearance to the flooring surface.
This protective topcoat layer acts as a shield against wear and tear, extending the lifespan of the flooring. It also ensures that the underlying resin layers are securely sealed, preventing any exposure to external elements that could compromise their integrity.
The application of a topcoat is crucial in achieving a uniform and flawless finish, eliminating any imperfections or rough textures on the surface. This final touch not only adds a layer of protection but also enhances the overall aesthetic appeal of the resin flooring, making it visually appealing and easier to maintain.
What Are The Factors To Consider Before Choosing Resin Flooring?
Before selecting resin flooring, it is crucial to consider factors such as traffic levels, chemical exposure risks, aesthetic preferences, and budget constraints to ensure the ideal flooring solution for your specific needs.
Traffic requirements play a significant role in determining the type of resin flooring best suited for your space. High-traffic areas, such as commercial kitchens or manufacturing facilities, necessitate durable options like epoxy coatings or polyurethane systems.
For spaces prone to chemical exposure, such as laboratories or warehouses, it is imperative to choose a resin flooring system that offers resistance to acids, solvents, and other harsh substances.
Aesthetic considerations involve choosing from a wide range of colors, finishes, and textures to complement your design scheme while meeting functional requirements. Aligning your aesthetic preferences with your budget constraints will help narrow down the choices to find the most cost-effective yet visually appealing resin flooring solution.
Traffic And Usage
Understanding the expected traffic and usage patterns is essential when selecting resin flooring, particularly in industrial and commercial settings where heavy footfall and equipment movement dictate the flooring requirements.
Choosing the right resin flooring system can significantly impact the overall performance and longevity of a space, ensuring it can withstand the continuous demands placed upon it. The durability and wear resistance of resin flooring plays a crucial role in maintaining a safe and functional environment, especially in areas prone to heavy traffic. The ability of resin floors to withstand chemical exposure and high impact makes them a popular choice for industrial facilities where stringent hygiene and safety standards are paramount.
Chemical Exposure
For environments with chemical exposure risks, opting for chemical-resistant resin flooring is critical to ensure long-term performance and protection against corrosive substances that may compromise standard flooring materials.
Choosing the right chemical-resistant resin flooring involves considering protective coatings that create a barrier against harmful chemicals. Liquid resin applications offer seamless coverage, reducing the risk of penetration and damage to the substrate. Specialized formulations further enhance the flooring's ability to withstand chemical exposure, ensuring durability and longevity in demanding industrial settings.
By prioritizing chemical resistance in resin flooring selection, businesses can safeguard their infrastructure, maintain operational efficiency, and minimize the need for costly repairs or replacements due to chemical degradation.
Aesthetics
Aesthetics play a significant role in resin flooring choices, with decorative options and aesthetic appeal influencing the overall look and feel of the space where the flooring will be installed.
When considering resin flooring, one must carefully evaluate the customization features that can lend a unique touch to the design scheme of a room. From color variations to patterns and textures, the possibilities for personalization are seemingly endless. These decorative elements offer a chance to infuse character and style into any space, whether it's a residential area or a commercial establishment. The aesthetic preferences of individuals or businesses are often reflected in the flooring material chosen, making the selection process a crucial aspect of interior design.
Budget
Balancing budget constraints with the desire for quality flooring solutions is essential when choosing resin flooring, as options range from cost-effective choices to customizable high-end finishes based on financial considerations.
Understanding the impact of budget considerations on resin flooring selection can lead to informed decision-making that aligns with both financial parameters and aesthetic preferences. Cost-effective options like epoxy coatings or polyurethane finishes provide durability and functionality at a lower cost, ideal for those looking to stay within budget constraints.
Alternatively, for those seeking a more customized flooring solution, decorative quartz or metallic epoxy overlays offer a luxurious finish that can be tailored to specific design requirements, although they may come at a higher price point.
By evaluating cost-effective and customizable flooring options, individuals can find the perfect balance between budget limitations and achieving their desired flooring aesthetic.
Are you tired of being disturbed by outside noise while trying to relax in your bedroom? Soundproof wall panels may be the solution you've been searching for. In this comprehensive guide, we'll explore the benefits of soundproof wall panels and why they are essential for creating a peaceful and serene environment in your bedroom.
We'll delve into the different types of soundproof wall panels and the materials that make them effective, as well as the top products available in the market. We'll provide practical insights on how to install these panels in your bedroom. If you're ready to transform your bedroom into a quiet oasis, keep reading to discover how soundproof wall panels can make a significant difference in your daily life.
Why Do You Need Soundproof Wall Panels For Your Bedroom?
Soundproof wall panels are essential for your bedroom to create a peaceful atmosphere and reduce noise, ensuring your privacy and enhancing the overall room acoustics.
They play a crucial role in maintaining a serene environment, particularly in urban areas where external noise can disrupt your peace. By effectively dampening sound and minimizing disturbances from adjoining rooms or outside traffic, these panels promote better sleep quality and relaxation.
Their sleek and customizable designs contribute to the aesthetic appeal of your bedroom, complementing the overall interior while serving a practical purpose. Investing in soundproof wall panels aligns with the growing trend of home improvement, as individuals prioritize creating tranquil living spaces to unwind and recharge.
What Are Soundproof Wall Panels?
Soundproof wall panels are specialized panels designed to control and dampen acoustic noise within a space, serving as an effective solution for noise control and enhancing the interior decor of a room.
Their purpose extends beyond mere functionality, as they also contribute to the aesthetics of space by offering versatility in design and texture, seamlessly integrating with various interior styles. These panels are a key element in home renovations for creating a peaceful and serene environment, allowing individuals to enjoy tranquility and privacy within their own living spaces. They are an essential addition for home theaters, recording studios, offices, and other areas where sound quality and control are paramount.
Explore: Best Bedroom Wallpaper
How Do Soundproof Wall Panels Work?
Soundproof wall panels work through the processes of absorption, decoupling, and damping to effectively attenuate sound and isolate noise within a specific area.
Absorption involves the conversion of sound energy into heat within the panel material, reducing the propagation of sound waves. Decoupling prevents the transmission of vibrations by creating a separation between the wall and the structure, further minimizing sound transfer.
Damping controls resonance and vibration, minimizing the reverberation of sound within the space. When these mechanisms work in harmony, soundproof wall panels can significantly reduce the impact of unwanted noise, creating a quieter and more comfortable environment.
Absorption
Absorption is a key aspect of soundproof wall panels, as they effectively absorb and minimize the impact of sound waves, contributing to improved interior design and room soundproofing.
This absorption property is essential for creating an acoustically pleasing environment, as it reduces echoes and reverberations, resulting in better sound quality within the room. Soundproof wall panels with high absorption coefficients also enhance the overall aesthetic of the space by allowing for a sleek and seamless integration into the interior design.
Meeting both functional and design requirements, these panels offer an effective solution for enhancing the ambiance and functionality of any room.
Decoupling
Decoupling in soundproof wall panels serves as an effective method for reducing noise transmission, utilizing specialized soundproofing materials to create a barrier against unwanted sound, and enhancing the impact of building materials.
This method involves the installation of a resilient layer between the structural components of the wall, which helps to isolate vibrations and prevent sound waves from traveling through the structure. By incorporating decoupling, the panels can effectively minimize the transfer of airborne and impact noise, providing an acoustically improved environment within the space.
The use of soundproofing materials such as acoustic insulation, mass-loaded vinyl, and resilient channels further enhances the sound barrier construction, ensuring maximum noise reduction and creating a more peaceful and comfortable indoor setting.
Damping
Damping within soundproof wall panels involves insulation and the implementation of effective soundproof solutions, contributing to comprehensive noise control and enhancing residential soundproofing.
This damping effect works by absorbing and dissipating sound energy, reducing the transmission of airborne and impact noises. By minimizing vibrations and reverberations, soundproof wall panels create a peaceful and quiet environment within homes.
The improved insulation properties provided by damping help regulate indoor temperature and enhance energy efficiency. This demonstrates the significant impact of damping on not only soundproofing but also on overall comfort and quality of living.
What Are The Best Materials For Soundproof Wall Panels?
The best materials for soundproof wall panels include:
- Acoustic foam is known for its sound absorption capabilities and is a popular choice for its lightweight and versatile nature.
- Fiberglass panels, are effective in blocking sound transmission and are made from recycled glass, making them a sustainable option.
- Mass-loaded vinyl offers high-density sound blocking and is made from non-toxic materials, enhancing its eco-friendly appeal.
- Soundproof drywall, with added dense layers, provides excellent sound insulation and is made from recycled and sustainable gypsum materials, promoting environmental consciousness in construction projects.
Acoustic Foam
Acoustic foam is a popular material for soundproof wall panels due to its exceptional sound absorption properties, making it an ideal choice for improving room acoustics and soundproofing residential spaces.
It is known for its ability to reduce echo and reverberation, creating a more controlled and pleasant sound environment. This versatile material can be used in recording studios, home theaters, offices, and other areas where sound clarity is essential. In residential settings, acoustic foam panels can be installed on walls to minimize noise transmission between rooms, providing a quieter and more peaceful living space. Its lightweight and easy-to-install nature makes it a practical solution for homeowners looking to enhance their room acoustics and create a more comfortable environment.
Fiberglass
Fiberglass is a versatile material for soundproof wall panels, offering effective dampening properties and contributing to comprehensive noise reduction solutions, while also providing practical and customizable options for soundproofing projects.
Its ability to absorb sound waves makes it an excellent choice for creating peaceful and quiet environments. The versatility of fiberglass allows for a wide range of customization, including different sizes, shapes, and colors, making it adaptable to various design preferences. In addition, fiberglass panels are highly durable and resistant to moisture, ensuring long-term effectiveness in soundproofing applications. These characteristics make fiberglass an ideal material for both residential and commercial soundproofing projects.
Mass Loaded Vinyl
Mass-loaded vinyl is a high-quality material used in soundproof wall panels to create an effective sound barrier, often sought after by noise control experts for its exceptional performance in soundproofing applications.
It is known for its impressive density and flexibility, allowing it to block airborne and impact noises alike effectively. The construction of soundproof wall panels with mass-loaded vinyl ensures that it can significantly reduce sound transmission, making it a favored choice for spaces that require the utmost privacy and peaceful environments.
In addition, its durability and resistance to wear and tear make it a long-lasting solution for maintaining exceptional soundproofing performance over time.
Soundproof Drywall
Soundproof drywall is an innovative and durable material used for soundproof wall panels, offering seamless installation and integration within interior architecture to enhance the acoustic properties of a space.
It is specifically engineered with unique sound-dampening properties, effectively reducing noise transmission between rooms and creating a peaceful and quiet environment. The installation of soundproof drywall involves carefully fitting and securely fastening the panels to ensure airtightness. The innovative design of the material also contributes to its fire-resistant and mold-resistant attributes, making it a highly sought-after choice for modern interior architecture. The use of soundproof drywall has become increasingly popular for its ability to elevate the overall acoustic experience in residential, commercial, and industrial settings.
What Are The Different Types Of Soundproof Wall Panels?
The different types of soundproof wall panels include:
- Fabric-wrapped panels offer a sleek and sophisticated look, complementing various interior designs with their customizable fabric coverings.
- Acoustic diffusers are designed to scatter sound waves, adding a visually intriguing element to the room while maintaining their functional purpose.
- Decorative soundproof panels, which come in a wide range of styles, from modern geometric patterns to elegant wood finishes, contribute to the overall aesthetic appeal of the space while effectively reducing noise levels.
Fabric-Wrapped Panels
Fabric-wrapped panels offer versatile interior design solutions and contribute to a comfortable and stylish bedroom makeover, serving as effective options for residential soundproofing projects.
These panels can be utilized for various applications, such as creating a cozy ambiance by reducing noise and echo in bedrooms. They also provide an opportunity to infuse a personal touch into the decor with a wide range of fabric options, patterns, and colors.
Fabric-wrapped panels are known for their ability to enhance the overall acoustics of a room, making them ideal for creating a peaceful and comfortable living space. Their versatility makes them an excellent choice for any bedroom makeover seeking a balance between aesthetics and functionality.
Acoustic Diffusers
Acoustic diffusers are stylish additions to soundproof wall panels, enhancing room acoustics and contributing to a tranquil environment, providing excellent value for money in soundproofing solutions.
Their intricate designs not only optimize sound distribution but also elevate the visual appeal of a room. By scattering sound waves in various directions, they prevent echoes and reverberation, creating a balanced and immersive auditory experience. Their cost-effective nature makes them an attractive option for those seeking practical yet aesthetically pleasing room acoustics solutions.
Decorative Soundproof Panels
Decorative soundproof panels feature modern designs and offer practical privacy solutions for bedrooms, often proving to be budget-friendly options for residential soundproofing projects.
These panels come in a variety of contemporary styles, from sleek minimalist designs to bold and vibrant patterns, adding a touch of elegance to any room. Apart from their aesthetic appeal, they serve as an effective barrier to reduce noise transmission, ensuring a peaceful and quiet environment. With their easy installation and cost-effectiveness, they have become a popular choice for homeowners seeking to create a tranquil living space without breaking the bank.
How To Install Soundproof Wall Panels In Your Bedroom?
Installing soundproof wall panels in your bedroom can be approached through professional installation services or as a DIY project, offering opportunities for home renovation and improvement.
Professional installation of soundproof wall panels can ensure a seamless and efficient process, with experts handling the intricate details and ensuring maximum noise reduction.
On the other hand, for avid DIY enthusiasts, embarking on a DIY project provides a sense of accomplishment and allows for a more hands-on experience in home improvement.
Both approaches offer their unique advantages, and it's essential to weigh the convenience, cost, and desired outcome before making a decision.
What Are The Benefits Of Using Soundproof Wall Panels In Your Bedroom?
Using soundproof wall panels in your bedroom offers various benefits, including affordable soundproofing solutions, enhanced tranquility, and a comfortable, innovative environment that promotes energy efficiency.
These panels provide an economical and practical way to reduce noise transmission, allowing you to enjoy a peaceful and undisturbed atmosphere for relaxation or work. In addition to soundproofing, they contribute to creating a more pleasant indoor climate by helping to regulate temperature and minimize energy loss. This results in lower heating and cooling costs, making your living space both acoustically and economically efficient.
What Are The Top Soundproof Wall Panels For Bedrooms In The Market?
The market offers top soundproof wall panels for bedrooms, characterized by stylish designs, high-quality materials, and exceptional performance, catering to both residential and commercial soundproofing requirements.
They provide an elegant solution for creating a peaceful and serene environment, effectively reducing unwanted noise and disturbances. These panels integrate seamlessly into various interior styles, offering a balance of functionality and visual appeal. With their advanced sound-absorbing properties, they enhance the acoustics of any space, making them suitable for home theaters, offices, recording studios, and more. Their durability and ease of installation make them a popular choice for both professionals and DIY enthusiasts alike.